
These ideas run from a free stack of pallet boards to a spiral build that needs a quarter-scale cardboard mockup before you touch the real wood.
The 22-inch tabletop size and the 27.5-inch version share one cut list; you just add a board and tweak the spacing in step 7.
[link-whisper-related-posts]1. Upcycled Wooden Christmas Trees
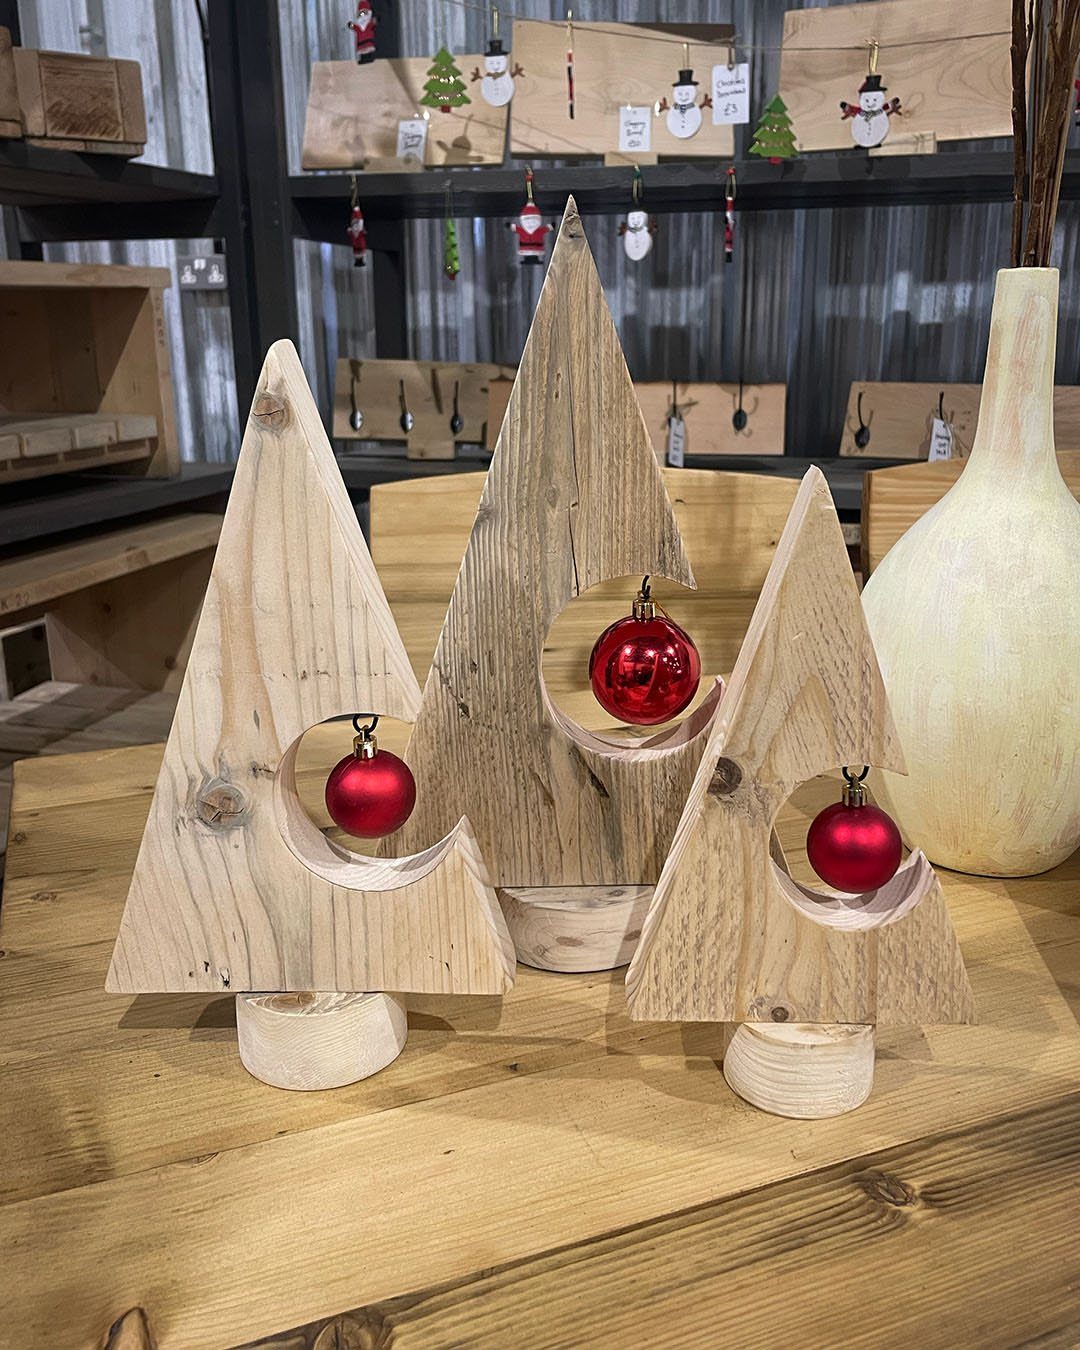
Reclaimed pallet boards or old fence pickets cut into nested triangles make a tree that costs almost nothing and carries the grain scars of its first life.
Cutouts that hold ornaments instead of shelves keep the silhouette clean and the weight down.
I would sand enough to lose splinters but stop before the gray patina disappears; that weathering is what makes the project read as intentional rather than unfinished.
A jigsaw handles the curves if you drill a starter hole first. Wood glue along the edges where the triangles meet adds stiffness without visible fasteners.

Package Includes: Includes 1 light up wooden Christmas tree with battery box design, suitable as Christmas tree decor and lighted Christmas decoration for porch, yard, patio or garden display, creating farmhouse Christmas decor

Holiday Gingerbread Set: Christmas porch sign styling meets a playful gingerbread theme with a candy trimmed house and stacked cookie characters, finished in hand painted multicolor details that bring a warm merry Christmas sign look to seasonal displays

Christian Themed Christmas Ornaments: you will receive a set of 24 Jesus-themed Christmas ornaments featuring 8 distinct designs (3 pieces of each style); With their exquisite carved patterns and colorful backgrounds, they cater to a variety of decorative needs; The generous quantity ensures you have plenty for daily use and replacements
2. DIY Wooden Christmas Trees for Outdoors
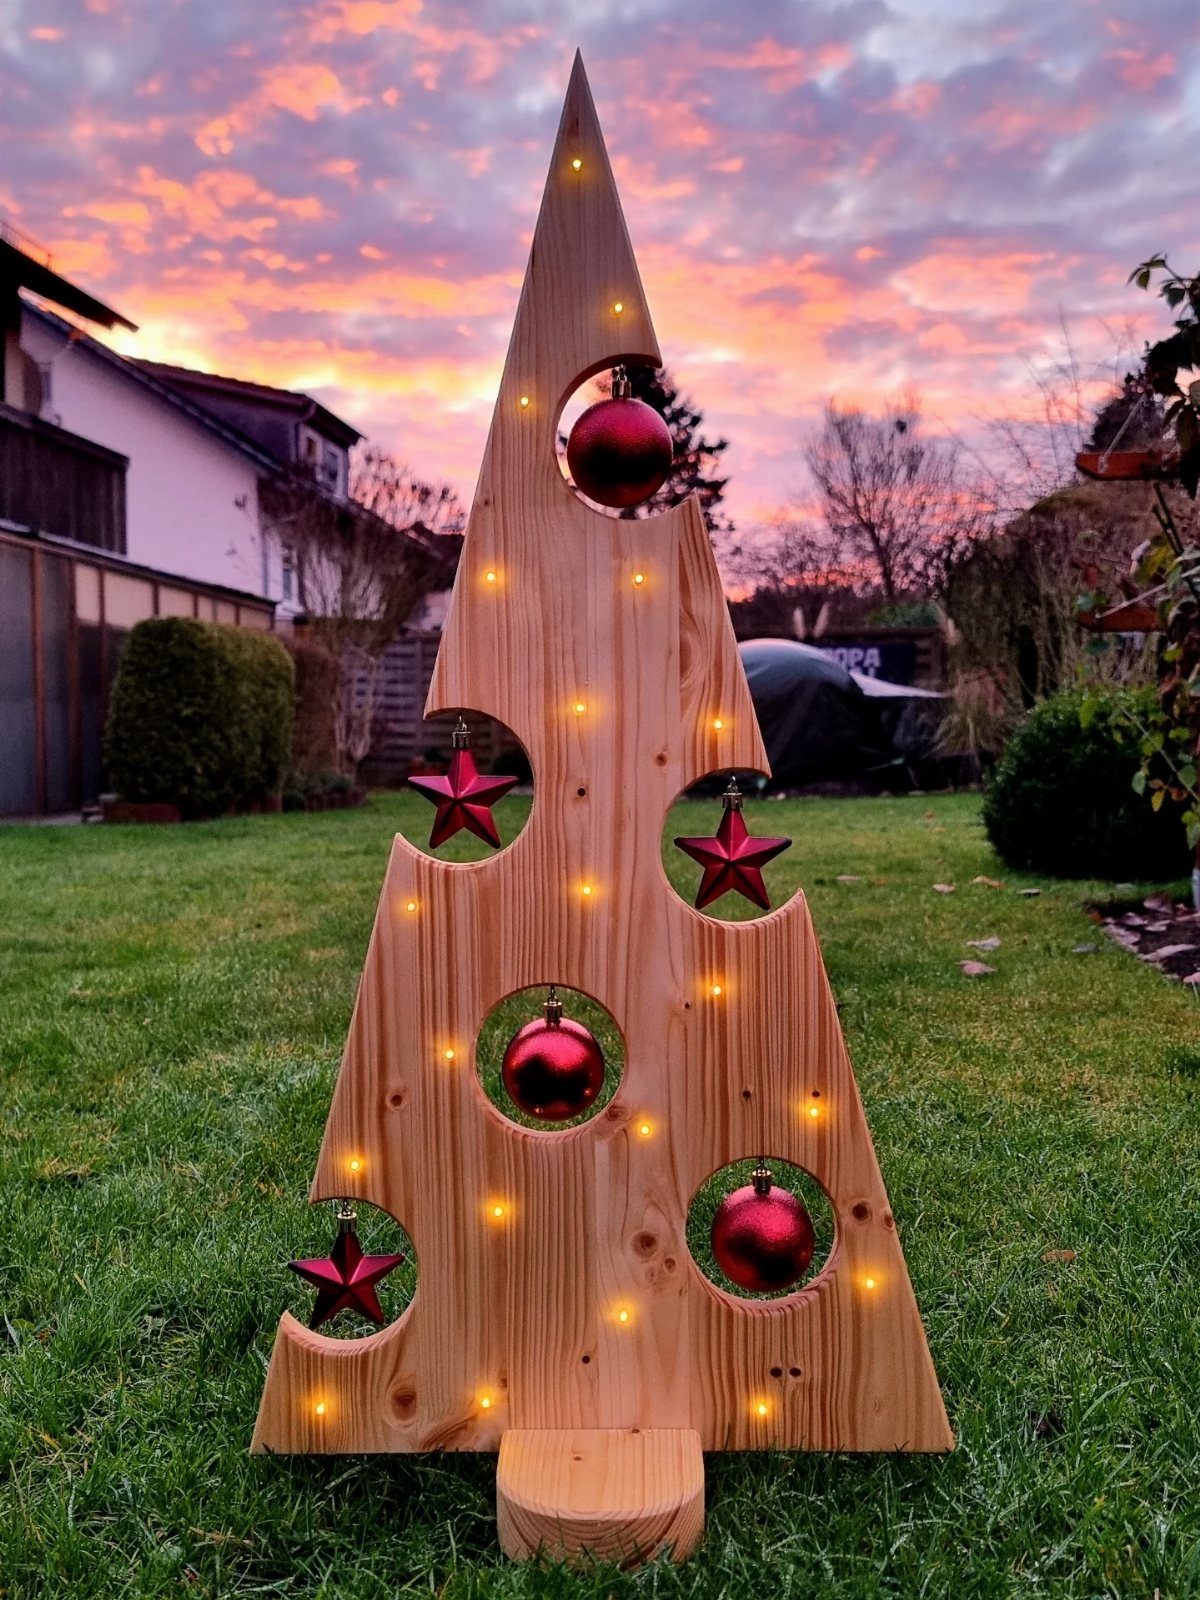
Untreated 2×6 framing lumber cut at angles and held with glue and brad nails scales up to porch or yard size without getting fussy about joinery.
The 2×6 width gives you enough surface to set lights into routed grooves or hang ornaments from cup hooks screwed into the face.
A flat cutout handles wind better than a solid slab of the same height, and circular cutouts save weight you do not have to move or brace.
I would build it in 2 hinged panels if storage matters more than a single silhouette; the same angles and spacing apply, just with a piano hinge down the center seam.
Either way, seal the end grain with exterior paint or oil if you want it to last past one season in wet ground.

【Birch Tree with led Christmas Lights】This light up tree made from nature material with white birch look which branches are dotted and tipped with Cool White LED Path lights.

Convenient & Practical: There have 50 pieces hooks and 50 pieces screws. use a phillips screwdriver can easily screw the nail into the wooden beam or tap it with a hammer and tighten it again.

Q-Shaped Buckle Design : Not like the ordinary ceiling hooks for outdoor string lights, the safety latch is added to prevent hanging objects from falling or sliding out even with vertical installation. No more worry about string lights being fall off.
3. Wood Christmas Tree Decor DIY
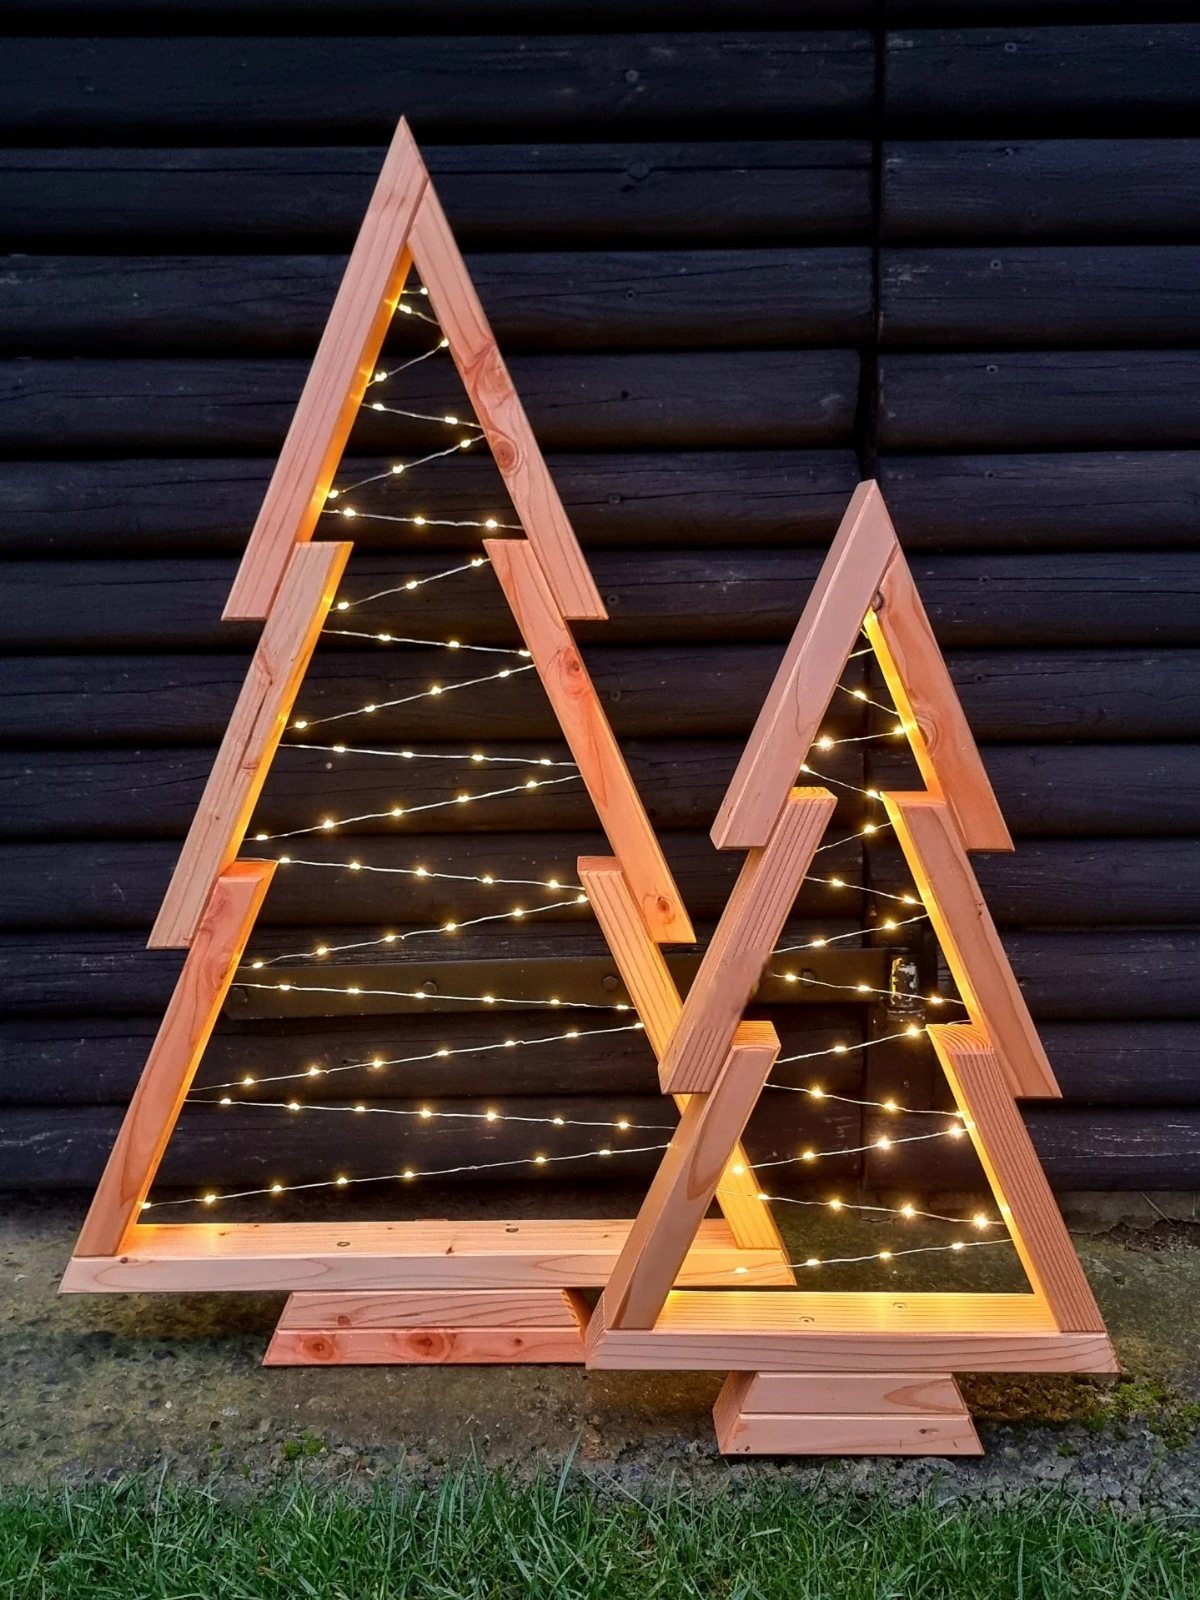
1x boards, glue, and brad nails build a frame tree that stores flat and scales to the space you have. Plans run small, medium, and large, so you can match a tabletop corner or flank a door without recalculating angles.
Frames strung with fairy lights rather than draped need the light length measured against the inside perimeter before you cut any wood.
I would drill holes at the turns and thread the wire through so the lights sit tight to the frame instead of sagging.
The open center keeps the look light; a solid backing would read as a signboard instead of a tree.

PALLET CHRISTMAS TREE - 2 PACK - 14.5" x 9.5" Unfinished Wood Tree Ready to Decorate and Personalize - For DIY , Gifts & Crafts

NATURAL LIFELIKE APPEAL: Our artificial branches look ultra-realistic and lifelike. With 139 individually crafted branch tips, this full bodied tree is as charming as the real thing.
NATURAL LIFELIKE APPEAL: Our artificial branches look ultra-realistic and lifelike. With 371 individually crafted branch tips, this full bodied tree is as charming as the real thing.
4. Small Christmas Tree
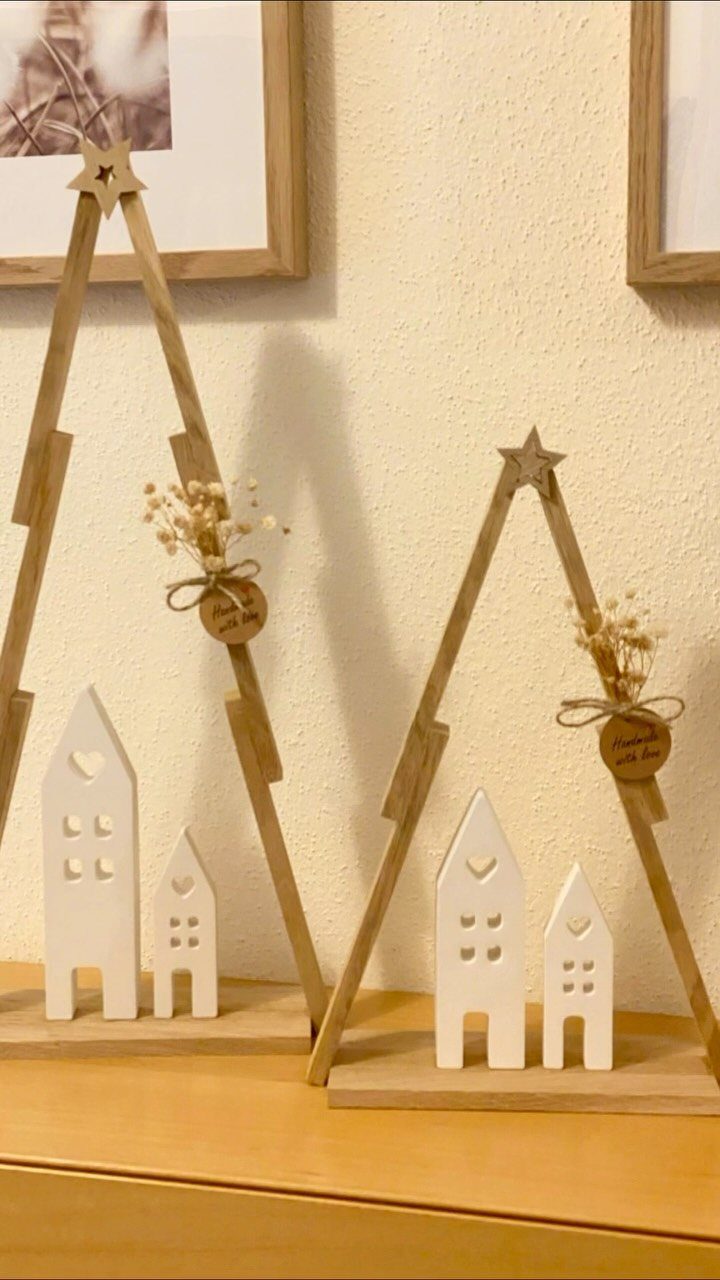
Two sizes come out of one method: a 22-inch tree at 18 inches wide, and a taller 27.5-inch version at 21 inches wide. The steps stay the same; the larger one needs one extra board cut and adjusted spacing in step 7.
That range fits a mantel, a shelf, or a table centerpiece without crowding. Dried flowers and small figurines sit well on the flat rungs, but the bare frame works too if you prefer to change the dressing year to year.

Vintage Christmas Tree Ornament Set: this set includes 5 wooden Christmas tree decorations with knitted texture and clear printed patterns, ideal for creating coordinated festive layouts and warm holiday scenes, matching other ornaments to enrich decoration layers and show vivid three dimensional visual effect

Light Up Birch Tree: The small christmas tree is 22in tall, decorated with 8 cute Christmas ornaments, and 24 LED warm white lights.It serves as the perfect tabletop centerpiece, featuring a realistic, wrapped artificial bark finish that brings a touch of rustic nature indoors.

🎄Basic🎄:The wooden Christmas Trees are in two different different sizes--the big Christmas tree measures 4¼'' W x 13¼'' H, and the other one is 4'' W x 9½'' H, creating a festival atmosphere for indoor decoration.
5. Horizontal Slat Wooden Christmas Tree
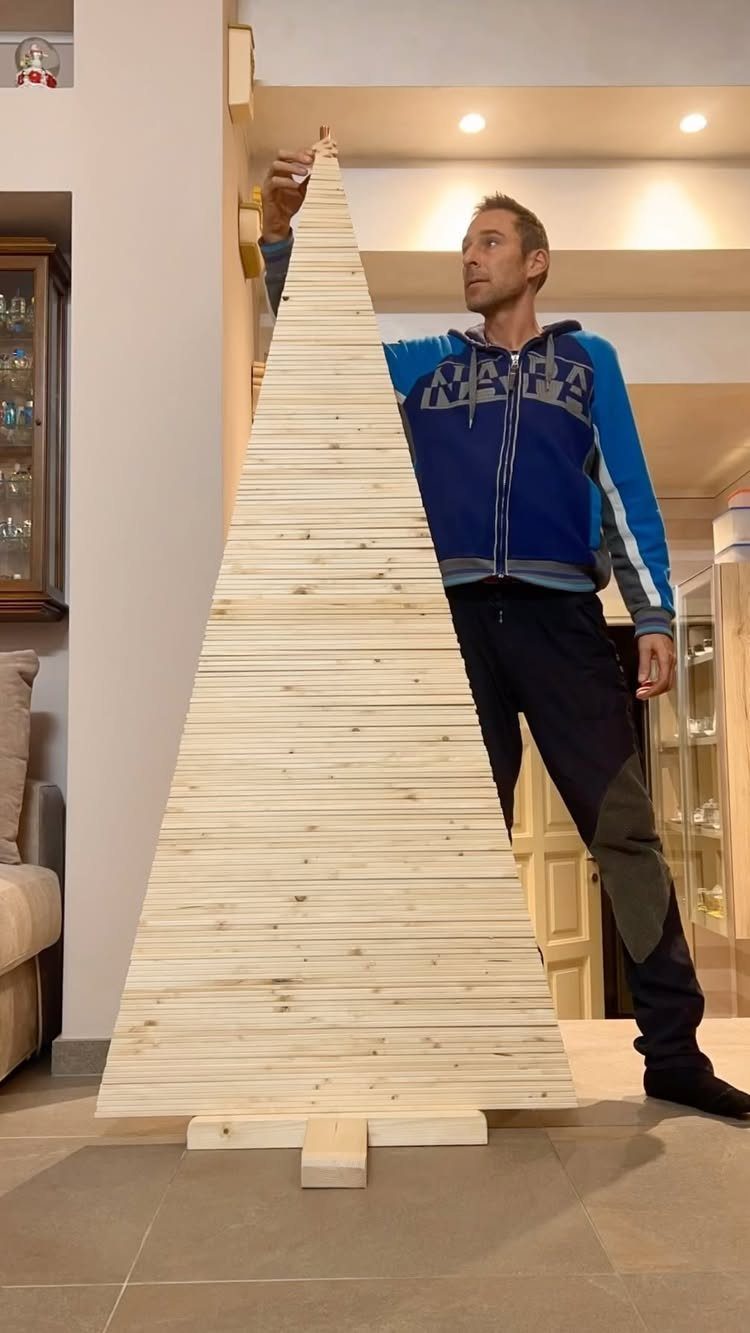
Check your floor surface and your household traffic before deciding on a freestanding base versus wall anchoring.
The slat spacing is a judgment call: tight reads solid, loose reads airy and casts shadow patterns with lights behind.
Either way, rip your slats to consistent width so the edges line up clean; uneven gaps read as mistake, not style.

🌲PERFECTLY SIZED & VERSATILE: Christmas tree storage built with craftsmanship. Generously sized for fluffy tree that can easily fit up to 7.5 ft disassembled Artificial Christmas Tree. The Xmas tree bag is small enough to put away, big enough to hold and protect Christmas tree for the coming year after year.

Package Composition: this Christmas photo ornaments set includes 3 square wooden photo frames (3.94 inches) and 3 oval wooden photo frames (3.54 x 4.33 inches) for a total of 6 pieces, both sides of each pendant are covered with identical sage green and white buffalo plaid linen fabric, the unified retro checkered farmhouse style enriches your matching scheme of Christmas tree hanging ornament greatly

PROPIK Durable Holiday Rolling tree storage bag with 2 wheels-, Made with strong tear-proof material Heavy duty polyester construction. (this is not hard like a container it’s like a duffel bag)
6. Spiral Wooden Slat Christmas Tree
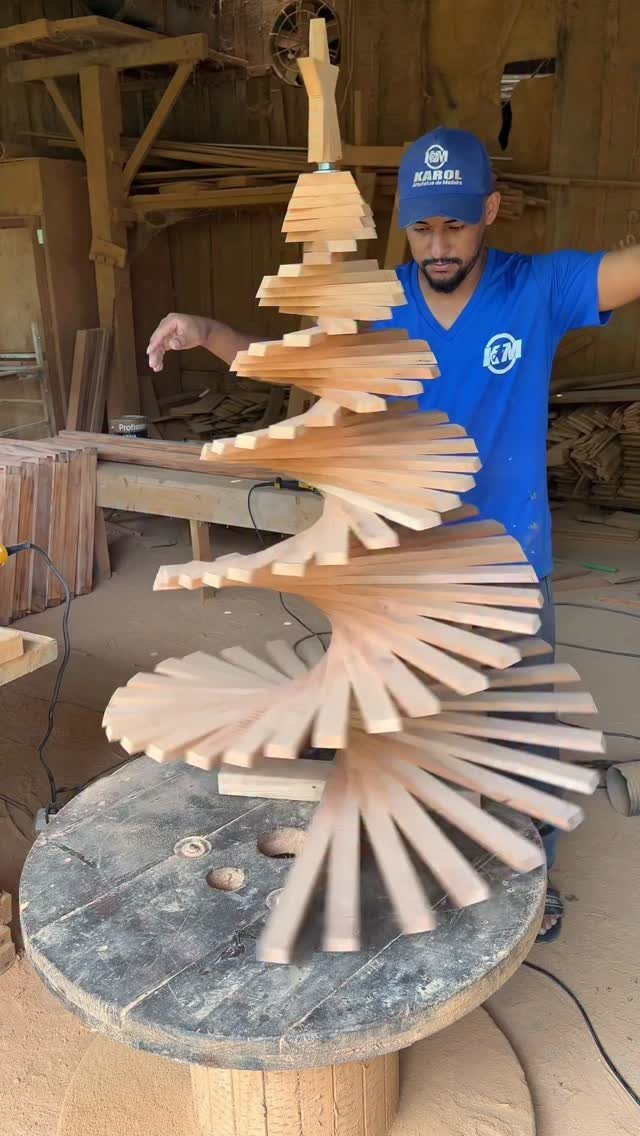
A spiral of fanned slats around a central pole is the most sculptural of these builds, and the one that demands the most precision.
Each slat needs the right angle and a hole drilled or routed for the pole at exactly the same distance from its inner end, or the spiral wobbles visually.
A round pedestal hides whatever counterweight keeps it upright; plan that base into your design from the start.
I would build a quarter-scale mockup from cardboard or cheap pine before committing good lumber, because the twist angle is hard to eyeball and expensive to recut.

Generous Package: our packages include 6 mini wooden vintage Christmas trees, giving you ample quantity for tasteful, festive displays; Enjoy the freedom to create a dense little forest or a spaced out grove, or distribute the mini trees throughout your space for a cohesive Christmas theme

【Merry Xmas-Themed Design】Capture the essence of Christmas with a vivid blend of colors and the beloved character.

Reliable Wood Material: halloween gothic hanging ornaments made of quality wood and double-sided printing, these scary hanging ornaments are sturdy, polished and reliable, without burrs, ensuring they last for years to come; They can withstand most weather conditions, making them ideal for indoor or outdoor Christmas ornaments
7. Driftwood Branch Christmas Tree
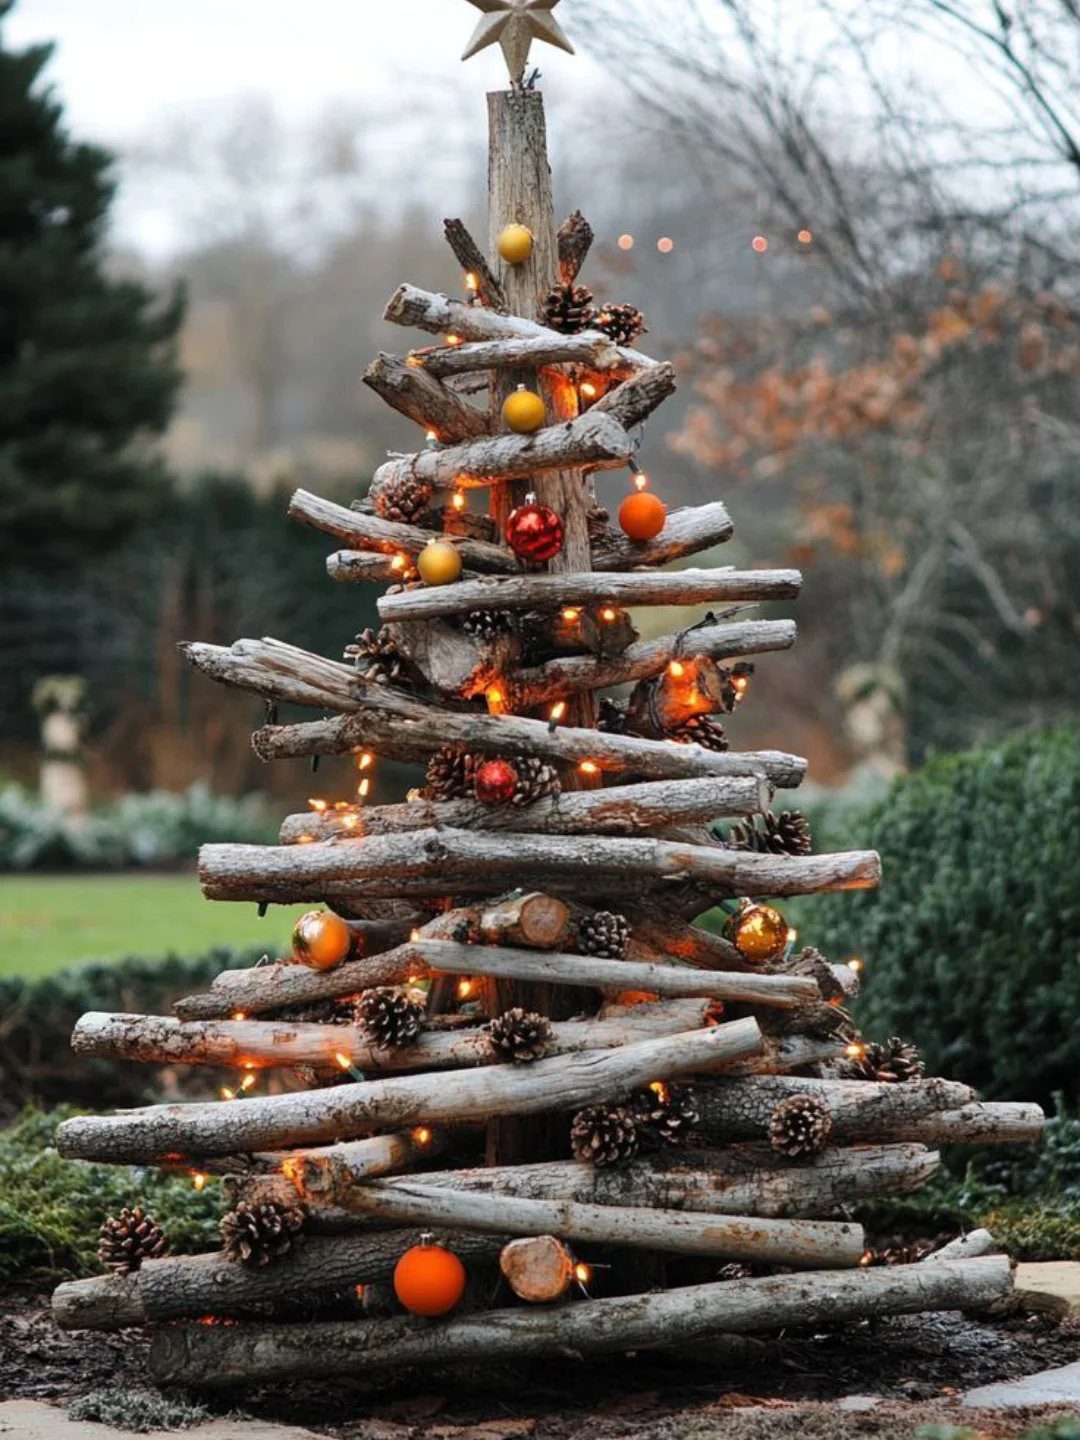
Stacked horizontal branches read as a tree through nothing but careful spacing and descending length, no joinery required. The gaps between branches are where the shape lives; too tight and it goes bulky, too loose and the silhouette falls apart.
A central dowel or rebar pounded into the ground threads the branches on, largest at the bottom.
Drill each branch dead center so the stack stays upright in wind. The holes can be sloppy; gravity and the rough bark hide a lot.
Seal cut ends if you want it outside past one season, or leave it raw and let the weather keep going.
Fairy lights wrap easier than they drape on needles, and the flat tops of branches hold small ornaments without hooks.

Super Bright Twinkle Lights: 164 FT (50m) extra-long string lights with 500 warm white LEDs provide bright, non-glaring illumination. Ideal for large Christmas trees, outdoor patios, wedding backdrops, or bedroom walls — covers more area than standard 100 FT lights.

Elegant Birch Tree Set: Illuminate your space with this set of two 6 foot artificial birch trees, each featuring 128 warm white LEDs. The authentic-looking bark and gentle illumination provide a warm and inviting ambiance.
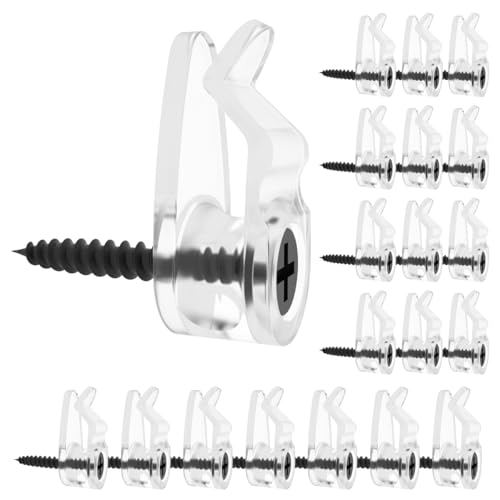
Convenient & Practical: There have 50 pieces hooks and 50 pieces screws. use a phillips screwdriver can easily screw the nail into the wooden beam or tap it with a hammer and tighten it again.
Tools and Materials Needed
A miter saw gets the clean angles, though any circular saw with a steady hand works if you cut slower and sand the face flat after.
A brad nailer saves clamp time on the frame builds; clamps alone do the job but add hours of waiting between steps.
I keep a 24-inch clamp for trees under 2 feet and step up to 36 or 48 inches for anything taller, since a bowed glue-up is permanent.
A drill with a 1/2-inch Forstner bit bores the clean flat-bottomed holes that let lights sit recessed or branches thread onto a dowel.
For the spiral tree and any cutout silhouettes, a jigsaw is enough; a bandsaw is faster if you have access.
A router with a round-over bit breaks edges so paint or stain sits even and splinters do not catch on lights.
Exterior builds need exterior stain, paint, or sealant. Interior pieces get by with interior stain topped with polyurethane, though I would still seal end grain anywhere humidity swings.

Full & Realistic 4ft Cedar Christmas Tree: A potted christmas tree with multi‑layered PE branches and soft, lifelike needles that mimic a real touch cedar tree. Dense enough to look natural from a few feet away – a solid option for porch christmas tree, outdoor christmas tree, or front porch decor.

2 Pack 4 Ft Entrance Christmas Trees: Package includes 2 pack potted Christmas tree, size is 4*2 Ft (H*W); Each with 140 white tipped branch tips,14 round white tipped pinecones, 12 clusters of red berries(7pcs/cluster) and 60 warm white lights

Generous Package: our packages include 6 wooden vintage Christmas trees, giving you ample quantity for tasteful, festive displays; Enjoy the freedom to create a dense little forest or a spaced out grove, or distribute the Xmas tabletop trees throughout your space for a cohesive Christmas theme
Finishing Options
Stain reads warmer than paint on grain that took effort to select. Sand with the grain, vacuum the dust off with a soft brush, then wipe with a damp cloth and let it dry before the first coat.
Foam applicators lay stain down even; wipe the excess with a shop towel before it skins. Build color in thin passes, not one heavy layer, and let each dry as the can specifies.
Wood filler after staining, not before.
Filler grabs pigment differently and leaves speckled spots if you stain over it. Match the filler to the finished color, not the raw wood.
Paint opens more routes. Chalk mineral paint and a stencil brush let you dab on a pattern; painter’s tape holds the stencil flat.
Less paint beats more, especially on boards that are not glass smooth. Excess bleeds under the edge and the fix is sanding back to bare wood and starting that spot again.
For a textured topcoat, additives like Sea Spray mixed into white paint give a snow-dusted look that catches light.

Package Contents: 48 miniature bottle brush trees in 5 different sizes, gold color. NOTE: Our Xmas tree is a SMALL size Christmas tree, Please carefully check the size and color of the tree in the picture before placing an order

24-Day Christmas Cheer – Surprise Ornament Countdown: Enjoy a fun and festive holiday countdown with this wooden Christmas tree advent calendar. Each of the 24 compartments features charming mini ornaments such as snowmen, Santa, reindeer, bears, bells, and more. Kids will love decorating their tabletop tree each day, anticipating the joy of Christmas

Pre-decorated design: Comes with stars, ornaments, and the word "Merry Christmas," ready to be placed without additional decoration.
Customization Ideas
Lights change a flat frame into something that reads at dusk.
Stencils scale to any tree you have painted. Secure them with painter’s tape, work with minimal paint on the brush, and build coverage in passes rather than loading up and risking bleed.
A repeated tree motif across a plank wall reads as a grove; single trees spaced wide read as ornaments themselves.
For outdoor pieces, cup hooks screwed into a 2×6 face hold ornaments that swing in wind without the weight of shelves. Routed grooves take lights flush so they do not snag when the piece moves in and out of storage.

Heavy duty: protect the center of your holiday decorations with this water, stain and tear-resistant polypropylene artificial Christmas tree cover

CHRISTMAS TREE BAG - At 65-inches-long, this large storage bag has a spacious interior with plenty of room to hold a disassembled 9-foot artificial tree or smaller trees as well as lights, garland, inflatables, seasonal clothing, or other holiday items.

🎄 Spacious 7.5ft Christmas Tree Storage Solution: The SJQYWDW christmas tree storage bag is designed to perfectly fit disassembled trees up to 7.5 feet tall, with extra room for ornaments, lights, and tree toppers. Unlike bulky christmas tree storage box options, our bag provides flexible storage while protecting your tree from dust, moisture. The christmas tree bags storage 7.5 size ensures your holiday centerpiece stays pristine year after year.
Storage Solutions
The frame trees and slat builds store flat by design; lean them against a garage wall or slide them under a bed.
A two-panel outdoor tree folds on its piano hinge and halves the footprint. I would mark which edge faces out before the hinge goes on, since flipping it wrong folds the painted face to the inside and traps grit.
For spiral or branch stacks, the central pole or dowel is the only long piece; branches or slats nest by size in a bin and the pole rides alongside.
The round pedestal base unscrews or stays put if it is small enough to sit on a shelf.
Seal outdoor pieces clean and dry before storage, not damp.
Any moisture locked under paint or oil winters over and mushrooms out in spring. A weekend of warm garage air costs less than recutting half a tree.
Frequently Asked Questions
Can I make a DIY Christmas tree at home?
Yes. Most of these projects finish in a weekend, with the frame trees and slat builds being the fastest to cut and assemble.
What kind of wood is a Christmas tree made of?
Framing lumber like 2x4s or 2x6s, 1x boards for frame trees, reclaimed pallet boards or fence pickets for upcycled versions, and driftwood or branches for rustic stacks.
Cheap pine works well for small mockups of spiral designs before you cut into better stock.