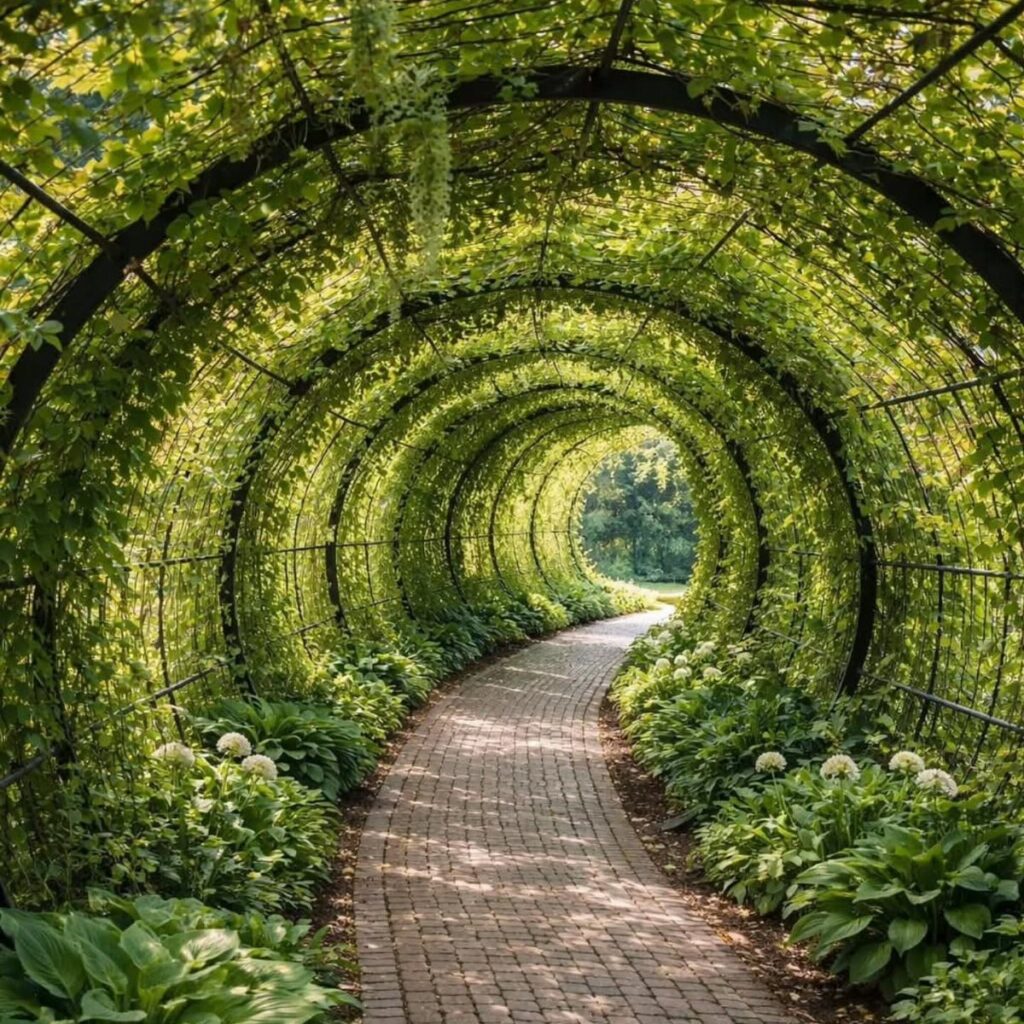
These 8 garden tunnel ideas run from a free bundle of willow whips to a high tunnel with greenhouse-grade plastic and lumber-framed doors.
What fits your yard depends on whether you want a season-stretching cover you lift off in May or a structure tall enough to stand inside and harvest through December.
The cheapest build on the list uses a single cattle panel, bent into a 6-foot arch with T-posts at each end.
[link-whisper-related-posts]1. Low Tunnel
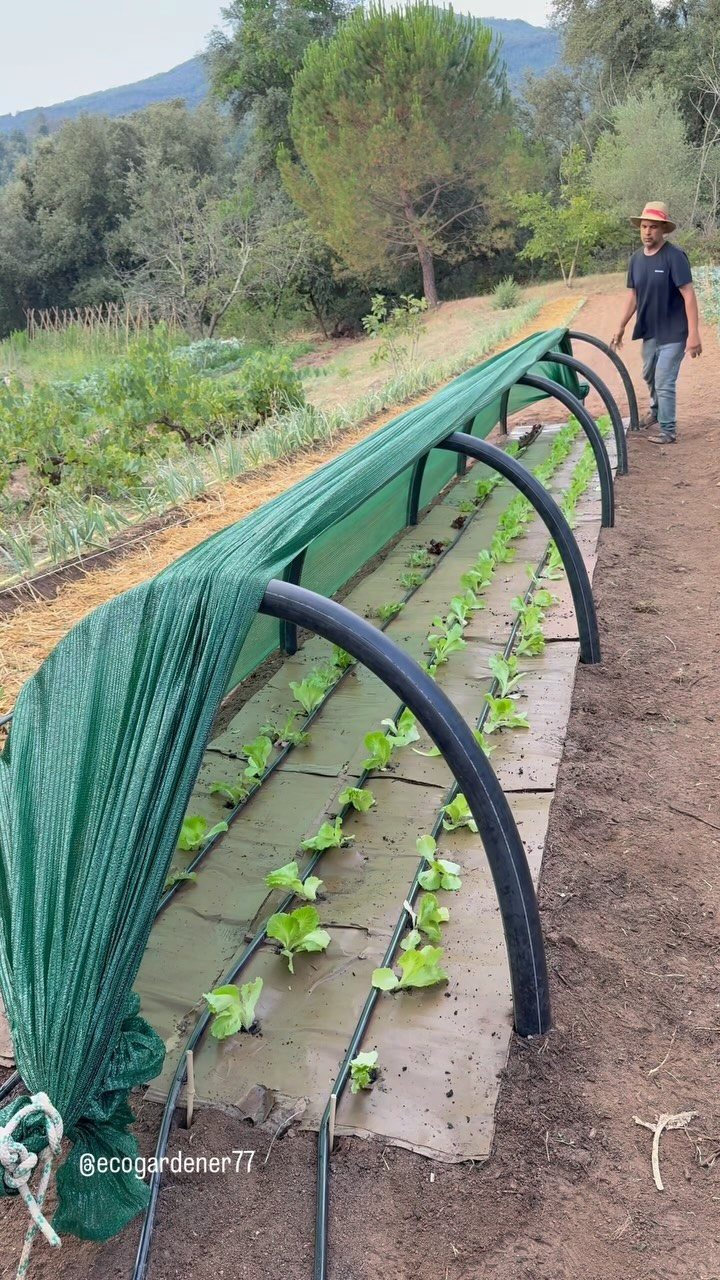
A low tunnel is the quickest way to push your season forward when spring keeps changing its mind.
PVC pipe or wire bent into hoops, covered with plastic or mesh, gives you a 3 to 4 foot tall shelter that sits right over the row you already planted.
I like that you can lift the whole thing off once the weather settles.
Wire frames last longer; PVC is cheaper and easier to find. Green mesh protects against insects and light frost without trapping too much heat underneath.
Build it in an afternoon using PVC pipe and a roll of row cover from any farm store. The height adjusts; lower hoops warm soil faster, taller ones let plants grow longer inside.

Eco-Friendly Material: Our garden Hoops are made from high-quality fiberglass that will never rust and are anti-oxidation, good flexibility and can be used for a long time without affecting the soil, and plants.

Garden Hoops for Raised Beds Row Cover: Note: There is NO netting included. You are no strangers to voracious critters, disease-ridden bugs and winter harsh weather conditions. Fiberglass garden tunnel hoops helped to provide the protection your veggies needed, improving the quality of your harvests big time! You will have a lot fewer problems with insects eating your crop as well as the sun scorching the tender leaves.
2. High Tunnel
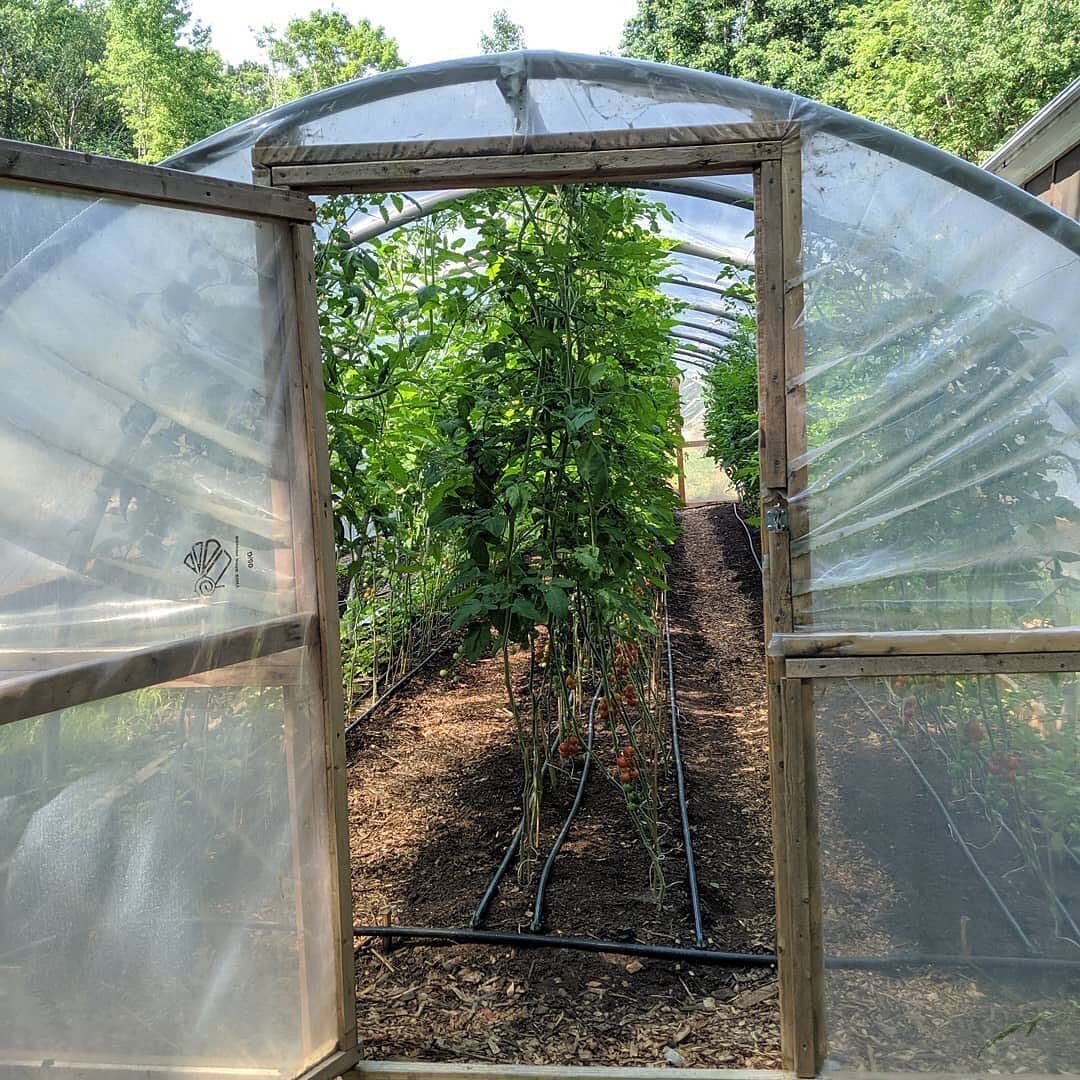
Walking into a high tunnel changes how you think about your growing year.
A wooden door frame and tomato vines reaching toward the plastic roof mean a structure tall enough to stand in and wide enough for rows with real pathways between them.
PVC or metal hoops carry the load, though metal holds up better to snow.
The plastic sheeting is the main cost; buy greenhouse-grade if you want it to last more than 2 seasons. Drip irrigation, visible along the mulched paths, saves you from carrying water through muddy aisles in March.
Year-round growing is possible here, not just season extension. Inground beds work fine, or add containers near the door for herbs you pick daily.

[Powerful Fixing Garden Clips] - For better fixing of garden nets and garden hoops, we use 3 times more elastic stiffened and thickened stainless steel springs. Only a few garden clips are needed to do the fixing job well and keep your plants better protected even in wind and snow (20pcs).

[Powerful Fixing Garden Clips] - For better fixing of garden nets and garden hoops, we use 3 times more elastic stiffened and thickened stainless steel springs. Only a few garden clips are needed to do the fixing job well and keep your plants better protected even in wind and snow (30pcs).

Package Includes: you will receive 64 pieces white greenhouse clamps, enough quantity to meet your daily use and greenhouse replacement needs; You can also share them with family, friends and neighbors
3. Cattle Panel Tunnel
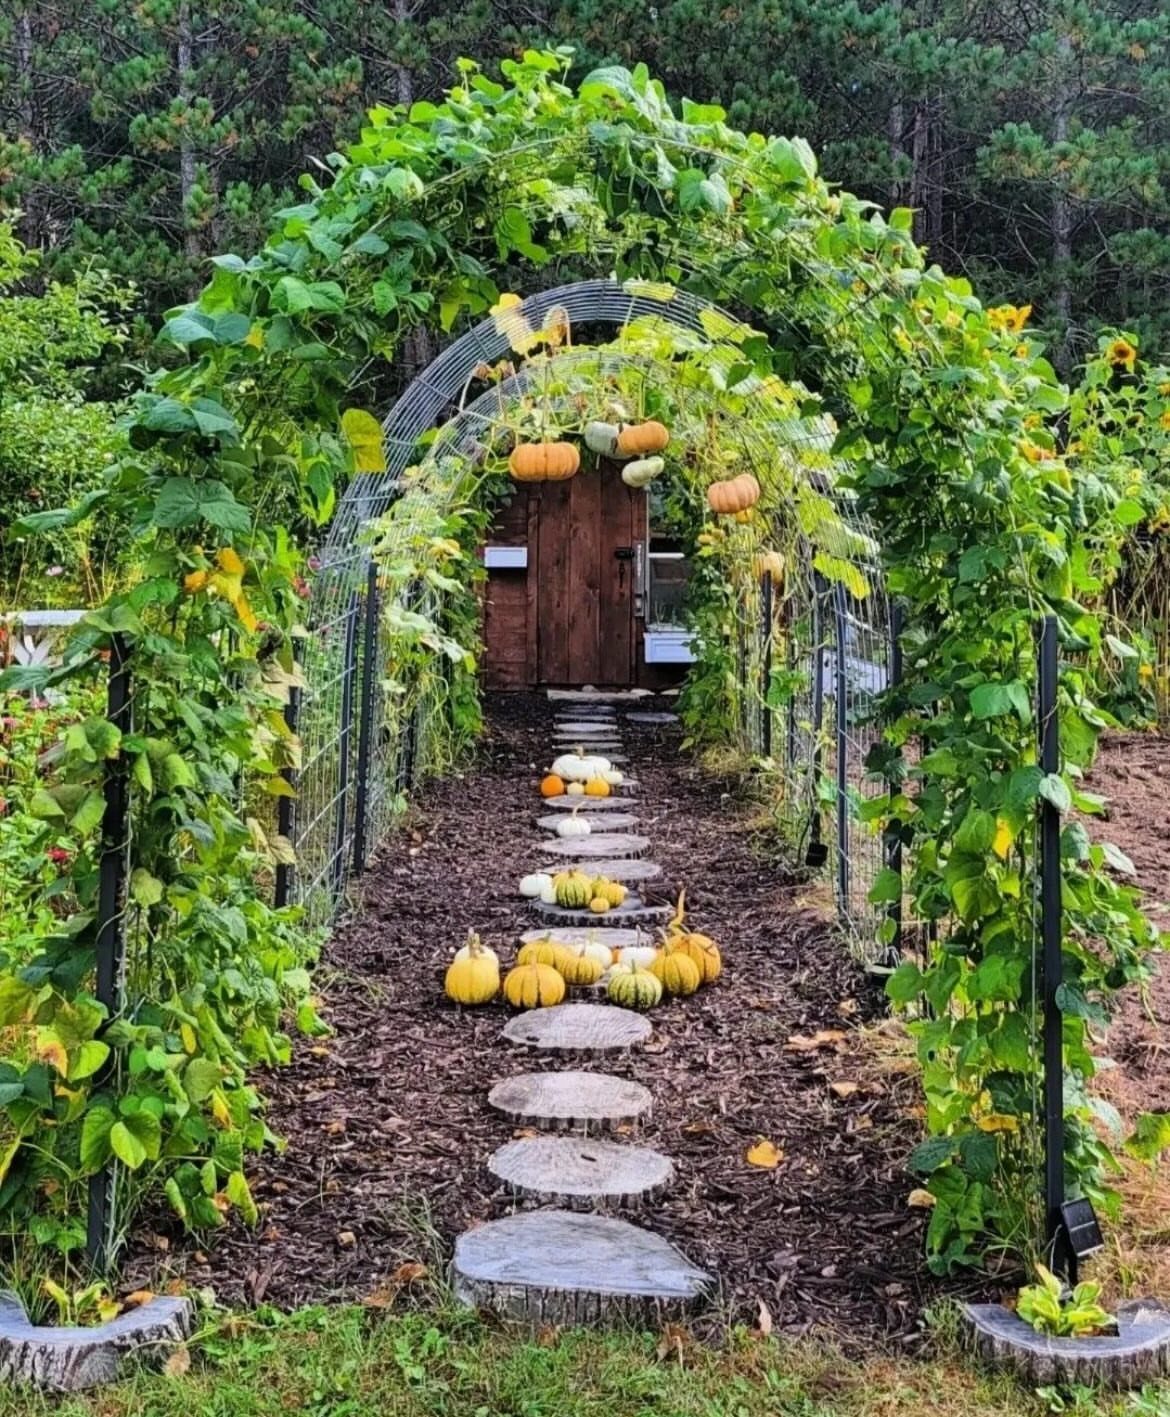
Cattle panels give you an arch strong enough to climb on and wide enough to walk through without brushing your shoulders.
The 16 ft panels bow into a tunnel about 6 feet high at the center, held by T-posts driven deep at each end.
Vines find the grid on their own; beans, cucumbers, and the luffa gourds I read about all grip the wire without tying.
Squash hanging through the openings like lanterns means the panel holes are large enough to harvest through without cutting the vine.
A single cattle panel at a farm supply store costs less than a bag of good potting mix, and two make a tunnel.
Two make a decent tunnel length. The rust that eventually comes is harmless; the wire outlasts several seasons of plants.

Spacious Walk-in Design: This walk-in tunnel greenhouse measures 15 x 7 x 7 ft. It provides ample space for vegetables, flowers, and potted plants. You can water, prune, and move plants comfortably inside, ideal for home gardening and small-scale growing

Upgraded Heavy-Duty Galvanized Frame: The tunnel greenhouse features reinforced load-bearing poles made from thickened galvanized pipes (Diameter: 1", Wall Thickness: 0.02"), enhancing overall strength and stability. Reinforced door poles, added diagonal bars, U-shaped stakes, and tie-downs increase stability and protect your plants from harsh weather conditions.

Spacious Walk-in Design: This walk-in tunnel greenhouse measures 10 x 7 x 7 ft. It provides ample space for vegetables, flowers, and potted plants. You can water, prune, and move plants comfortably inside, ideal for home gardening and small-scale growing
4. DIY Hoop Greenhouse
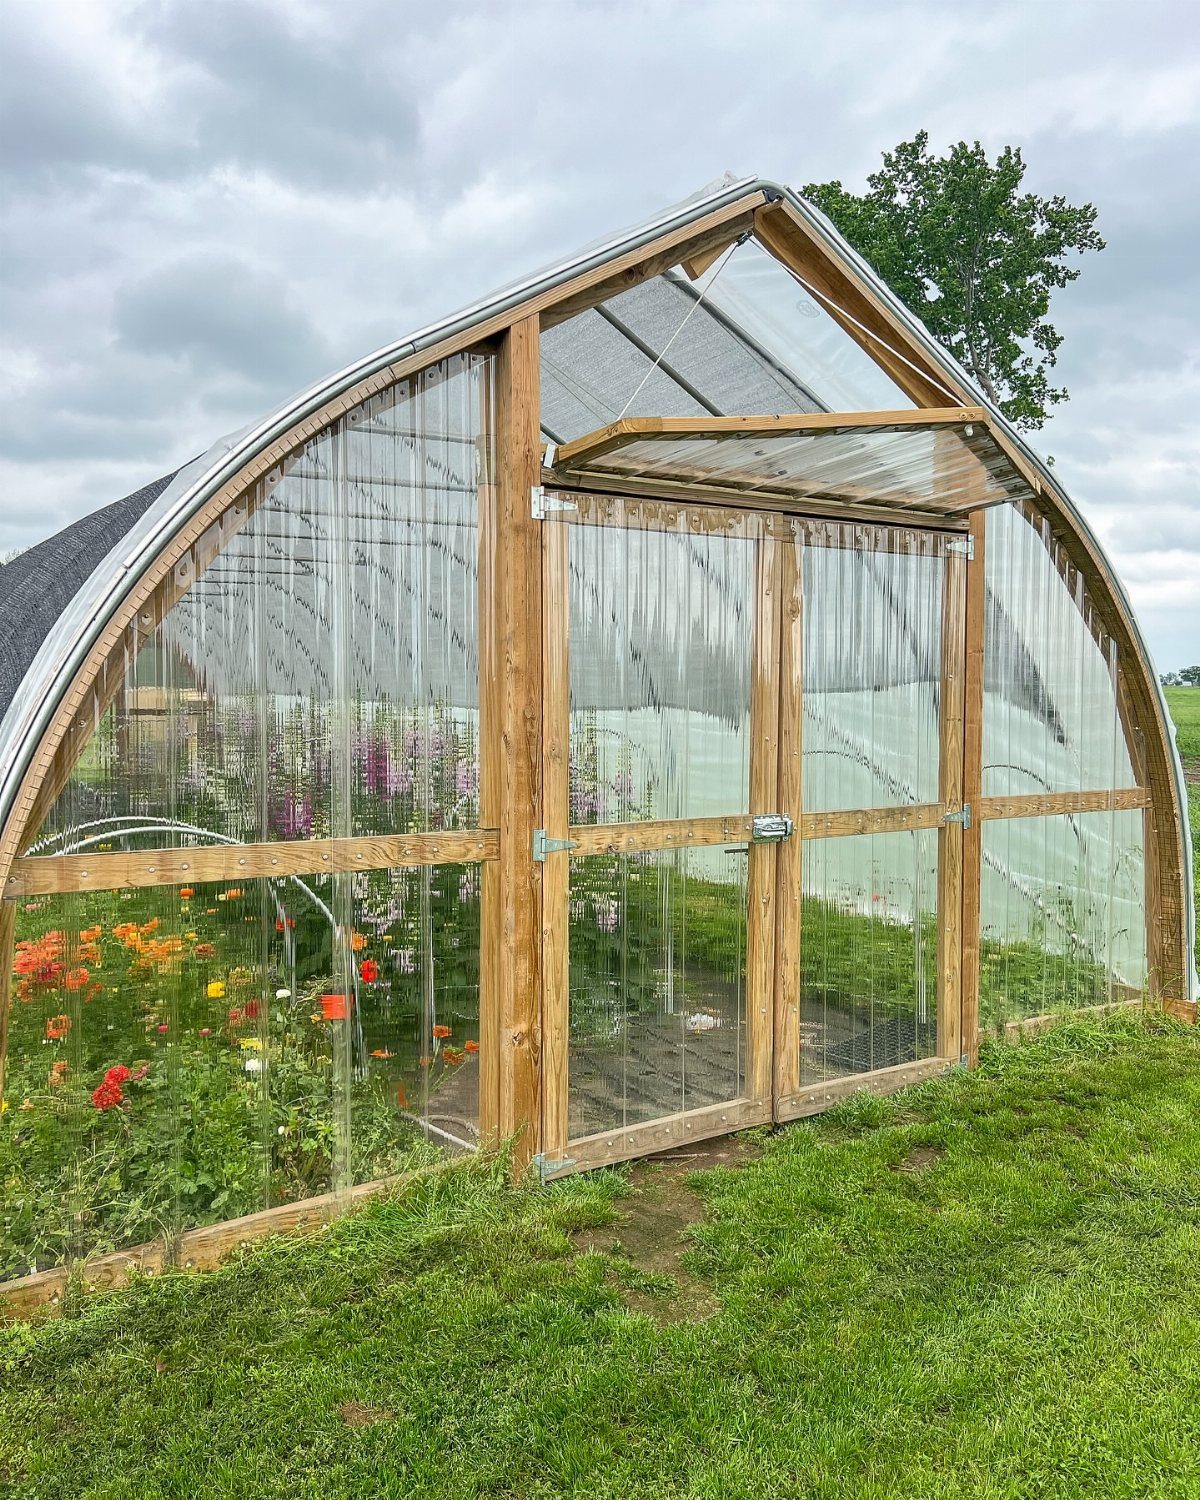
This hoop greenhouse uses a wooden front wall and internal bracing to solve the problem every PVC tunnel faces: wind catches the plastic like a sail and twists the frame.
The corrugated panels on the curved roof are rigid, so they do not flap or sag between hoops.
Building the front from lumber gives you a solid frame for real doors instead of a plastic flap you lift and clip. Horizontal and vertical beams inside keep the hoops from spreading under snow load or a strong gust.
Cost stays low because PVC is still doing the curved work; wood is only where rigidity matters. Clear panels pass more light than standard greenhouse plastic, though they cost more upfront and may need sealing at the seams.

【Premium Material】: Garden trellis features galvanized steel pipes coated with PE material, offering protection against corrosion and adverse weather, while also preventing plants from high-temperature burns

PRECISE DIMENSIONS & ADJUSTABLE WIDTH – Overall arch measures 87"H with a 65" span; 0.71" polyethylene-coated steel tubing resists rust. Base width adjusts to fit raised beds, garden borders, or walkway entrances of various sizes.
5. Raised Beds in High Tunnel
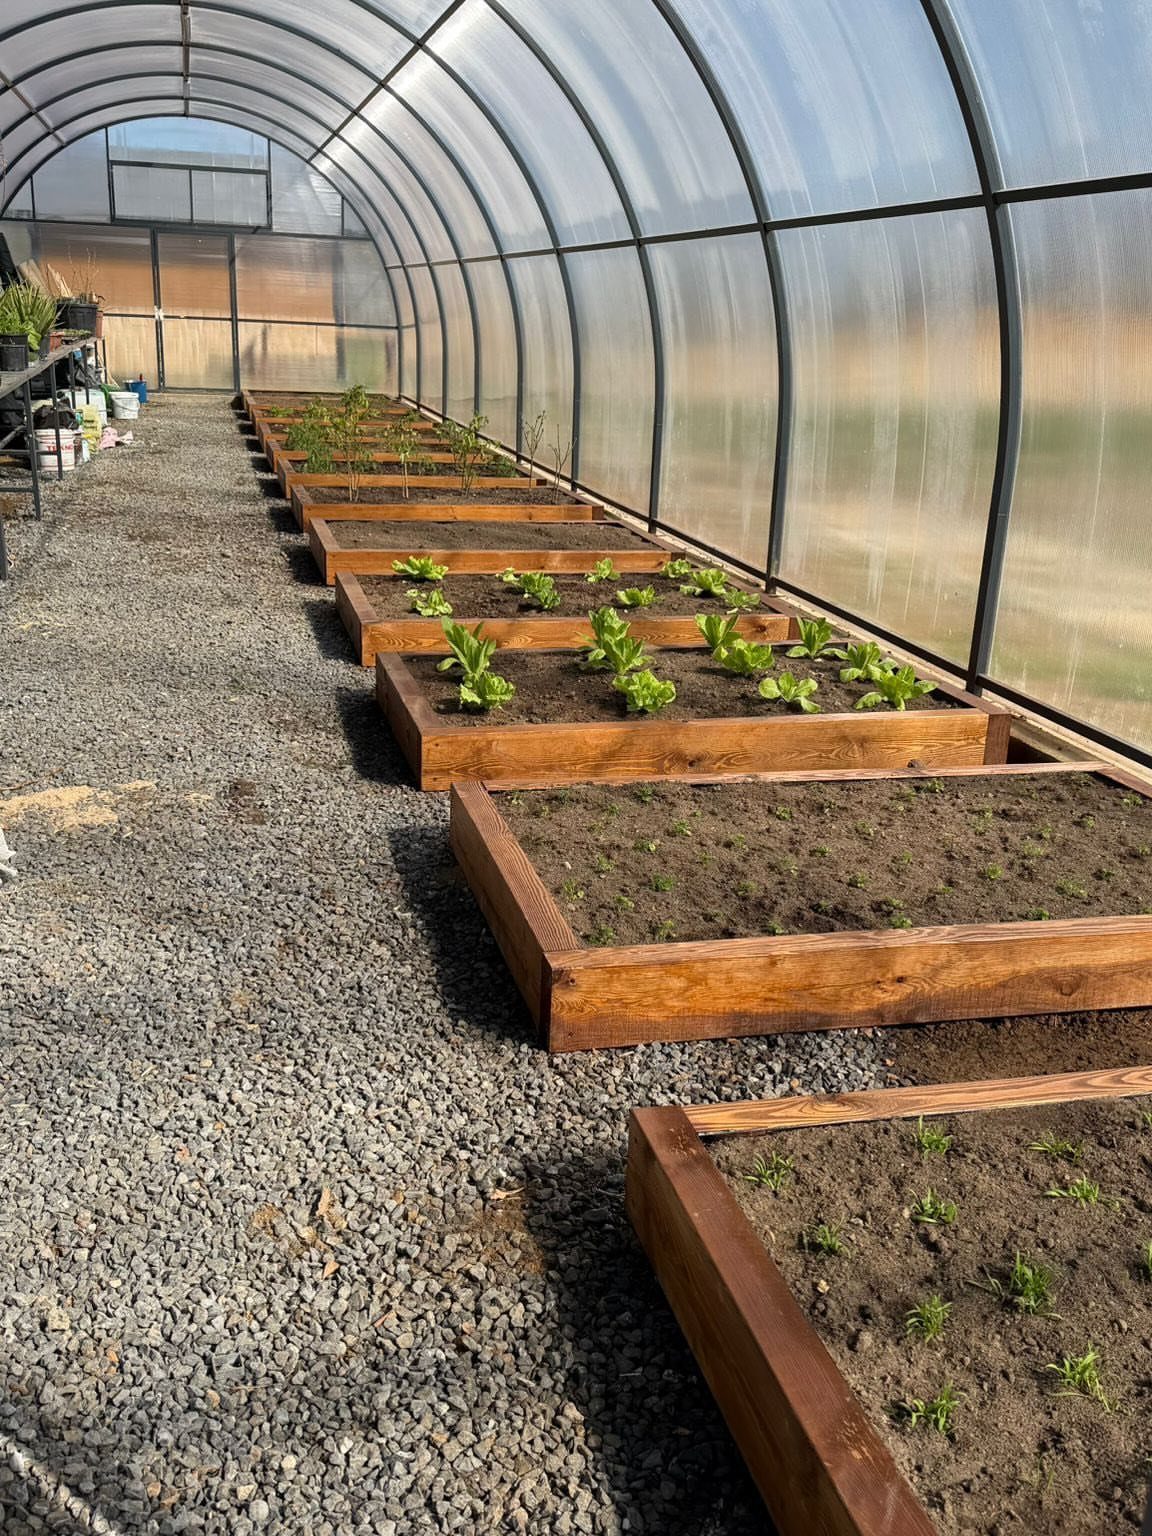
Raised beds inside a high tunnel put your soil at a height your back will notice by October. Wooden boxes sitting on gravel drain better than bare ground and keep mud off your boots when you walk between them.
That layout leaves room to roll a cart or kneel at the edge of each bed without squeezing past.
Filling raised beds with good soil costs more at the start than tunneling over existing dirt, but you control drainage and you start planting sooner, since raised soil warms faster in spring.
This layout suits anyone who already prefers raised beds outside and wants the same convenience under plastic. The tunnel structure and bed frames are separate projects; build the beds first, then fit the tunnel over them.

Defend Against Unwanted Visitors: Gardening is a rewarding and fulfilling endeavor, and you'll watch your plants grow from nothing to maturity before you finally harvest them. Once the plants begin to flower and bear fruit, these unwelcome visitors visit your garden and often leave a trail of destruction. Garden netting is the best choice for protecting your plants

Defend Against Unwanted Visitors: Gardening is a rewarding and fulfilling endeavor, and you'll watch your plants grow from nothing to maturity before you finally harvest them. Once the plants begin to flower and bear fruit, these unwelcome visitors visit your garden and often leave a trail of destruction. Garden netting is the best choice for protecting your plants

Ultra-Fine Mesh Netting: Large Size 2pack 10x33 Feet provide more security, Ultra Fine Garden Netting has a 0.04in ultra-fine mesh, It also allows sunlight | artificial light as well as air and rain to pass through. Light material, no burden for plant buds. Provide healthy growth environment for plants. Tip:(Not two packages, it's one package with two 10*33FT garden nets inside)
6. Inground Beds in High Tunnel
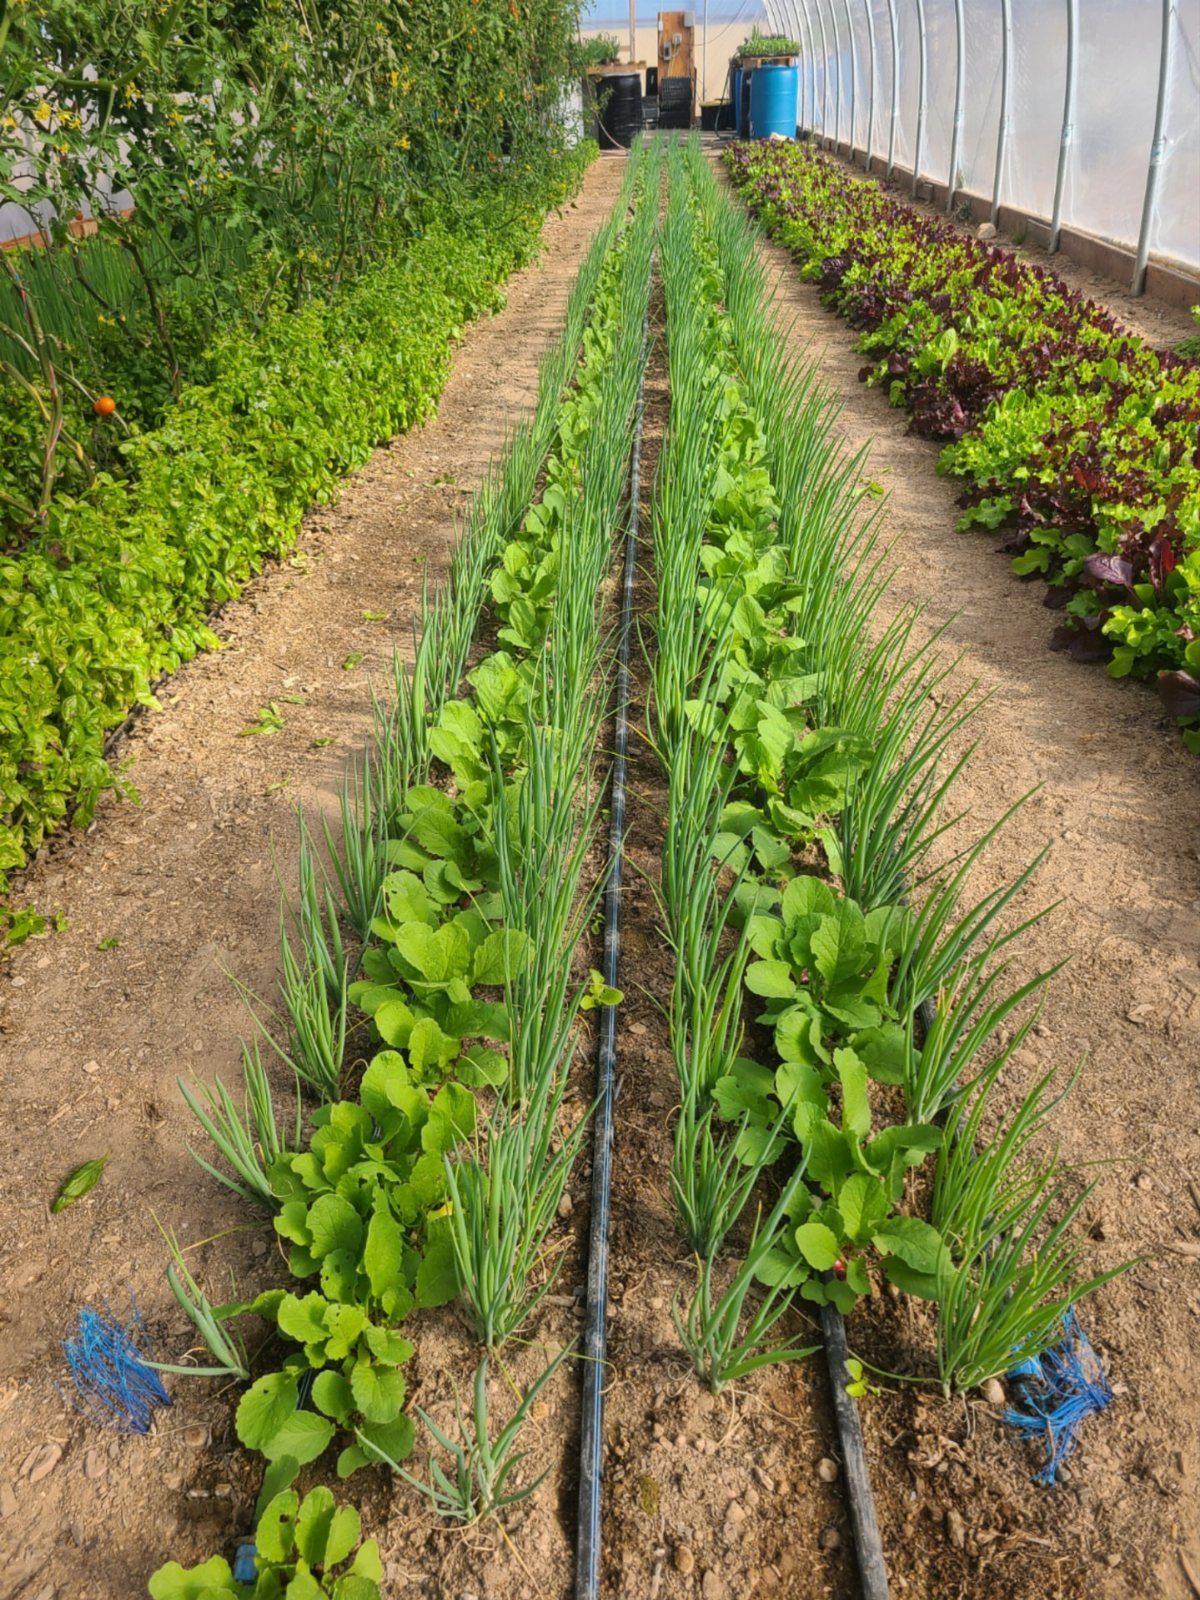
Planting straight into the ground inside a high tunnel keeps your costs down and your roots free to run. Rows following the tunnel’s length with narrow dirt paths between need no lumber, no fill soil, no extra construction.
Small border edges between beds, low enough to step over, keep your walking paths and root zones from blending together through the season. A few pots near the entrance give you flowers or herbs without redesigning the whole floor plan.
This is the fastest way to get growing once the tunnel frame is up. Soil drainage and compaction are your only real concerns; if your site holds water, raised beds inside the tunnel make more sense despite the extra work.
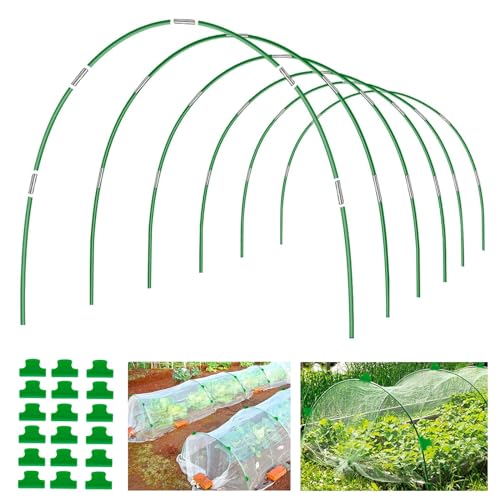
PVC-coated for all-weather durability: Protective coating resists rust, corrosion, and UV damage; Withstands sun, rain, and humidity with no cracking or peeling; Ideal for year-round outdoor use

【2-IN-1 DESIGN】This Warmfarm garden cloche tunnel comes assembled with 6 hoop stakes & a drawstring to open and close the access points. Accessible from either end & folds accordion style to allow access to any part of your garden row with ease!

Durable and Versatile Construction: Garden hoops crafted from friendly and heavy-duty fiberglass material, our garden bed hoops ensure long-lasting performance. These rust-free hoops boast exceptional flexibility and resilience, offering strong resistance against environmental factors. With anti-oxidation properties, they guarantee enduring support for your garden beds in all seasons.
7. Gourd and Melon Trellis Tunnel
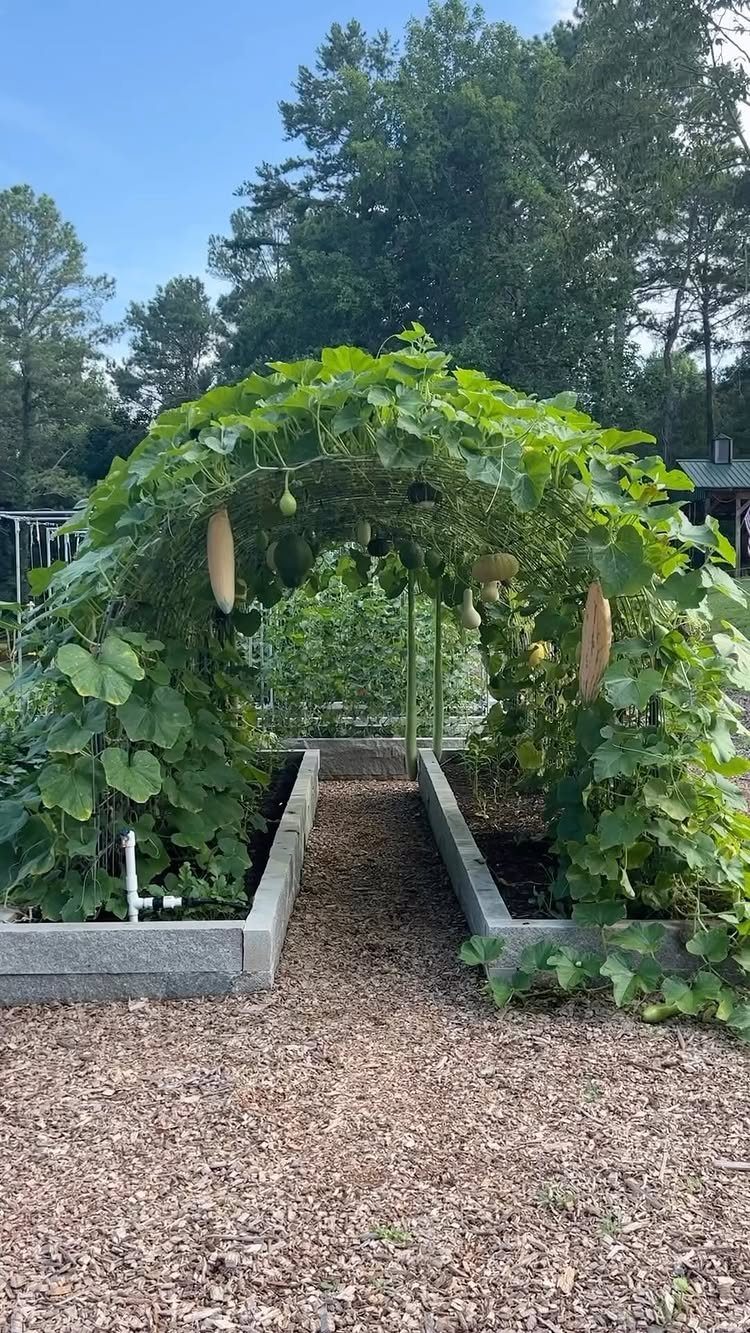
Gourd and melon vines climb fast enough to turn 2 raised beds into a green hallway by midsummer.
A cattle panel bent into an arch between them gives the vines something to grip, and the fruit hangs through the grid where air can reach it.
The 16 ft panels bow to about 6 feet at the center, same as a tunnel you walk through, though here the path sits at ground level and the crop hangs overhead.
Beans and cucumbers work too, but luffa gourds are what I keep seeing on these; they dry on the vine into sponges you can actually use.
T-posts at each bed corner hold the panel ends.
No tying needed, the tendrils do that work. Harvest by reaching up through the holes.

Package Includes: this package includes 16 pieces white PVC pipe clips offering plenty of supplies to meet their daily needs in a variety of applications; Whether it's standard use, replacements, or planned expansions, these greenhouse clips are ready for many projects

[Powerful Fixing Garden Clips] - For better fixing of garden nets and garden hoops, we use 3 times more elastic stiffened and thickened stainless steel springs. Only a few garden clips are needed to do the fixing job well and keep your plants better protected even in wind and snow (30pcs).
Package Includes: you will receive 64 pieces white greenhouse clamps, enough quantity to meet your daily use and greenhouse replacement needs; You can also share them with family, friends and neighbors
8. Living Willow Arch Tunnel
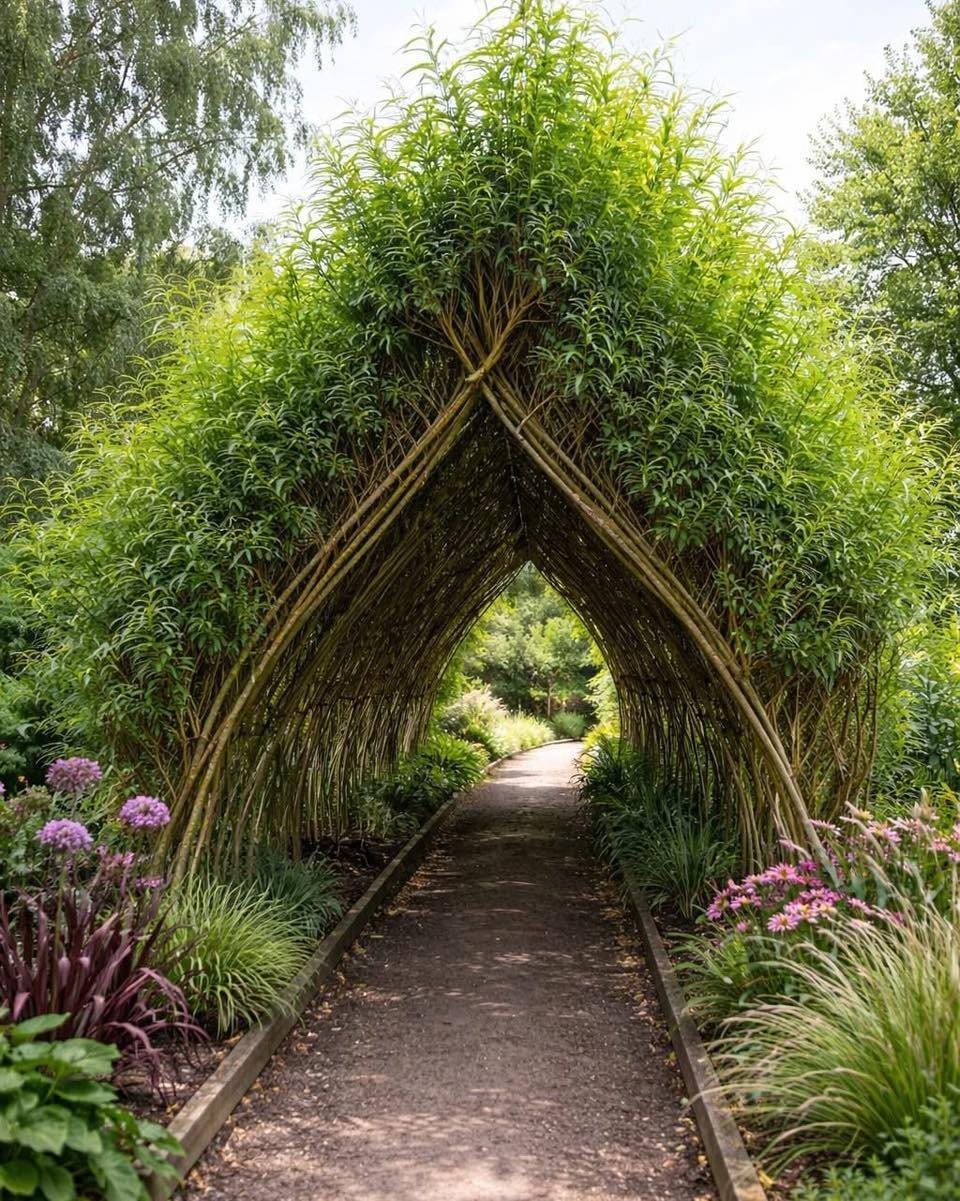
Willow whips root so readily that weaving them into a tunnel frame means the structure keeps growing thicker each year.
Fresh 6 to 8 foot rods, pushed into the ground at an angle and braided together at the crossing points, knit into a living arch that leafs out by June.
A pointed shape comes from setting the base rods closer together and weaving the tops to a narrower crown than a round cattle-panel arch. Side shoots get trimmed to keep the walking path clear, or left to thicken the shade.
This is the slowest idea on the list; the frame needs a full season to set before it carries much weight.
Plant clematis or hops at the base if you want coverage the first year while the willow establishes. No plastic, no wire, and the material is free if you have a willow patch or a friend who does.

Roll-up Door and Large Windows: The large door provides easy access to your outdoor greenhouse, and the large mesh sidewalls keep out unwanted guests with wings. Multiple openings allow for cross ventilation, so temperature and humidity are in your hands

Built-In Sprinkler Watering System: The integrated spray system in this Tunnel Greenhouse delivers balanced water coverage to plants, reducing frequent hand watering while helping maintain consistent moisture for healthier daily growth
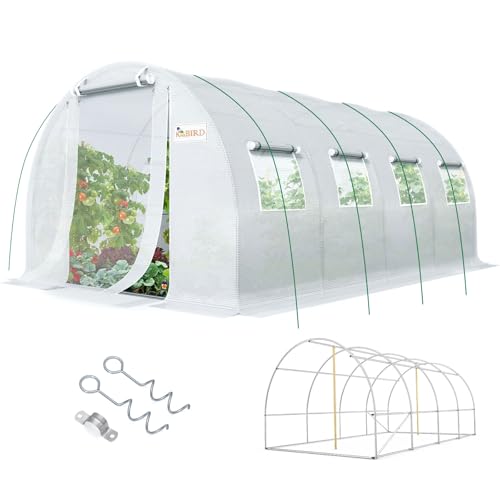
[Reinforced KING-Frame Structure] - KING BIRD portable plant tent is pro-designed and made of selected galvanized steel, with extra top crossbars, diagonal, bottom poles enhancing the structure. 2 supporting stiffeners are added to reinforce the frame. Durable stakes and ropes are given to fix it on the ground firmly. The 20ft large space is perfect for you to place abundant home vegetables, flowers plants, etc. Specific size: 236.2"L x 118.1"W x 79.2"H
Building Materials
PVC pipe is the material I keep seeing in builds that need to stay cheap. It bends for hoops, it is easy to find, and it costs less than metal.
For a low tunnel, flexible PVC or electrical conduit pairs with short rebar stakes pounded partway into the ground. Sliding the pipe over the rebar and bending it across the row gives the hoop its shape.
PVC clips hold the cover to the hoops; bricks or sandbags weigh down the edges against wind.
Wood belongs where rigidity matters. Corrugated panels on the roof stay quiet in wind, unlike plastic sheeting, though they run higher in price and the seams may need sealing.

【Perfect Size for Raised Beds & Gardens】Total dimensions: 78.7”H × 34.84”W × 30.9”D, this black garden trellis for climbing plants provides ample vertical space for heavy climbing vines. It fits standard raised beds perfectly and can even span across two raised beds, doubling your planting space while keeping your garden tidy and productive.

Made from robust tubular steel, weather resistant finish.

【Rust-Resistant Material】: Garden arch trellis features a galvanized steel core frame with a heat-insulating PE outer layer (20mm diameter) to prevent rust and plant scorching, ensuring structural stability and long-lasting durability
Season Extension
Cool season crops like radishes, peas, or lettuce germinate faster underneath, and young plants survive cold snaps that would stall them in the open.
The protection works both ways.
You can harden off seedlings started indoors by moving them under a low tunnel before they face open air permanently. The same structure protects transplants in their first weeks.
A high tunnel extends this further. The protected area gives you fresh vegetables for more of the year than outdoor growing allows, not just a head start.
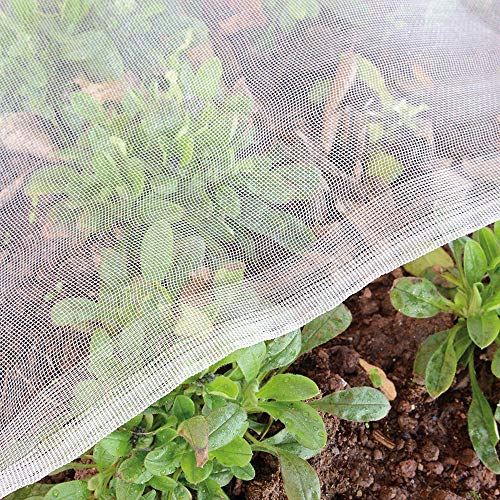
🥬Effective Bug Barrier: Protecting plants and vegetables from a wide range of pest insects and animals, such as cicadas, carrot fly and many species of aphids, you will get a healthier and happier garden

1. Fortify Your Garden Fortress: Say goodbye to pesky pests and unwanted critters! Our 4'x10' Plant Netting Pest Barrier acts as a sturdy shield, protecting your precious plants from insects, birds, and other garden invaders. It's like having a fortress around your garden beds, ensuring your plants thrive and flourish.

Comprehensive Package: This plant covers freeze protection kit comes with everything you need for hassle-free winter plant protection. You'll receive a large 10 ft x 30 ft 1.41 oz/yd² dark green frost plant cover, 20pcs gardening clips, 14pcs ropes for secure binding, and 14pcs metal stakes, ensuring that your plants are well-protected and secured, and ideal for both beginner and experienced gardeners
DIY Vs. Store-Bought
Pre-made low tunnels are sold online at different price points, but the parts for a simple one are ordinary hardware store stock.
PVC or conduit piping, rebar, and plastic sheeting assemble in the size of your own rows or raised beds. You choose the spacing; a hoop every 4 feet with two rebar supports opposite each other is the usual spacing.
A support beam across the top keeps snow from collapsing the tunnel, though that step is optional. If you have raised beds already, clamping the piping to the outside replaces the rebar stakes entirely.
Store-bought saves you the planning. DIY saves money and lets you match the tunnel to beds you already built.
For a step up in size, high tunnel kits exist, but the same choice applies: metal hoops carry snow load better than PVC, and building your own front wall with lumber gives doors that seal properly instead of lifting a plastic flap.
Maintenance Tips
Temperature inside a tunnel can rise fast enough to cook plants on a sunny day, even when the outside air stays cool. I check mine by feel in the morning and again by mid-afternoon; a thermometer left inside is better.
Ventilation is the fix. Rolling up the sides of a low tunnel, or opening doors and vents on a high tunnel, lets heat escape before it damages leaves.
The plastic traps moisture too, so air movement prevents the fungal problems that come with damp, still air.
Snow load matters on high tunnels in northern winters.
Metal hoops handle weight that PVC bends under; internal bracing or a support beam across low tunnels spreads the load. I clear what I can reach after heavy falls rather than testing the frame.
Plastic sheeting degrades in UV light.
Frequently Asked Questions
How do I build a DIY garden tunnel?
Bend PVC pipe or wire into hoops and cover them with plastic sheeting or row cover.
Half-inch PVC or electrical conduit bends into hoops when you slide it over rebar stakes hammered 6 inches into the ground, one pair every 4 feet along the row.
A ridge pole or cross brace at the peak keeps the frame from sagging under wet snow. The whole thing goes up in an afternoon with hardware store parts.
What crops grow best in a high tunnel?
Radishes, peas, and lettuce sprout sooner and shrug off late frosts when they start life under plastic or row cover.
Tomatoes climb toward the plastic roof in summer, and herbs in containers near the door give you daily pickings. The real advantage is stretching your season at both ends, not limiting yourself to one crop type.
How tall should a low tunnel be?
Most low tunnels run 3 to 4 feet tall, enough to shelter a row of plants while keeping the cover within easy reach.
Shorter hoops pull heat into the soil right after the thaw; extra height buys you a few more weeks before the plants outgrow the space. The height adjusts to what you are growing and when you need the tunnel off.