The 9 ideas below run from a free afternoon with paint and old cans to a full weekend with lumber and a pocket hole jig.
What decides it is whether you need the thing to roll, sit on legs, or stay put for years.
A locking caster wheel under one box lets a single person move tomatoes across the patio; a two-liter bottle hung with twine turns a balcony rail into seedling space with nothing but scissors.
[link-whisper-related-posts]1. Rolling Planter Box
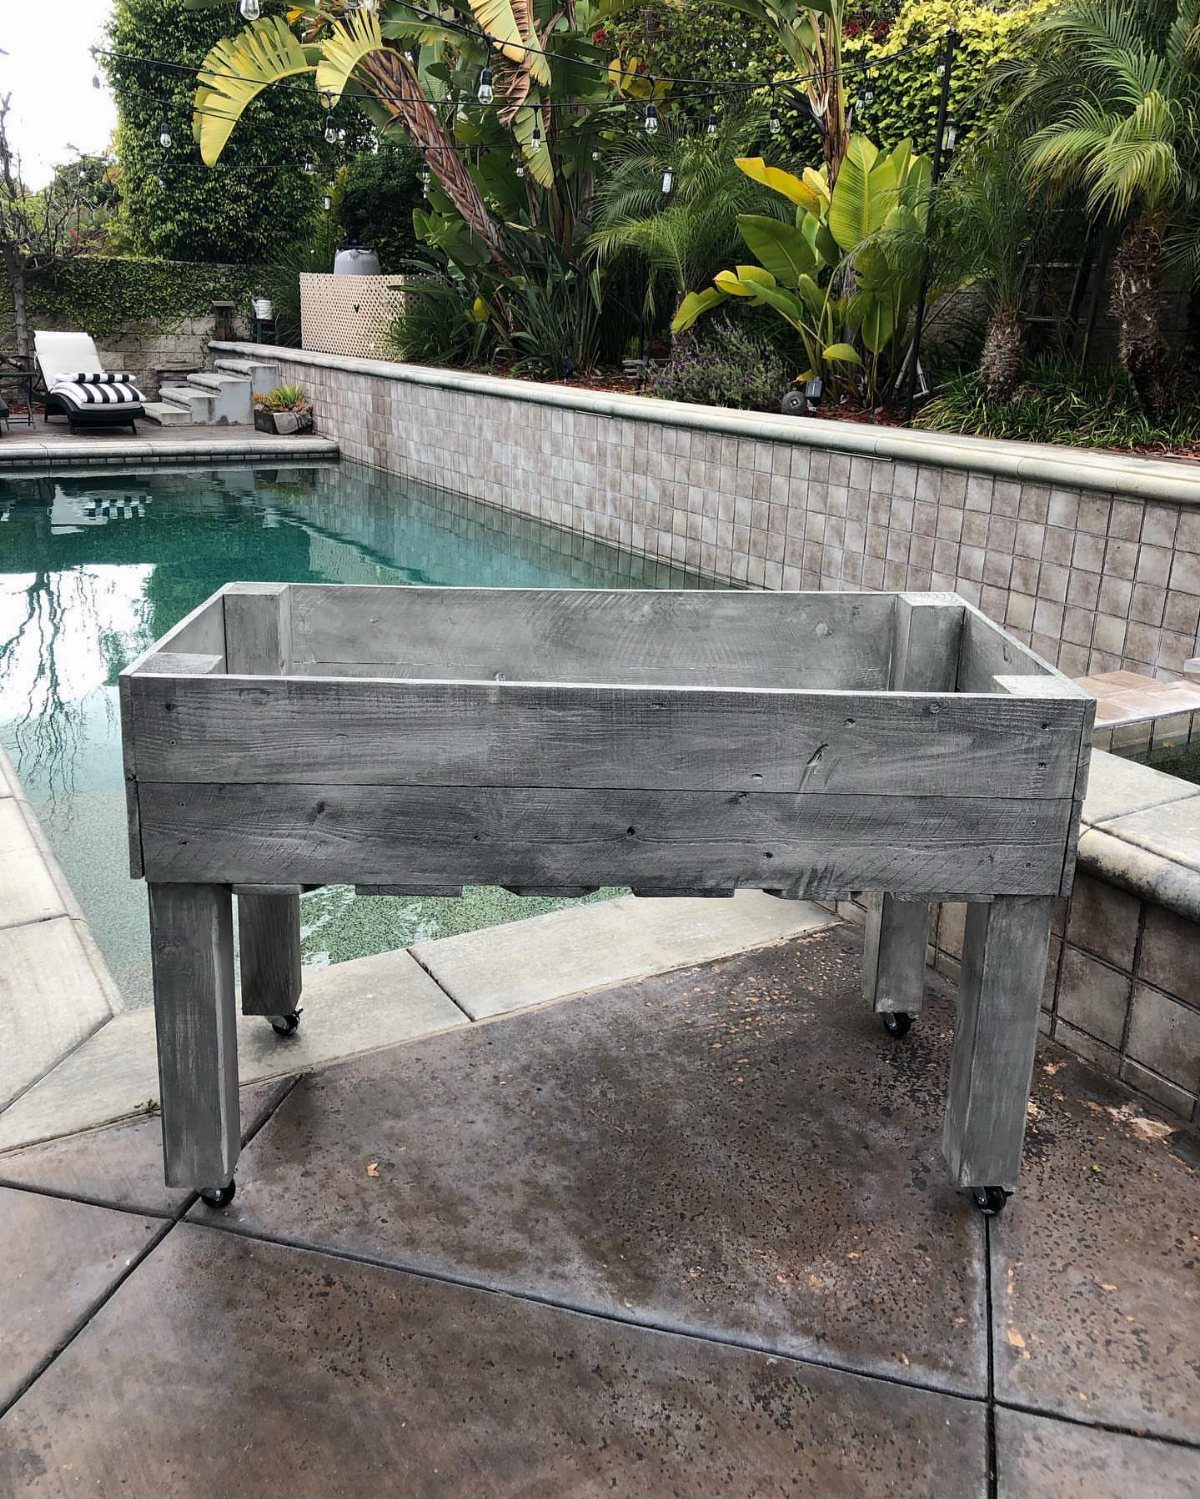
A rolling planter box buys you options. Sun moves across the patio, pests show up, or you decide the tomatoes need more afternoon light; with casters underneath, one person can roll the whole thing to a new spot.
I would build the box from 1×6 boards and the frame from 2x4s, then bolt on four locking caster wheels from the hardware store.
Stain-plus-sealer on the outside keeps the weather out; leaving the inside bare keeps the soil clean.
If you are planting directly in it rather than dropping in nursery pots, drill drainage holes through the base and staple landscape fabric inside to keep dirt from falling through.
A coat of spar urethane over the sealer helps if your patio sees real weather. Lumber and hardware for a rolling box add up fast, but the build itself is straightforward enough to finish between Saturday morning and Sunday evening.

WHEELS THAT MAKE CHORES A BREEZE: No more struggling to reposition your big plant pots; Our rolling planter stand, suitable for indoor and outdoor use, easily transports large trees, vases, crates, Christmas tree stands, and heavy trash cans

Improve Your Plant Care: Effortlessly move planters for indoor plants and planters for outdoor plants to catch the rain or sunlight; Our plant caddy with wheels allows you to optimize the growth and ventilation of your plants effortlessly.

SMALL CASTERS SET OF 4: These 1 inch caster wheels add mobility to compact furniture and storage projects. Each 1 inch caster has a 0.5 inch wide wheel and a 1.5 inch installed height. Check the clearance beneath your item before ordering.
2. Small Wood Planter with Angled Legs
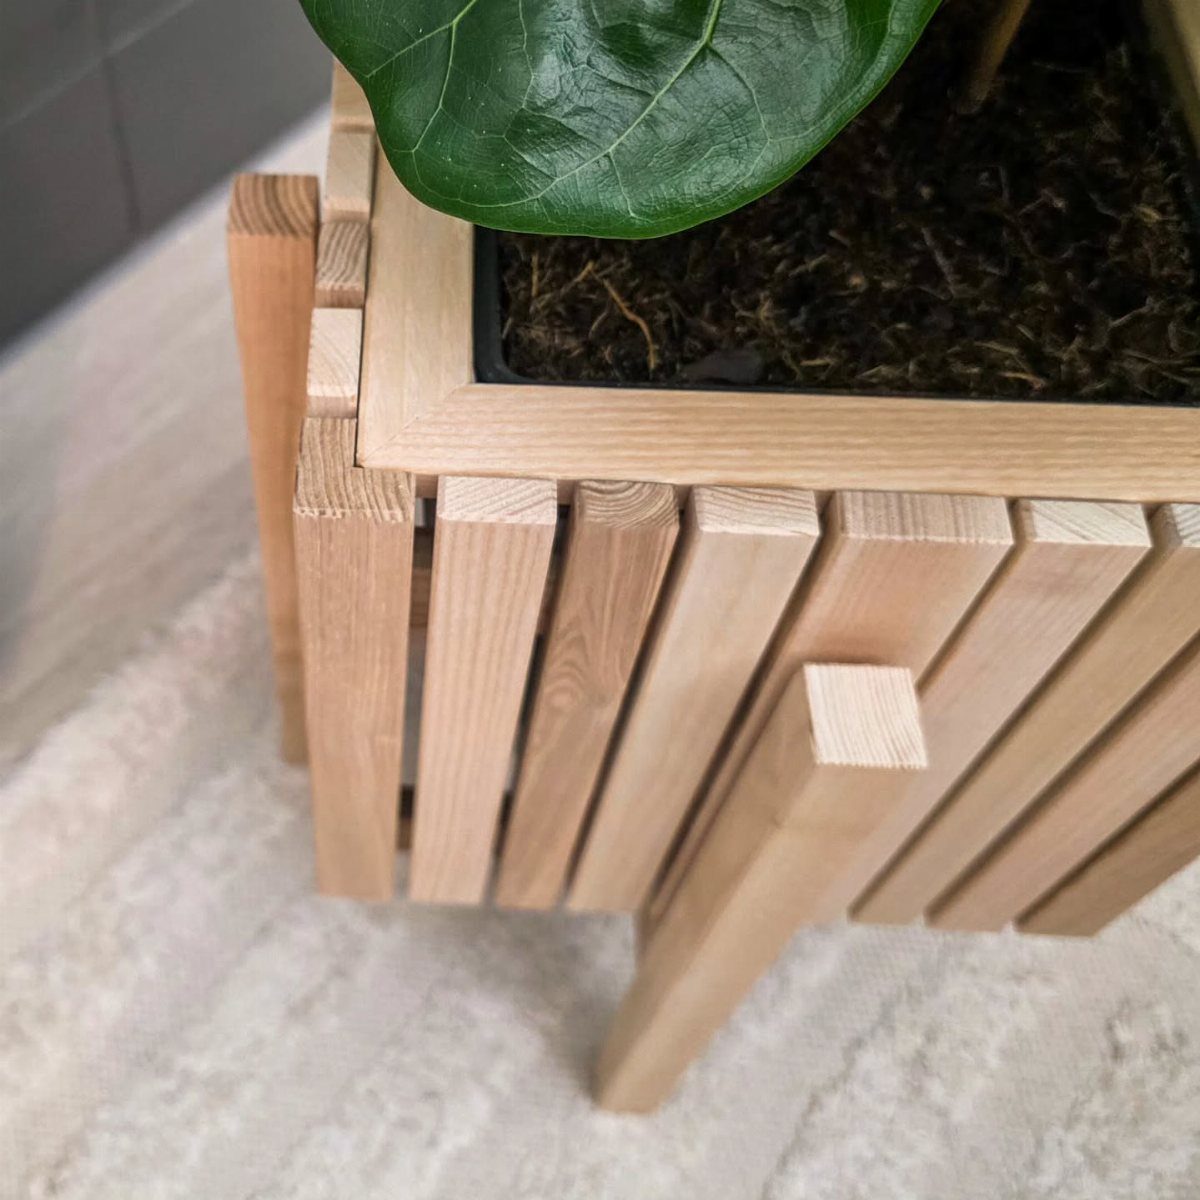
Angled legs turn a plain wood box into something that looks designed rather than built. The box is 1×6 slats, and the legs are 2x2s cut on a miter so they lean outward instead of running straight down.
A pocket hole jig hides the screws and keeps the outside faces clean; without one, you are either showing fasteners or finding complicated joints.
It drills the angled holes for screws so the joints stay tight without brackets showing. Wood glue and a few finish nails through the slats into the legs hold everything while the glue sets.
The builder sized this one for succulents or a few herbs, which keeps the weight low and the legs from working loose over time.
I like this as a gift project; it finishes in an afternoon, uses barely a board and a half, and the recipient can drop in whatever pot they already own.
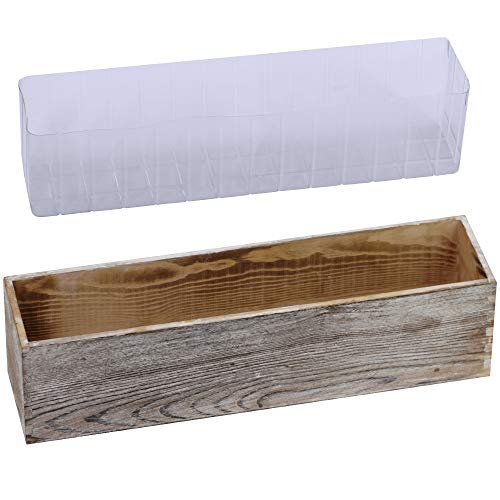
Quantity: Pack of 1 Rustic Rectangular Wood Planter Box Decorative Wooden Succulent Planter Window Box comes with a matching Removable Plastic Liner.

Elevate Your Garden - Opt for a brilliantly engineered raised garden bed to revolutionize your gardening. Its spacious design, measuring 48x24x30 inches, allows for the cultivation of multiple vegetable varieties alongside a plethora of herbs, optimizing your gardening space for ease and diversity.

Large Size and Wood Combination: MIXC raised garden beds is made of untreated fir wood, which resists warping and splitting over time better than cedar. The support part is made of Pinus radiata with better load-bearing properties. Dimension: 48”(L) X 24.4”(W) X 31”(H). With 5-6 cubic feet of space and a 9-inch depth, our garden bed offers generous room for your plants flowers and vegetables to breathe and thrive outdoors
3. Wooden Planter Box
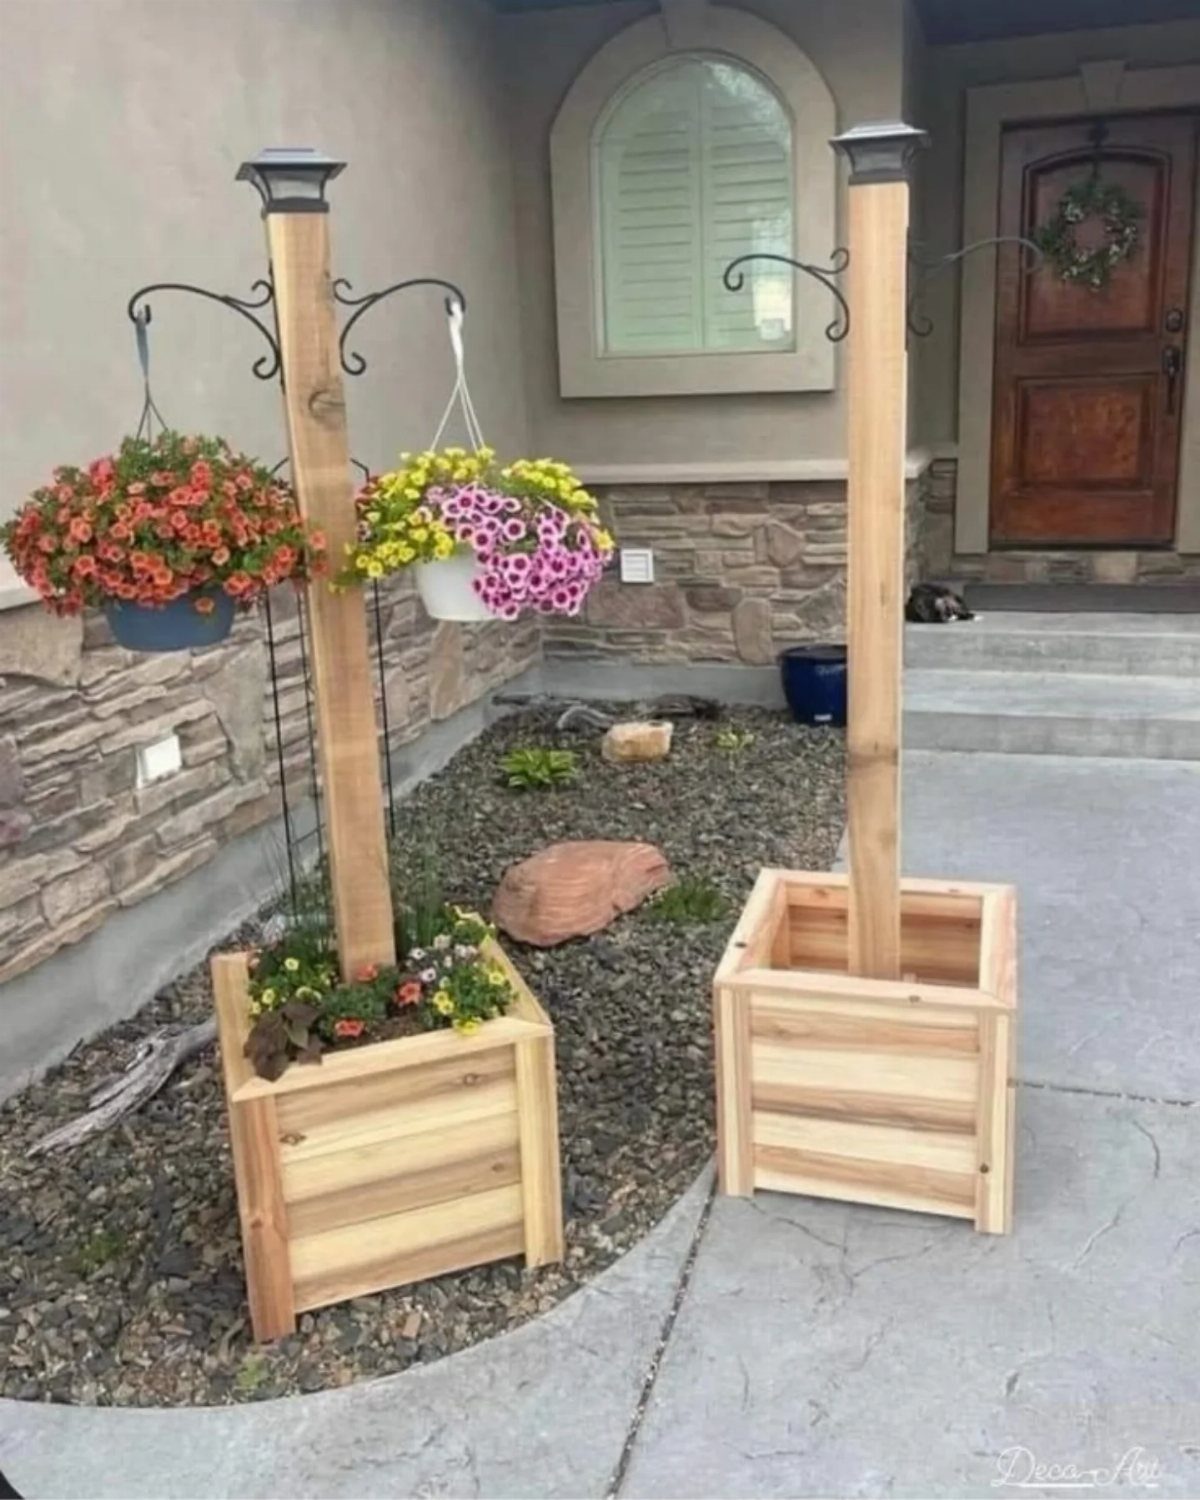
Adding a trellis or tall stakes to a wooden planter box gives you a place to hang a basket or hook a solar light, so the planter becomes a vertical piece without needing a wall.
Build it from treated 1×6 or decking boards, butted into a box 4 layers high with screws at the corners. The base is gravel board or stick timber, whatever your yard store stocks, cut to fit inside.
Drill drainage holes before you line it; plastic sheeting or an opened compost bag stapled to the inside keeps the soil off the wood and buys the box a few extra seasons.
Treated decking works straight off the rack, though it needs time to dry out before paint or stain will take properly. Two of these flanking a walkway give you symmetry without matching plants.
Wooden planters are ideal for adding greenery and colour to small spaces, patios, and balconies. You can buy ready-made planters, but making your own is easy!

Durable Cedar Construction – Made from natural cedar wood with thickened panels for enhanced stability and weather resistance. Designed to resist warping and decay, offering reliable performance through multiple seasons of outdoor use.

HIGH-QUALITY ACACIA WOOD CONSTRUCTION: Our garden boxes outdoor raised are crafted from durable Acacia wood; The unique wood grain enhances your space, ideal for decorating or growing plants
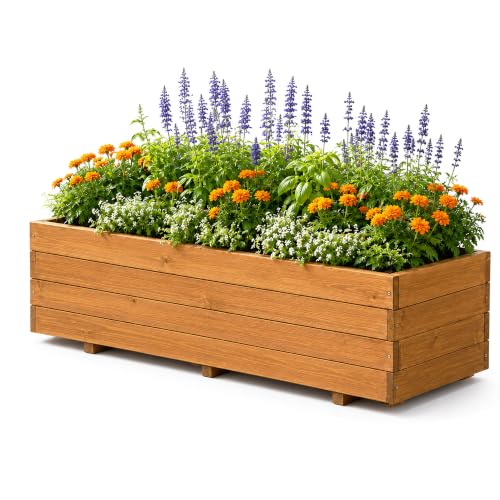
[ Solid Fir Wood Garden Box ]: Made by ScienGarden from solid fir wood, this wooden planter box features a smooth water-based paint finish for a cleaner, sealed surface. The natural wood look makes it suitable for outdoor garden decor, patios, porches, balconies, and backyard spaces.
4. Upcycled Painted Can Planters
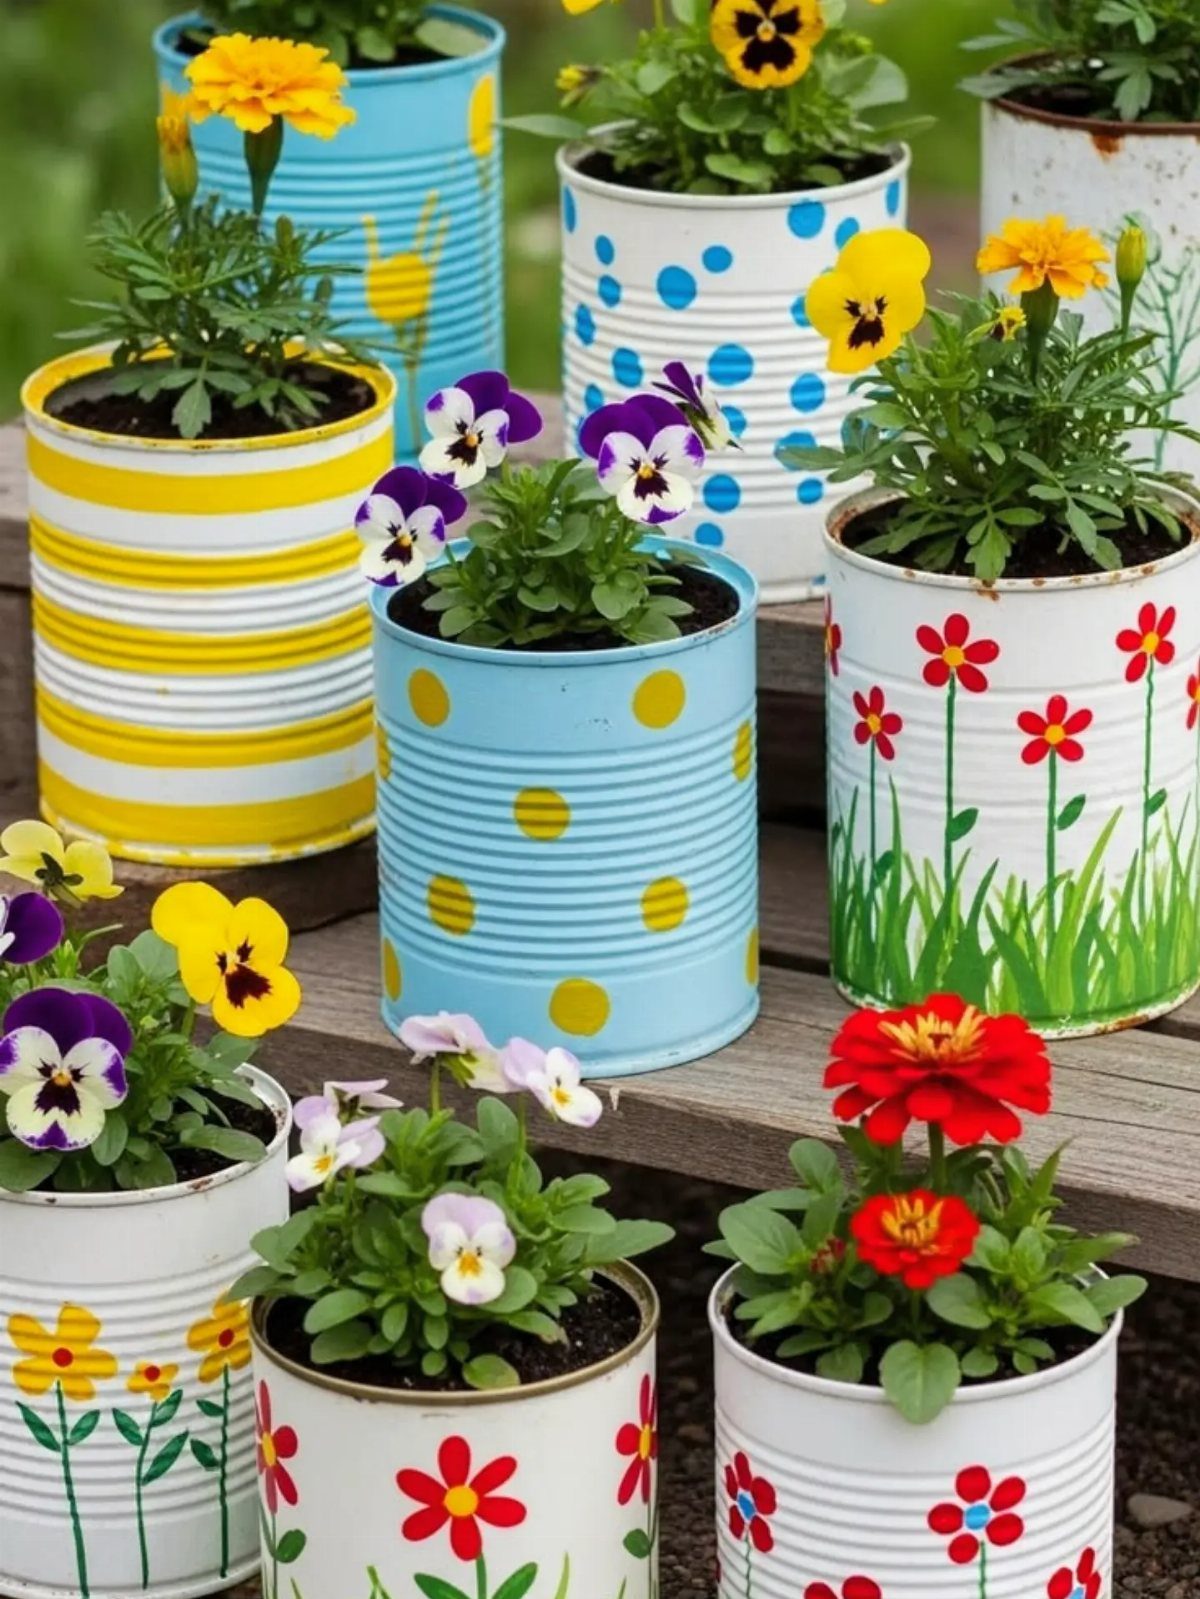
Old cans become planters the afternoon your kids get bored and you have acrylic paint in the drawer. Strip the paper label, wash the inside with soap, and punch holes in the bottom with a hammer and nail for drainage.
Stripes, dots, and flowers drawn with the brush handle end are simple enough that kids can run the whole job.
Pansies or other small annuals fit the scale, and a few cans lined on steps or a windowsill read as intentional rather than makeshift.
I would seal the outside with a spray clear coat so the paint does not flake in the rain.
No woodworking, no budget, and the materials were heading for recycling anyway.

PERFECT DIY TOOLS: Made of Aluminum, not rust or break.Mini pocket hole jig set, perfect for DIY home projects or professional and general commercial use;

POCKET HOLE SET: Our easy-to-use tool creates corner and angle pocket hole joints for leg-and-rail connections, building face frame cabinets, sneaking screws into tight spots, and securing picture frames, with unlimited applications.

【High Quality】The pocket screw jig is made of high quality aluminum alloy. It's durable and won't rust or crack. The equipped cutter head has perfect performance, sharp and burr-free. Ideal for building train tables, workbenches, entry hutches, bookcases and dressers and more
5. Plastic Bottle Planters
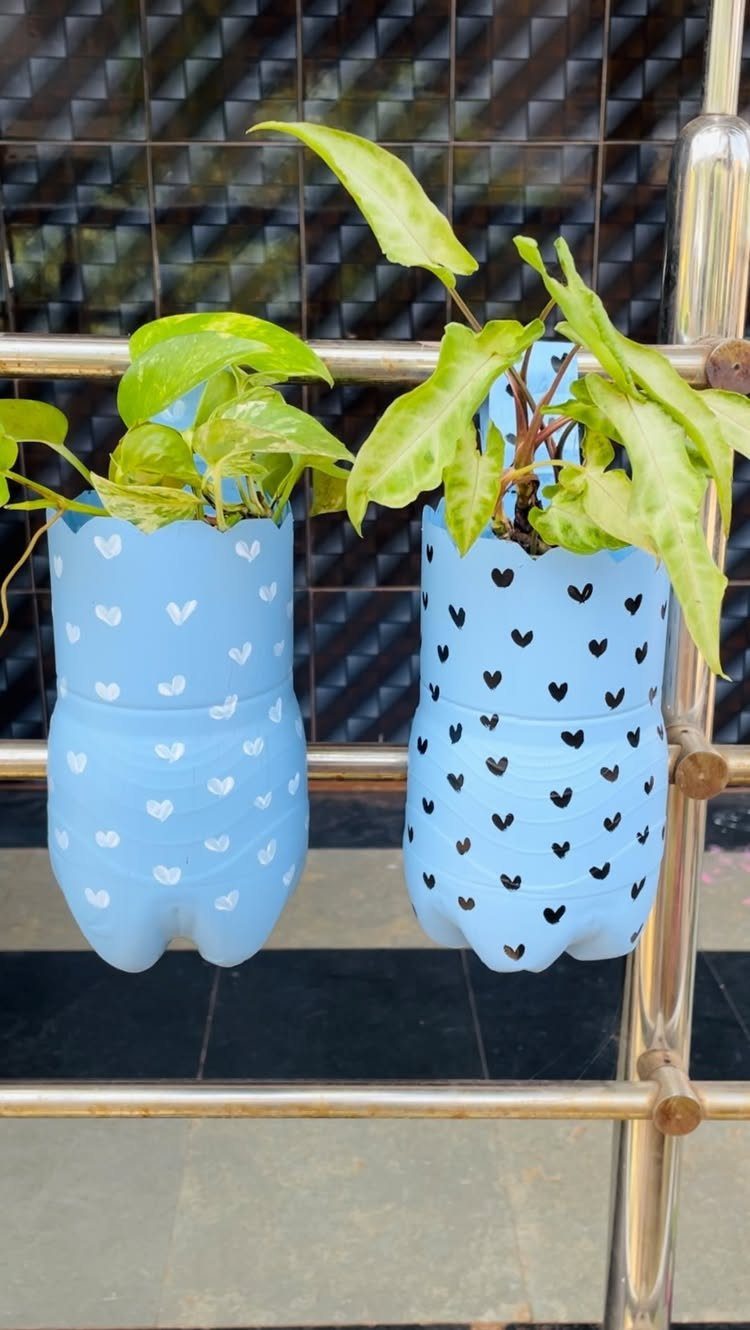
Two-liter bottles hang on a railing with twine through holes punched near the cut edge, which turns a narrow balcony into usable growing space.
Cut the bottle in half, or about a third down from the top, and use the bottom as the planter. Painted hearts and a few bright details turn the bottle into something that lands better with kids than with adults.
A few of these on a kitchen window or a child’s room rail let seedlings start early without demanding floor space.
Drainage matters: melt or drill small holes in the base, and do not overwater. The plastic holds moisture longer than terracotta.

Reinforced solid iron hooks hold up to 40 lbs with no sagging or wobbling, keeping your plants and décor perfectly stable.
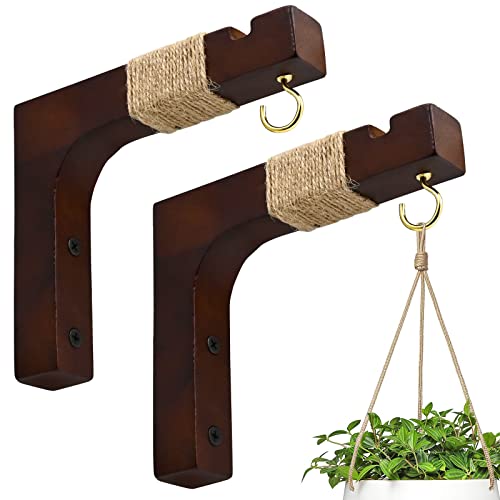
【Unique Rustic Farmhouse Style Design】The natural wooden plant hanger hooks especialy designed for plant lovers, these have a sleek design with an indent at the top and a hooks at the end to secure your plant ring or string in place to prevent it from sliding around. They are smooth with no rough edges or splinters, so you can place them wherever you'd like without the worry of getting poked. Unique hemp rope design attached on plant hooks for wall add more beauty for minimalist farmhouse decor.

Package Includes: you will receive 2 pack of 3.93 inch /10 cm diameter hanging orchid planter:, which are simple looking and quite sturdy planters, and can replace plastic and clay planters
6. Recycled Rainboot Planters
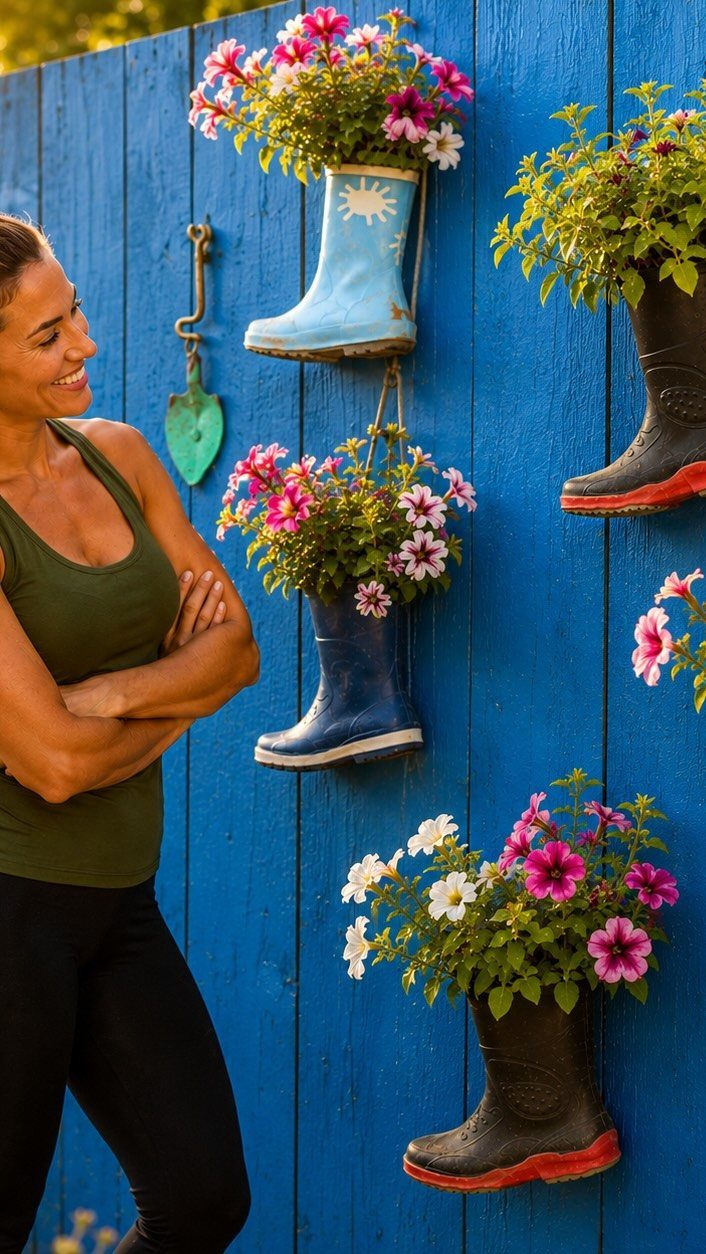
Worn-out rain boots have one virtue as planters: they are already built to hold water, which means they hold soil too.
Punch drainage holes through the sole with a drill or a heated nail, fill with potting mix, and tuck in trailing petunias or a few herbs.
Hanging boots by their handles from a fence turns a blank vertical surface into something slightly absurd in the best way.
Sizes from toddler up work; larger boots hold more root mass and dry out less often. I would avoid anything with a heavy lining that will rot and smell.
This is not a long-term planter.
The rubber breaks down in sun, and the shape is awkward to store off-season. For a summer fence line or a one-off garden party, though, the novelty pays off.

SMALL CASTER LARGER HELPER - Nefish 1” low profile casters set includes 2 caster wheels with brake and 2 without. Bonus 16 pcs screws for better usage, so it is very easy for you to install the wheel in some furniture, home cabinets, Laundry Basket, shelves and display racks.

Installation: Mounting screws are included. The caster plate has pre-drilled holes.

HEAVY-DUTY CASTERS SET OF 4: These 4-inch casters feature thickened steel brackets and top plates with dual steel ball bearings. Each supports up to 550 lbs, for a total capacity of 2,200 lbs when weight is evenly distributed across all four casters
7. Oven-Bake Clay Terrazzo Planter
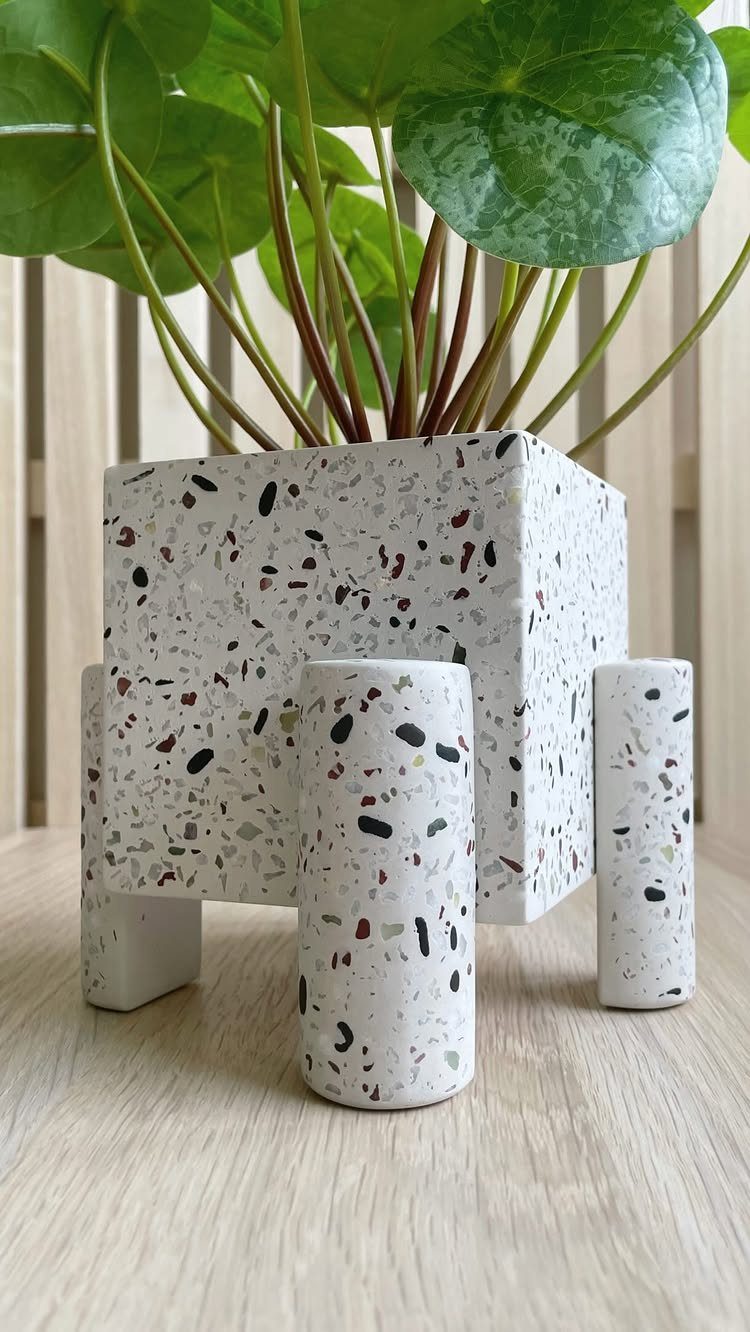
Oven-bake clay lets you fake stone without the weight or the wet saw.
Marble the clay with flecks of a second color, roll it flat, and press it around a square form; add short cylinders for legs while the clay is still soft.
After baking, paint chips and speckles finish the terrazzo look, and a coat of Sculpey glaze seals the surface against water.
The clay stays fragile; this is a planter for a nursery pot dropped inside, not for soil packed directly against the walls.
I would keep the scale small, more windowsill than floor. The bake time is short enough to finish in one evening, and the material cost stays under what a store-bought ceramic pot runs.

LARGE PLANTING SPACE: Designed with a long bed space (5CuFt) deep enough to provide your plants and vegetables with ample room to breathe and grow healthy

Durable Cedar Construction – Made from natural cedar wood with thickened panels for enhanced stability and weather resistance. Designed to resist warping and decay, offering reliable performance through multiple seasons of outdoor use.

DEEP PLANTER FOR MAXIMUM YIELD: With 16" of soil depth and a spacious planting area, this elevated bed supports healthy root vegetables like carrots, beets, and radishes while allowing more crops per bed, boosting overall harvest and garden productivity
8. Hollowed-Out Log Planters
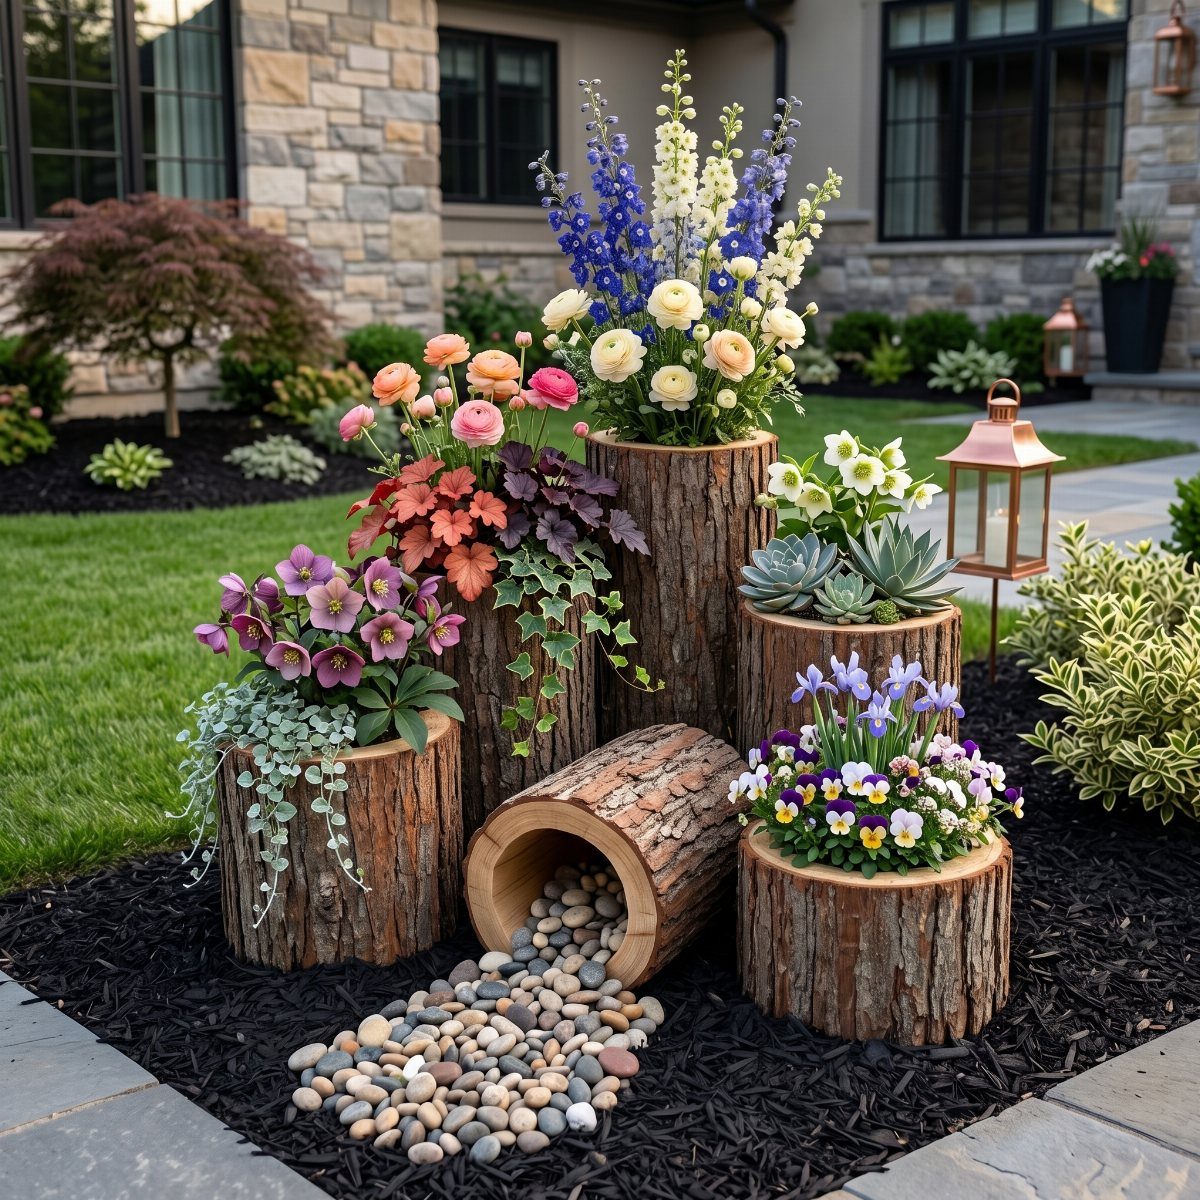
A log planter is already the shape you need; the work is hollowing it.
An adze or a sharp spade and mallet scoops the center down to a few inches of wall, deep enough for potting mix and a small root ball.
The bark holds moisture in, so drainage has to come from you: auger holes through the base, or set the whole log on gravel so water can escape.
Hardwoods last longer than soft; cedar or locust buys you seasons before rot sets in.
These are heavy once planted. If your winters freeze hard, plan where it sits now, because you will not want to move it later.
9. Glass Jar Terrarium Planter
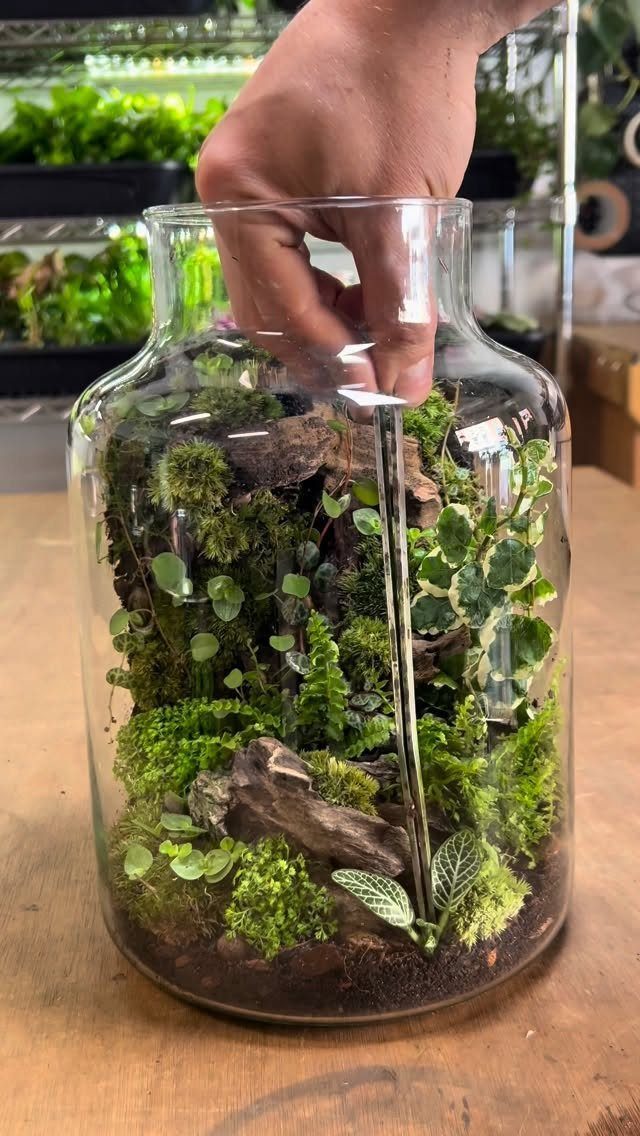
A closed glass jar traps humidity, which is the point and the risk. Moss and small ferns tolerate it; succulents will rot.
Layer gravel, then activated charcoal, then soil, shallow because the jar is not deep.
Long tweezers or chopsticks keep your hand clear of the neck, which matters more in a small jar than you might expect. The seal is not perfect, so check every few weeks for mold or for soil pulled too wet.
I would start with an open jar and a lid I can set aside while I learn the balance. Once the plants settle, the closed system mostly tends itself.
Choosing Materials for Planters
Pressure-treated 1×6 boards or decking stock handle outdoor weather, but the treatment chemicals need a buffer between wood and soil.
Old wood costs less and looks lived-in faster. Railway sleepers, pallet off-cuts, or leftover decking pieces all work; just check for rot or hardware left buried.
Repurposed pedestal sinks, old lumber, anything solid enough to hold soil and survive a freeze can become a planter if you drill drainage.
Cold-climate readers should think past summer. Materials that survive winter outside save you from hauling everything indoors; materials that do not should be small enough to move.

Beautiful Solid Acacia Wood – Made from naturally occurring acacia for a warm, high-end look with unique grain in every piece.
Finishing Touches for Planters
Sanding is optional, but a quick pass with 80-grit prevents splinters and takes the fuzzy edge off cuts. An orbital sander speeds it up; hand-sanding works fine on small boxes.
New pressure-treated decking arrives wet with factory treatment. Paint or stain applied too early flakes or peels; 6 months of drying time lets the boards acclimate and the finish stick.
Fresh cuts on new wood soak up water like a sponge, so brushing end-grain protector on before you nail anything together saves you from rot later.
Stain soaks in and shields the fibers from inside; paint coats the surface and shows wear sooner.
Fence paint or shed stain both work on stick-built boxes. I used a stain-plus-sealer on one box and black paint on the stand; the combination hides dirt where feet kick and lets the grain show where it counts.
Upcycling for Planters
The planters already covered give the pattern: cans, boots, bottles, jars, and old sinks all hold soil if you add drainage.
The principle is checking what you already have for shape and volume, then punching or drilling holes so roots do not drown.
Character is the side benefit. A row of painted cans reads as a deliberate collection; mismatched boots on a fence turn a blank surface into something that starts conversations.
The materials were leaving anyway; the only cost is time and maybe a can of spray clear coat to keep the paint from washing off.
Scale stays small with upcycled pieces.
A two-liter bottle or a toddler boot fits annuals or a single herb, not a tomato. Cluster several for impact, or dot them where a full planter would overwhelm the space.
Drainage Considerations
Every planter in the list includes drainage except the closed terrarium, which is designed to trap moisture. For everything else, holes are not optional; waterlogged soil rots roots.
Size the holes to the box. Drainage holes matter more than the exact count or size; what counts is that water has somewhere to go instead of pooling around the roots.
Space them evenly and keep them clear of the edges, where a split would weaken the base.
Gravel or stones at the bottom are insurance, not a substitute for holes.
They create a gap where excess water can collect below the root zone, but without an exit the water still sits. Landscape fabric over the holes stops soil from washing through without blocking flow.
Plastic bottles and cans hold moisture longer than wood or terracotta, so their drainage holes matter more. Check them more often, and water less.
Frequently Asked Questions
What materials are best for outdoor planters?
Pressure-treated 1x6s or decking stock hold up against rain and sun, though you will want a plastic liner between the wood and the dirt to keep treatment chemicals out of the soil.
Metal holds up longer but wooden planters look warmer and can last years with the right protection.
How do I ensure proper drainage in my planter?
Water needs an exit path; holes through the base matter more than any layer of gravel, which just sits in standing water without them.
I set holes a few inches in from each corner so the wood there stays strong, and space the rest across the middle where the base carries less stress.
A square of landscape fabric stapled across the underside lets water out while holding the mix in place.
Can I use repurposed wood for planters?
Yes, and it saves money while looking weathered from day one. End grain drinks up moisture like a straw, so I brush on end-grain protector on every fresh cut before I screw anything together.
How do I keep wooden planters from rotting?
A solid coat of stain-plus-sealer or exterior paint buys time, and a plastic liner, even an opened compost bag, keeps wet soil from touching the wood directly.
Leaving the inside bare on a rolling box keeps soil clean, but for most planters that barrier buys extra seasons. End-grain protector on fresh cuts also helps, since cut ends drink water like a sponge.
What do I put in the base of a planter?
Drainage holes come first; without them, nothing else saves the roots.