These run from paper you fold by hand to acrylic the machine scores and breaks, with most landing in a weekend and a trip to the craft store.
The one that belongs to you depends on whether your tree needs weight, warmth, or a tiny car rattling inside a clear ball.
[link-whisper-related-posts]1. Paper Snowflake Ornaments
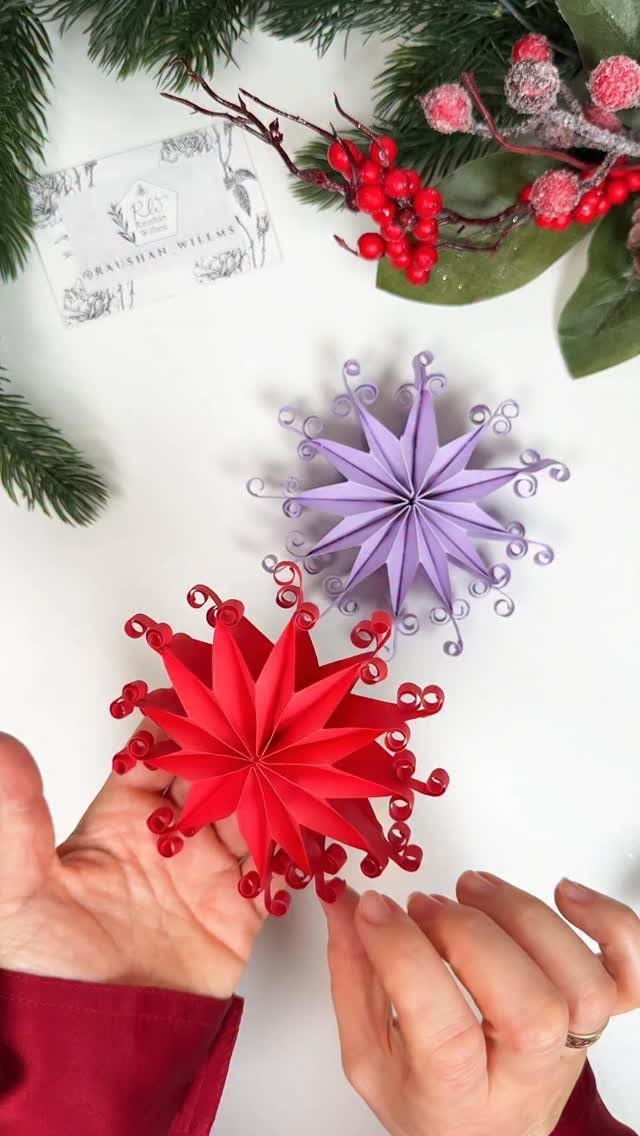
A 3D folded paper snowflake builds out from stacked layers the Cricut cuts clean through. I like these for trees that already carry glass balls; the paper weighs almost nothing, so branches stay level.
Colorful cardstock or felt both work, and double-sided paper hides any reverse view. The machine handles the intricate cuts, then you stack and glue the layers with buttons or ribbon between them for depth.
These suit gift toppers too: flat for mailing, dimensional once opened.

Snow Flakes Decorating: You will receive 30 snowflake christmas tree decorations, 18 of them are designed with 3D effect, 3 sizes in total, exquisite and not monotonous. The other 12 pieces are made of delicate cut-out snowflake flakes in a total of 3 different snowflake shapes. These white ornaments for christmas tree match perfectly with all kinds of Christmas decorations, adding more romance and festive atmosphere to your home

Snowflake ornaments kit: you will receive 36 pieces of Christmas snowflakes hanging ornaments in different sizes and styles, and each paper snowflake comes with a rope for easy hanging, sufficient quantity and various styles to meet your different decoration needs.
2. DIY Flannel Christmas Tree Ornaments
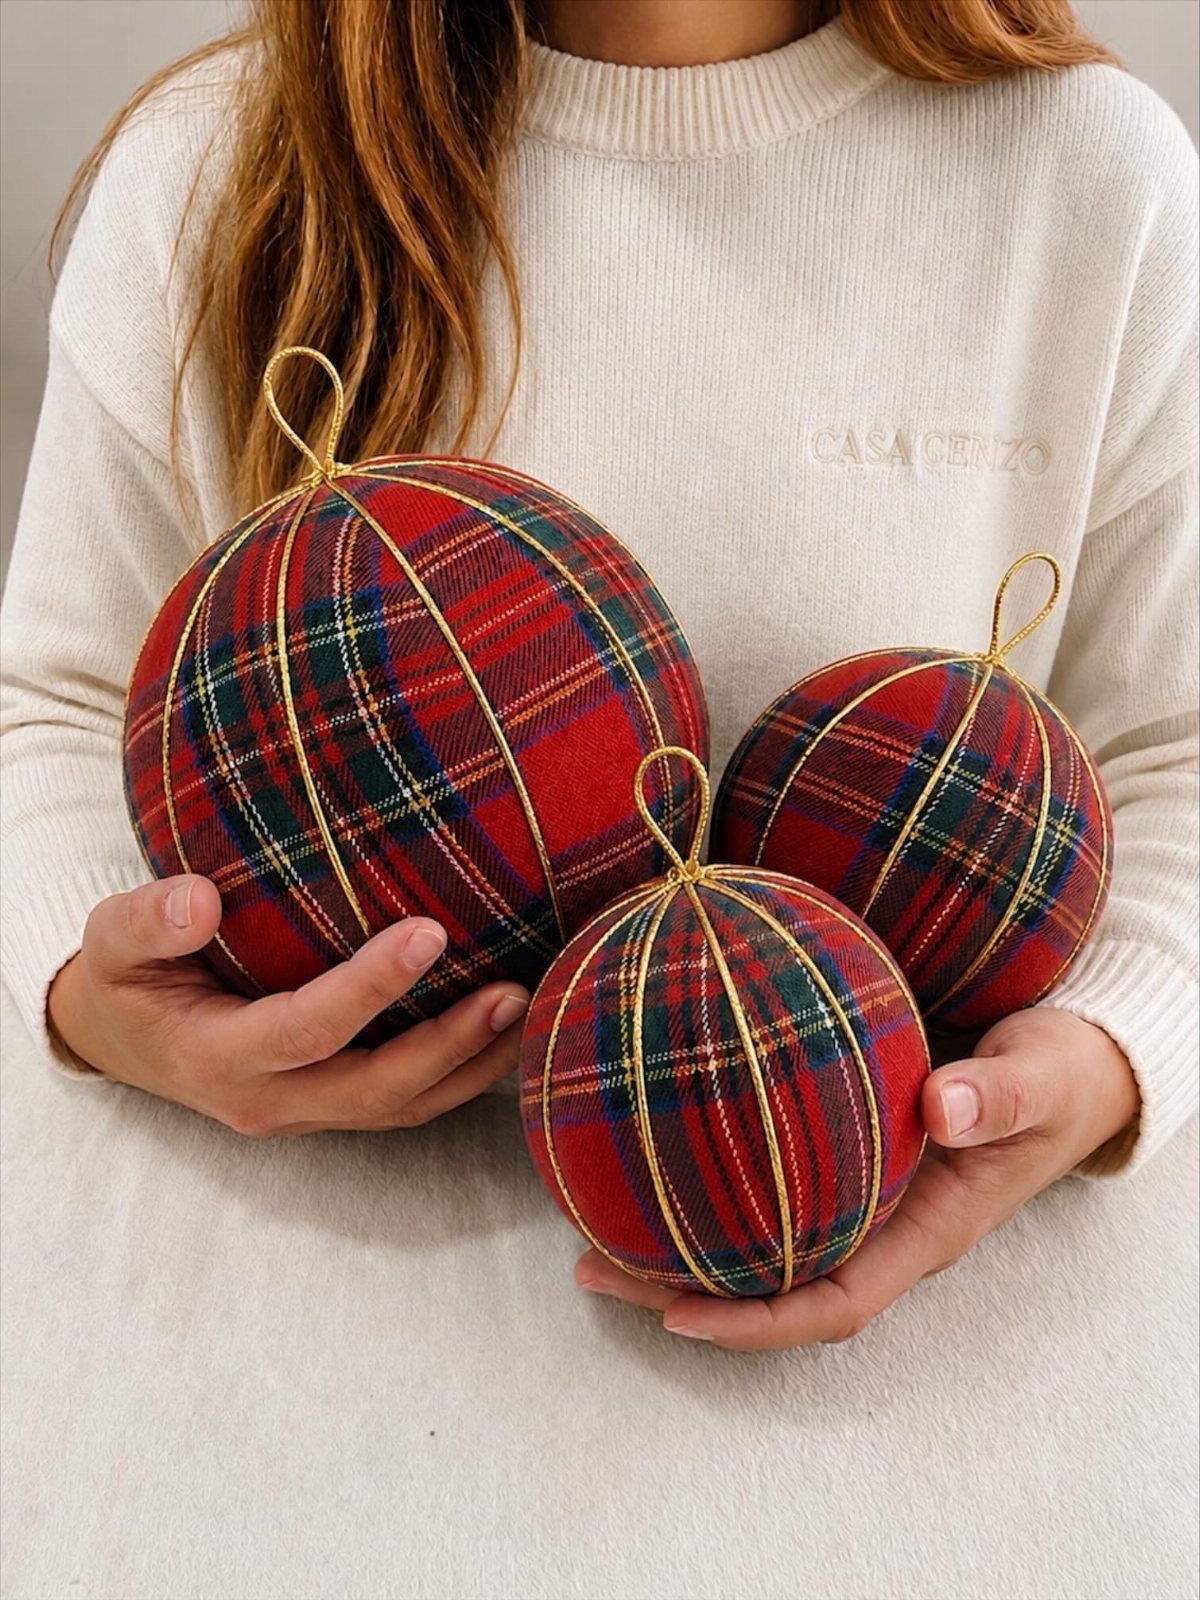
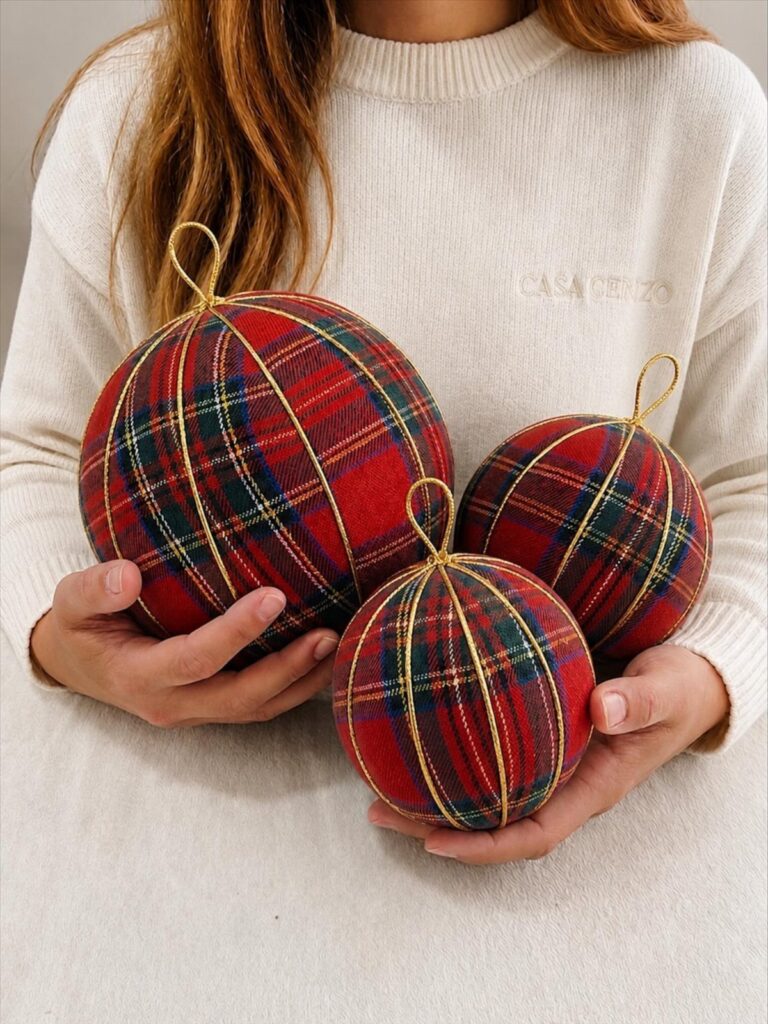
Flannel scraps turn into stuffed ornaments that read warm before you even touch them. Red plaid flannel wraps around foam ball forms, with gold string trim catching the light against the weave.
I prefer working with scraps from old shirts or remnant bins; the grain already softens from washing.
Cut panels to wrap your form, seam and stuff, then add the trim while the glue gun is out. The hanging loop hides in the top seam.
Sized in sets of three, these fill gaps on a tree that runs too shiny or too matchy.

PRE-CUT ORNAMENT SHAPES - These colorful ornament shapes will be a festive addition to your holiday arts and crafts. They’re perfect for holiday decorations, creative gift tags, Christmas trees and more!

24 TOTAL Christmas card stock cutout circles for freshies.

PRE-CUT ORNAMENT SHAPES - These colorful ornament shapes will be a festive addition to your holiday arts and crafts. They’re perfect for holiday decorations, creative gift tags, Christmas trees and more!
3. Honeycomb Paper Christmas Ornaments
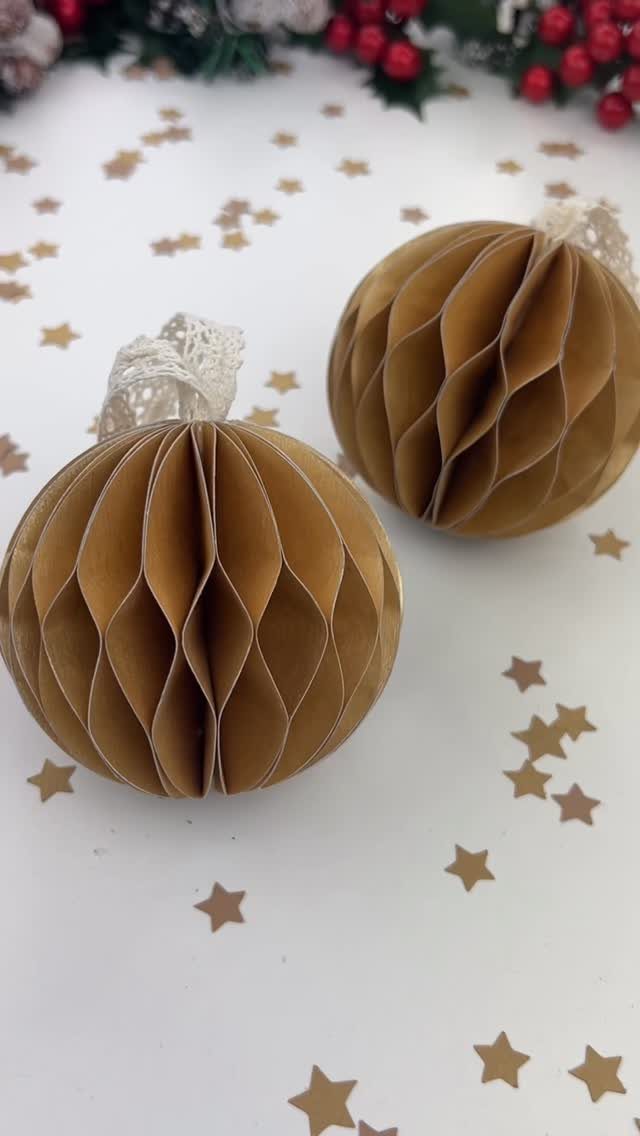
Honeycomb paper spheres open from flat cuts into ridged balls that catch light like vintage decorations. A metallic gold finish stays warm rather than mirror-bright, and a lace loop keeps the look from going too formal.
5 pattern files print then cut on double-sided scrapbook paper.
The Cricut scores the fold lines; you accordion-fold, align, and glue the stack at center. Pull open and the honeycomb locks into a sphere.
These store flat, which matters if your ornament bin already bulges. One pack of paper yields a half dozen.

Package Includes: our pack includes 50 pcs 3D Christmas paper honeycombs with 2 sizes, also include 50 pcs paperclips, rich color combinations; The package includes 1.18 inch and 3.15 inch honeycombs, creating a visually striking, multi dimensional display; The variety in sizes allows you to experiment with numerous decorating sets, making it an ideal choice for all your celebration needs

【30pcs Christmas Paper Fans Decorations】all in green, red and white decor. 12pcs 3inch paper honeycomb balls(4pcs red,4pcs green,4pcs white), 6pcs 6inch paper honeycomb balls(2pcs red,2pcs green,2pcs white), 6pcs 8inch paper honeycomb balls(2pcs red,2pcs green,2pcs white),3pcs 14inch paper fans(1pcs red,1pcs green,1pcs white), 3pcs 10inch paper fans(1pcs red,1pcs green,1pcs white)

Rich in Quantity: the package contains 12 pieces of paper honeycomb ornaments in 6 different styles, and each style comes with 2 pieces, enough quantity to fully satisfy your Christmas decoration needs, they are beautiful paper honeycomb ornaments for christmas tree
4. DIY Glitter Unicorn Ornaments
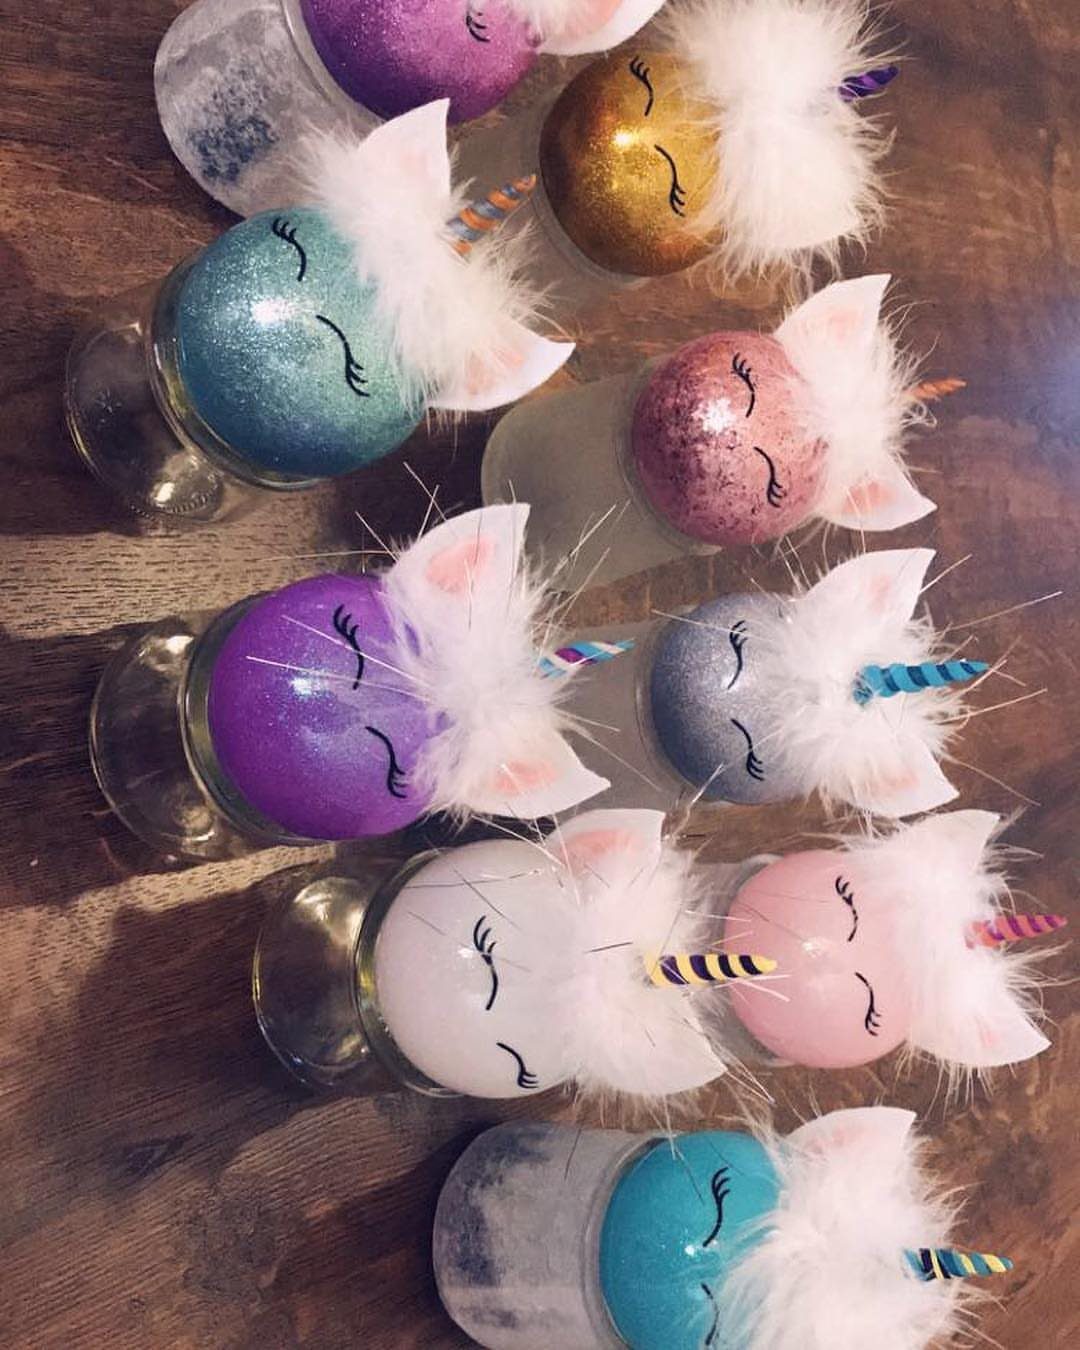
Glitter unicorn ornaments commit fully to the bit: horn, ears, vinyl eyelashes, the whole myth.
Basic glitter ornaments start with adhesive inside clear balls, then you build up from there.
Vinyl cuts the eyelashes and any facial detail; faux fur for ears needs only glue and patience. The horn shapes from clay or finds as a seasonal craft pick.
These land best where someone small still believes, or where your tree has room for one joke that plays straight.

24 Cute Hanging Plush Toys: Discover 24 different soft Christmas hanging plush ornaments — including Santa, snowmen, reindeer, Christmas trees, and more! Each comes with a 4cm red cord for easy display. Great surprise plush Christmas ornament, backpacks, or even as fun stocking stuffers

Packaging: includes 12 Christmas mini stuffed animals, featuring snowman, Christmas tree, Santa Claus, elk, elf, gingerbread man, Mrs. Claus, Christmas angel, Christmas wreath, candy cane, gingerbread woman, and elf woman; the classic color and unique designs will capture people's attention and fulfill all your Christmas decoration needs!

Cute Bear with Plaid Ball: Features brown plush fabric with holiday-inspired red and green plaid accents. The bear holds a small plaid ball, adding a warm, rustic touch to winter home setups. Ideal Christmas tree ornaments for creating a vintage atmosphere
5. Vinyl Ornaments
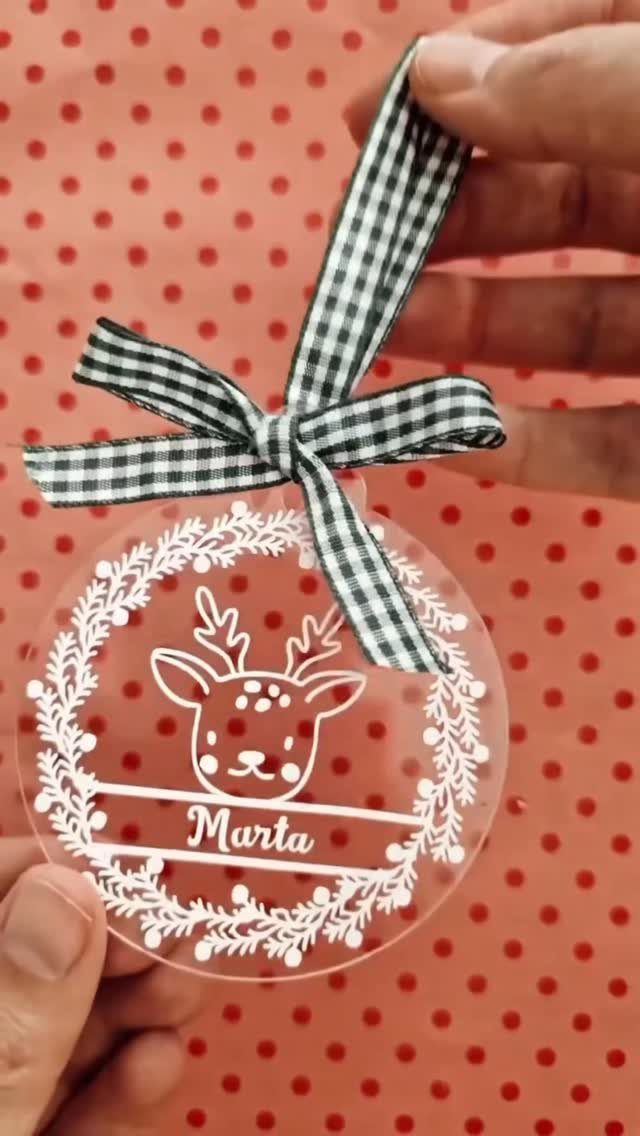
Vinyl on clear acrylic lets light pass through the design, so the ornament changes as the tree lights behind it shift.
Permanent vinyl lasts the season; removable if you want to reuse the ball next year.
Slits in the transfer tape let you lay the design smooth on a flat acrylic disc, no wrinkles where the surface curves slightly at the edges.
Press the carrier sheet from the front once the vinyl is positioned, then peel it back slowly.
Any Cricut model handles this. The files scale to your ball size.
6. Personalized Wooden Ornaments
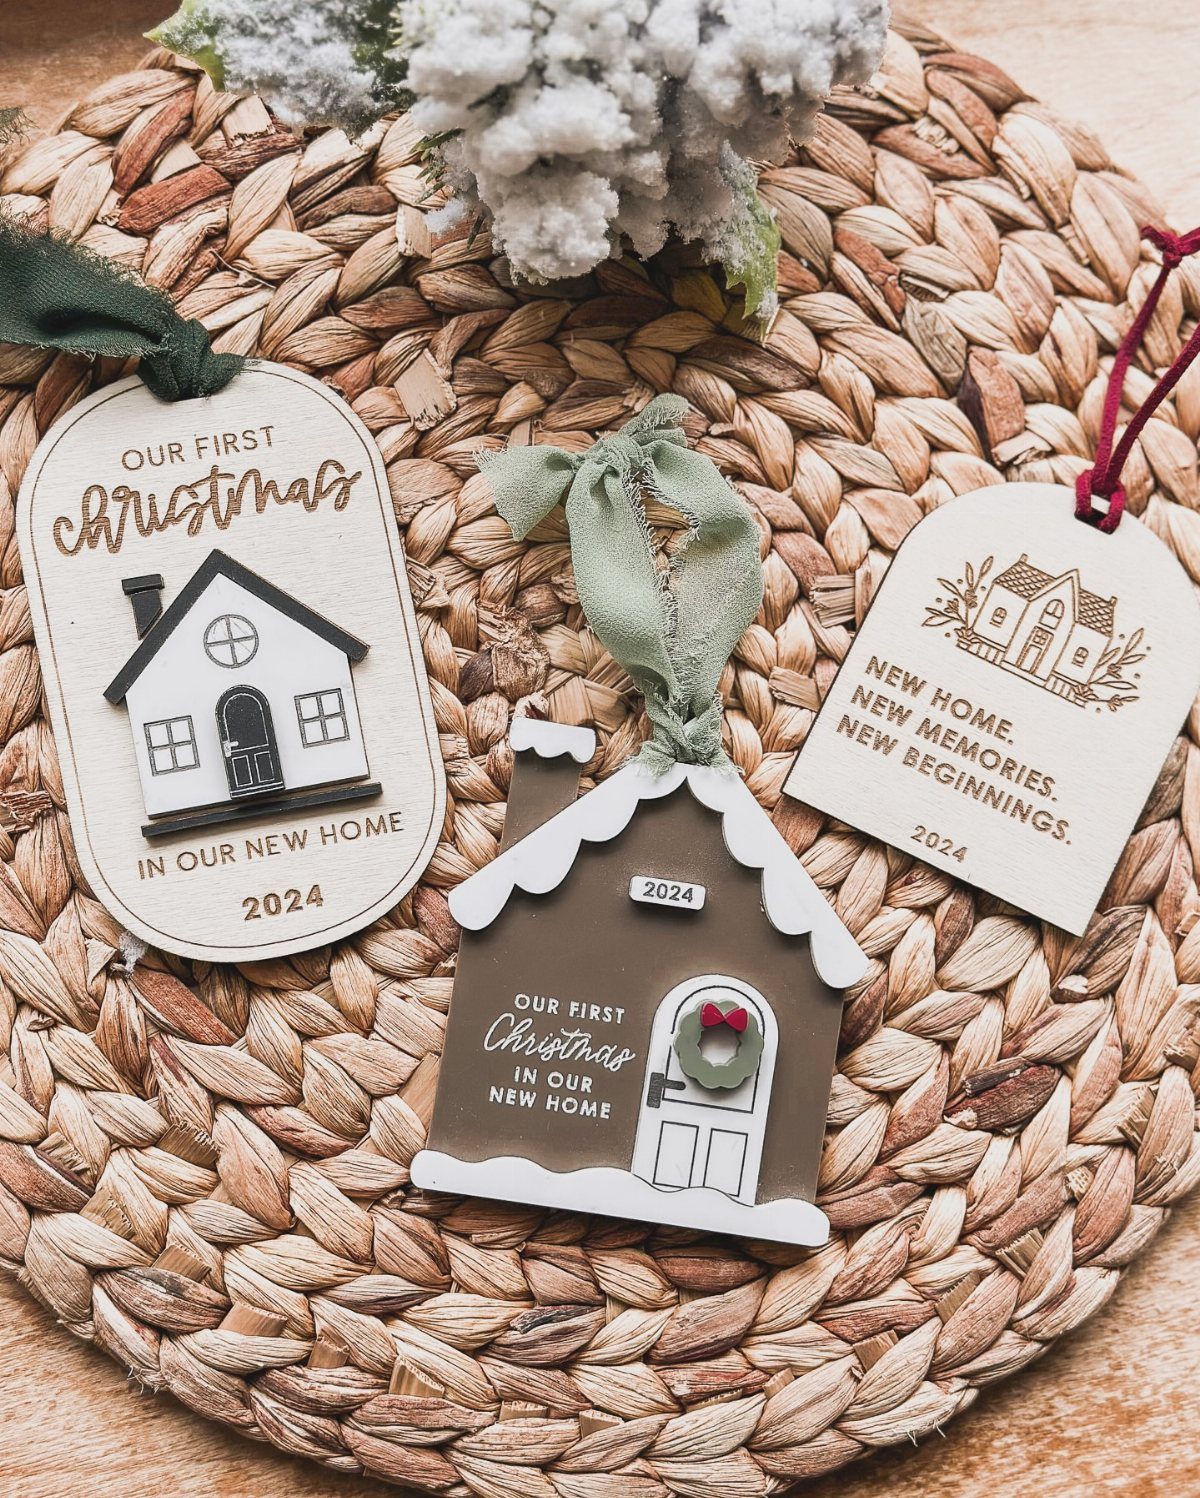
House-shaped wooden ornaments mark a first Christmas in a new place without needing the year to carry all meaning. Engraving reads cleaner than vinyl on wood grain, though either method gets you to the same personalized gift.
Removable vinyl lets you correct placement; permanent if the wording stays fixed.
I like the natural wood left bare against the text, though painted backdrops read more finished. Ribbon through the roof peak hangs it level.
These suit new homeowners, newlyweds, anyone whose address changed since last December. The wood weight feels serious in hand, unlike plastic or paper alternatives.
7. Painted Glass Ornaments
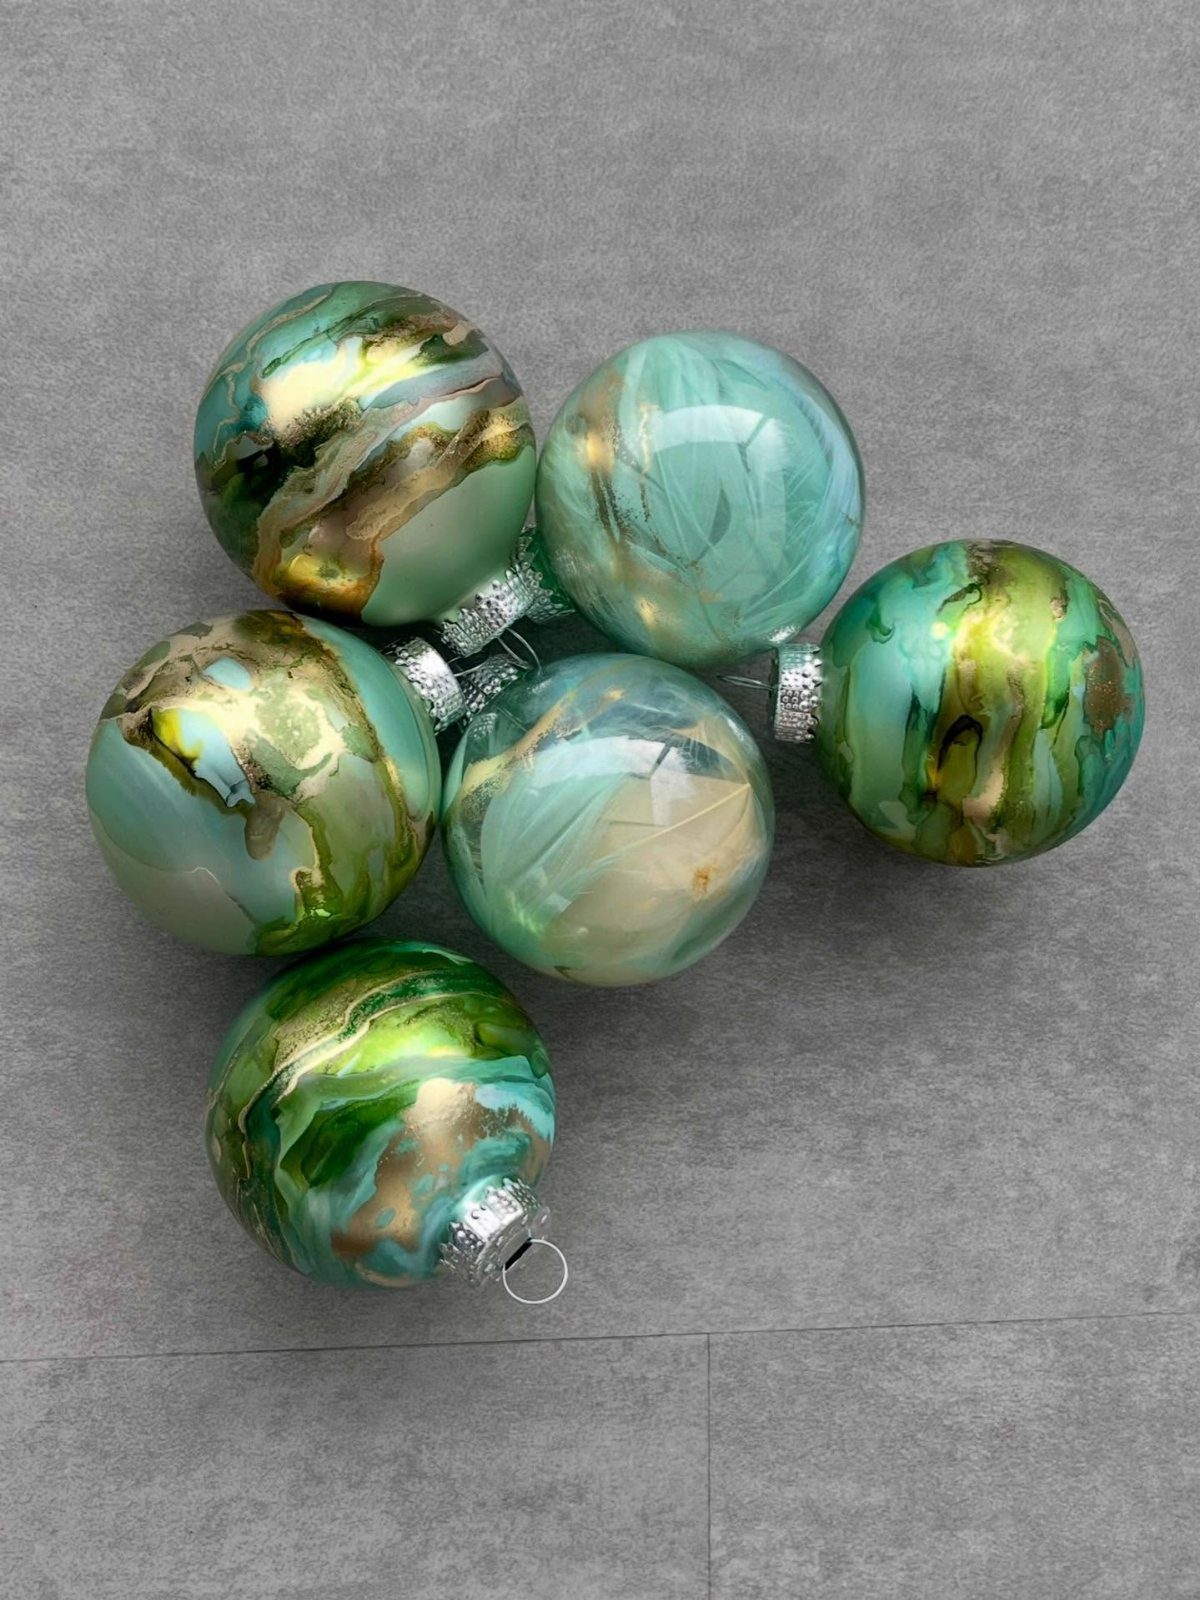
Swirled paint inside clear glass reads handmade without looking homemade. Metallic gold and deep green marble through the interior, catching tree light at the back of the ball where surface paint would dull.
Pouring paint works from the opening; rotate slowly and let each color settle before adding the next. Vinyl decals cut on the Cricut layer on last, once the interior is fully cured and dry.
These suit trees that run too red or too silver; the cool tones pull balance without shouting.
8. Buffalo Check Christmas Ornaments
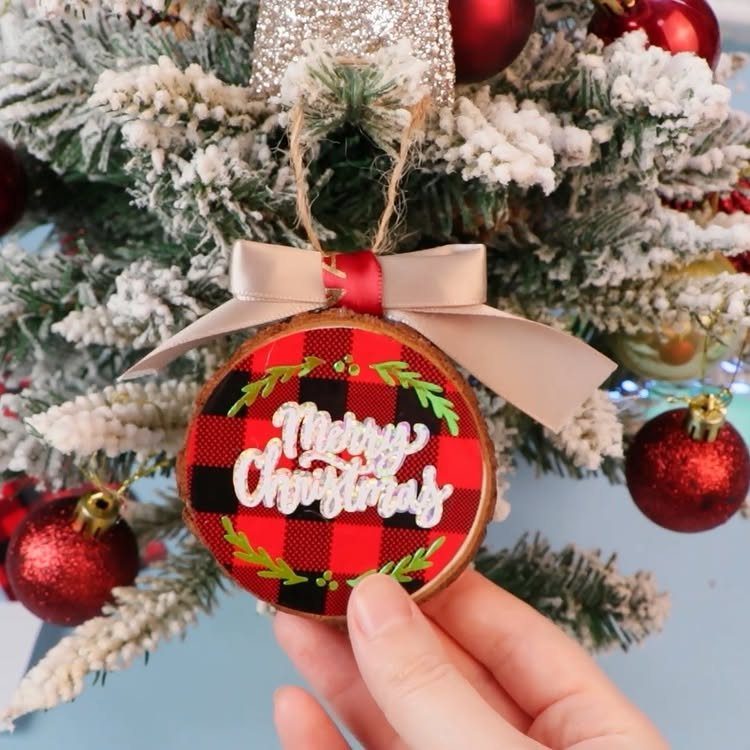
Buffalo check in red and black carries the weight of a whole tree’s personality on one small disk.
A wood slice base takes the pattern through fabric or decoupaged paper, with a wreath and bow keeping it from reading too lumberjack.
I like paper for the crisp intersection of lines; fabric softens at the edge where it wraps. The Cricut cuts the lettering clean against the busy ground, which hand-lettering rarely manages.
These read from across the room, big enough to catch the eye without crowding the branch. They anchor a tree that otherwise drifts too delicate.

Totally 8pcs 10inch colorful honeycomb balls,paper flower balls, wall backdrop honeycomb balls, party nursery balls for decorations

Sufficient Quantity: the package contains 6 different styles of Christmas honeycomb balls, 2 pieces each, a total of 12 pieces, enough quantity to fully meet your Christmas hanging decoration needs; There are 6 colors, you can mix and match freely according to your preferences
9. DIY Paper Spiral Ornaments
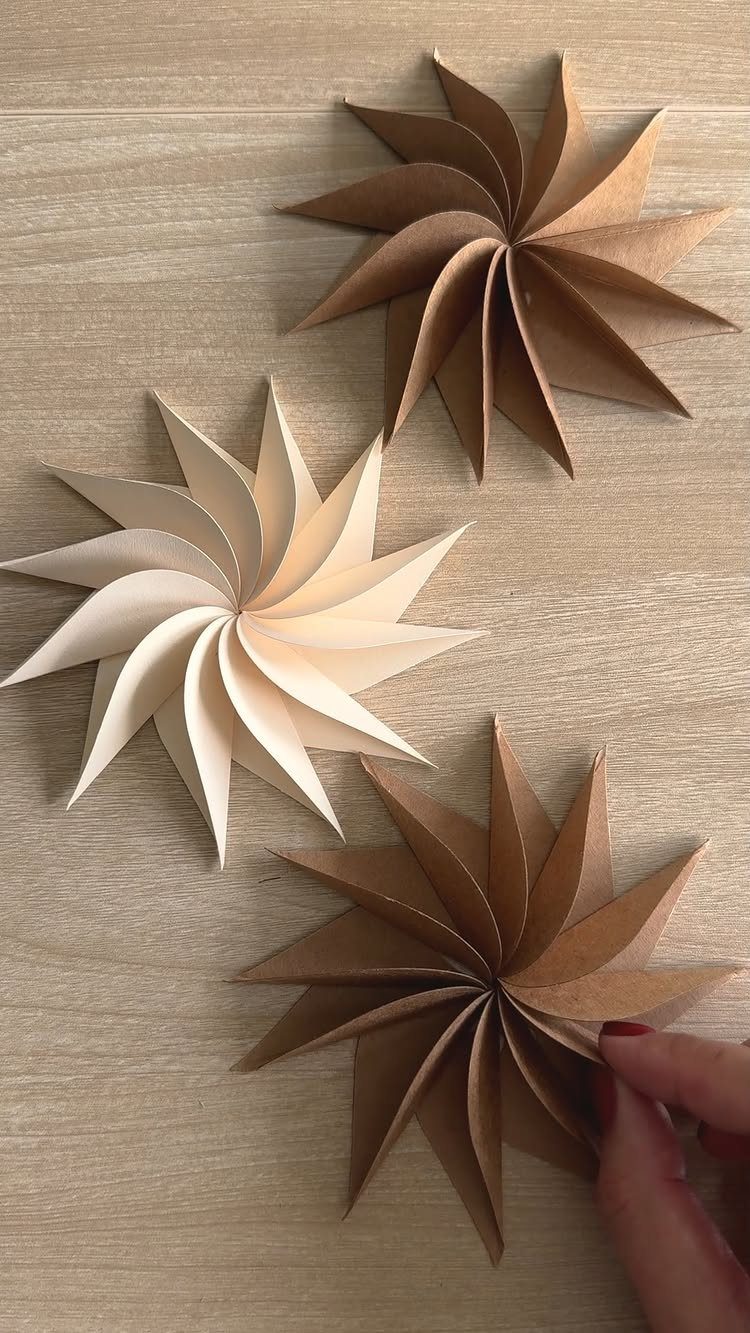
Spirals of kraft and cream paper open into dimensional stars that cast striped shadows under tree lights.
Double-sided paper hides the reverse, though matching tones on both sides let the spiral read continuous. I use bone folders for the creases; fingernails flatten the ridge.
These store nested flat and move fast once the file is set. A half dozen fills the gaps a glass-heavy tree leaves open, and the paper weight keeps branches from sagging.

【Super Value Pack】- 24 Christmas plaid stockings in 2 styles, 8.3" mini size. Each stocking has a 2 inch hang loop for easy display. Ready to hang on stocking holders.

Available 16 Styles: what you will receive are 48 pieces of Christmas tree plush decorations with gold hanging ropes, available in 16 styles of bear and Santa Claus, each type has 3 pieces; Enough quantities and different types could basically meet your Christmas decoration needs

Attractive animal decorations: these rustic Christmas ornaments with pine cones are designed in 3 animals namely reindeer, wolf and pig, also they are decorated with buffalo plaid bows, making them more delicate and exquisite
10. Glitter Glass Ball Ornaments
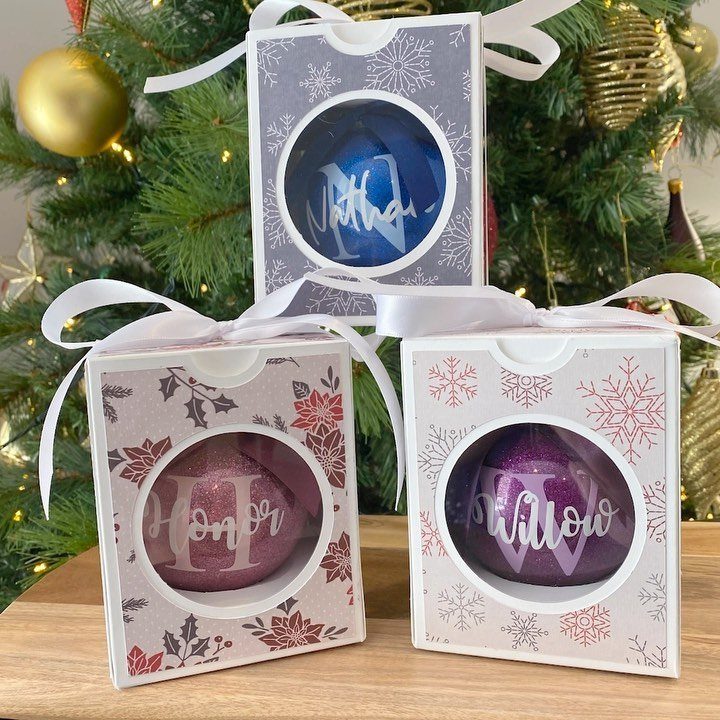
Glitter inside clear glass stays put for years if you do the adhesive step right.
Floor polish poured inside, swirled, drained; fine glitter follows and coats every surface. The Cricut cuts names in white script vinyl for the front.
Gift boxes with snowflake windows turn one ornament into a present complete. I make these in batches of six, assembly-lining the adhesive and glitter before the vinyl.
Coat, glitter, cure: 3 steps and the glass catches the light. Rushing the cure is where most people fail.

Rich in Quantity: you will receive 50 pieces acrylic Christmas ornaments in sufficient quantity, in the shape of lanterns, you can match them with rope or ribbons, then hung them on the Christmas tree to create a nice Christmas atmosphere

10 Pcs in Total: Contain 10 clear motel keychains with colorful glitter. Sufficient to meet your various DIY craft needs. Perfect for designing assorted unique presents, handicrafts, ornaments, souvenirs, accessories, etc.

Icicle Ornament Size and Content: the Christmas icicle contains 36 clear icicles, the Christmas icicle decoration is 5.12inch long, about 13cm.
11. Floating Photo Glass Ball
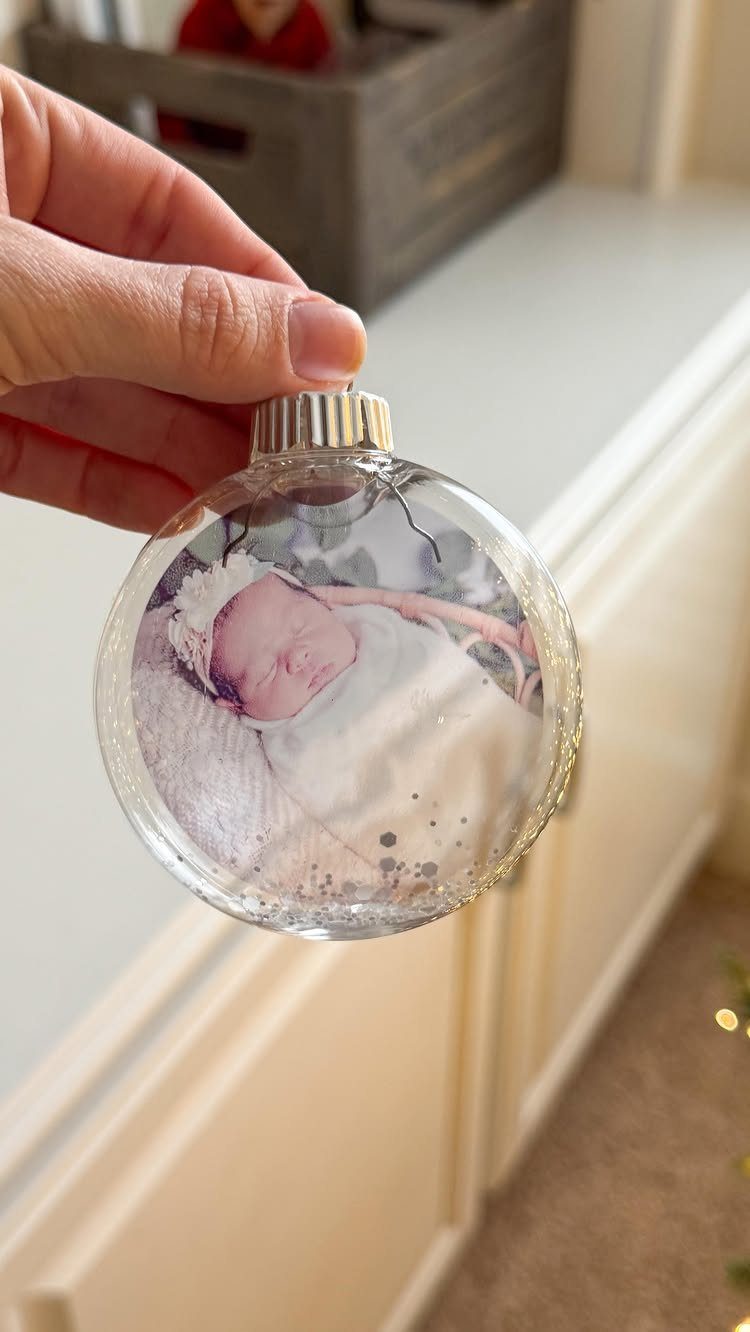
A photo suspended inside clear glass looks like it floats.
Print on lightweight paper, roll to fit the neck, then let it unroll against the inner wall. Silver glitter at the bottom grounds the image without competing.
The Cricut cuts a backing circle or frame if you want one; most people don’t. I use matte photo paper; glossy reflects the flash back into itself.
New parents, new pets, new houses: the subject changes, the method stays. These read as keepsake first, craft second, which is why they survive past the season they were made in.
12. Layered Acrylic Tree Ornament
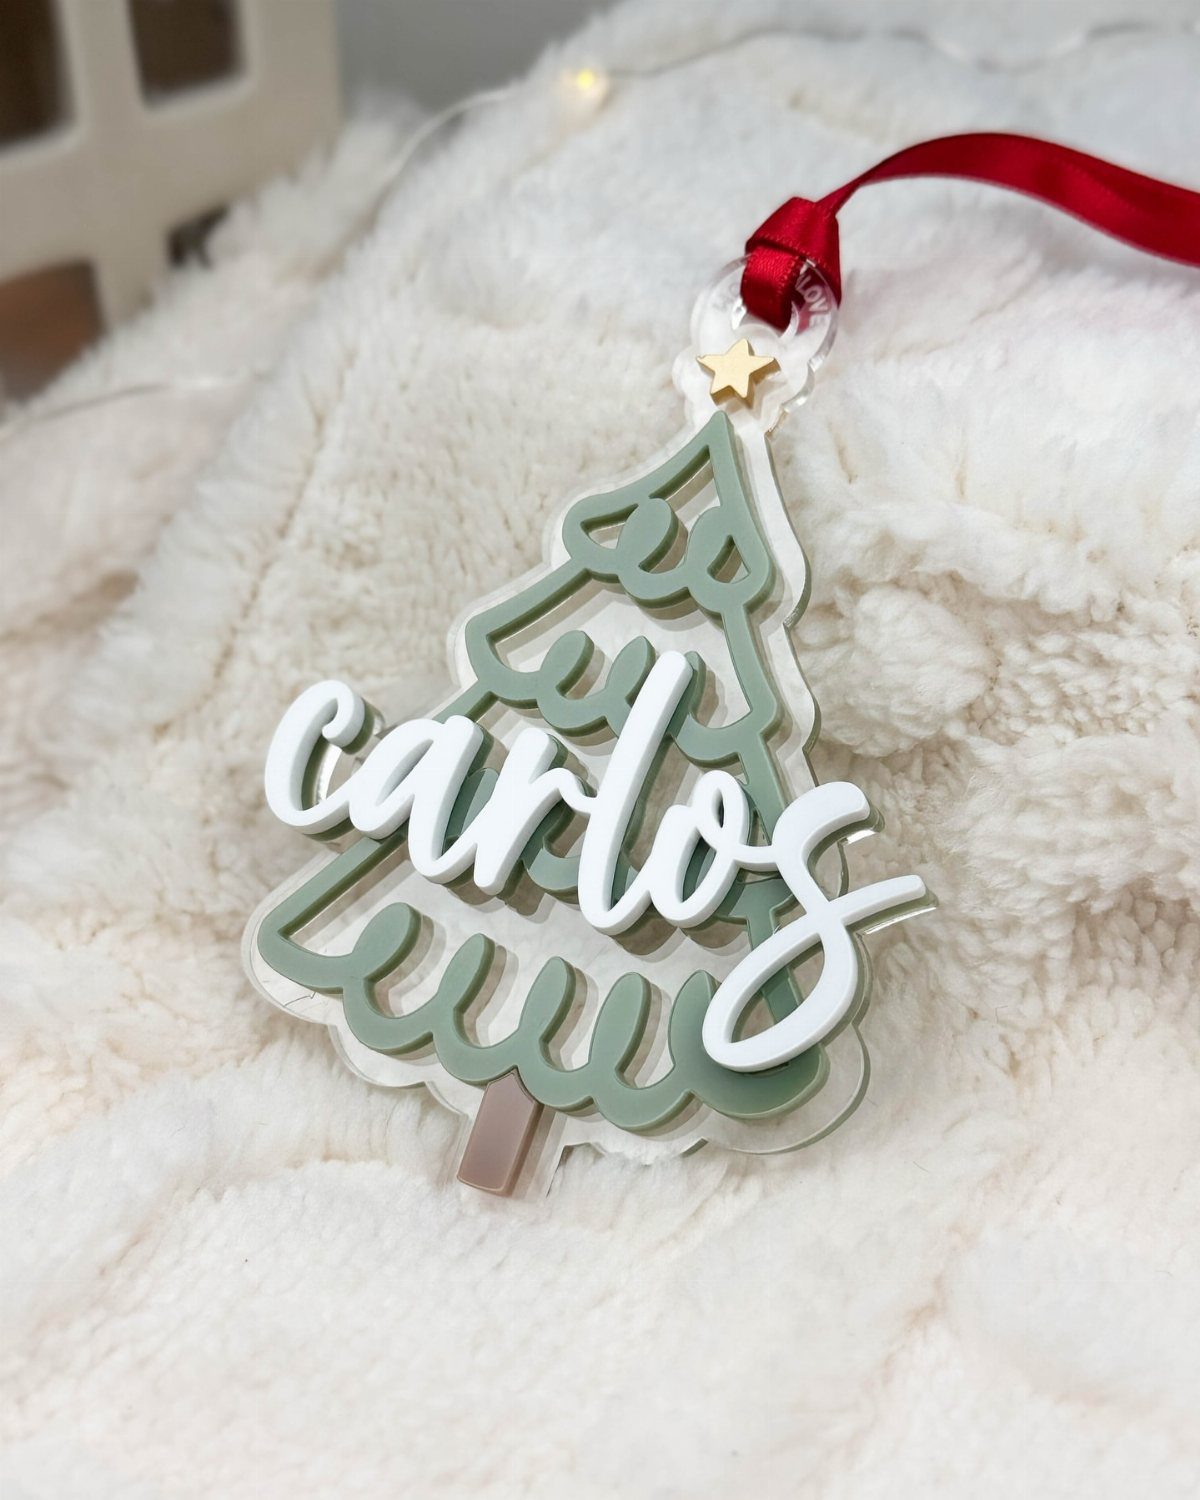
Layered acrylic needs attention to thickness; two thin sheets glue up cleaner than one fat piece the machine struggles to cut through. Sage green outline, white name, clear body: three passes, three weeding sessions.
The Cricut engraves the tree shape into acrylic with the engraving tip, not a blade meant for cutting. I tape the back to reduce fracture; the waste still cracks sometimes.
Ribbon color changes the whole read. Red against sage reads Christmas; cream or black would shift it to year-round gift tag.
Check your machine’s acrylic rating before buying stock.
13. Gold Flake Acrylic Ornaments
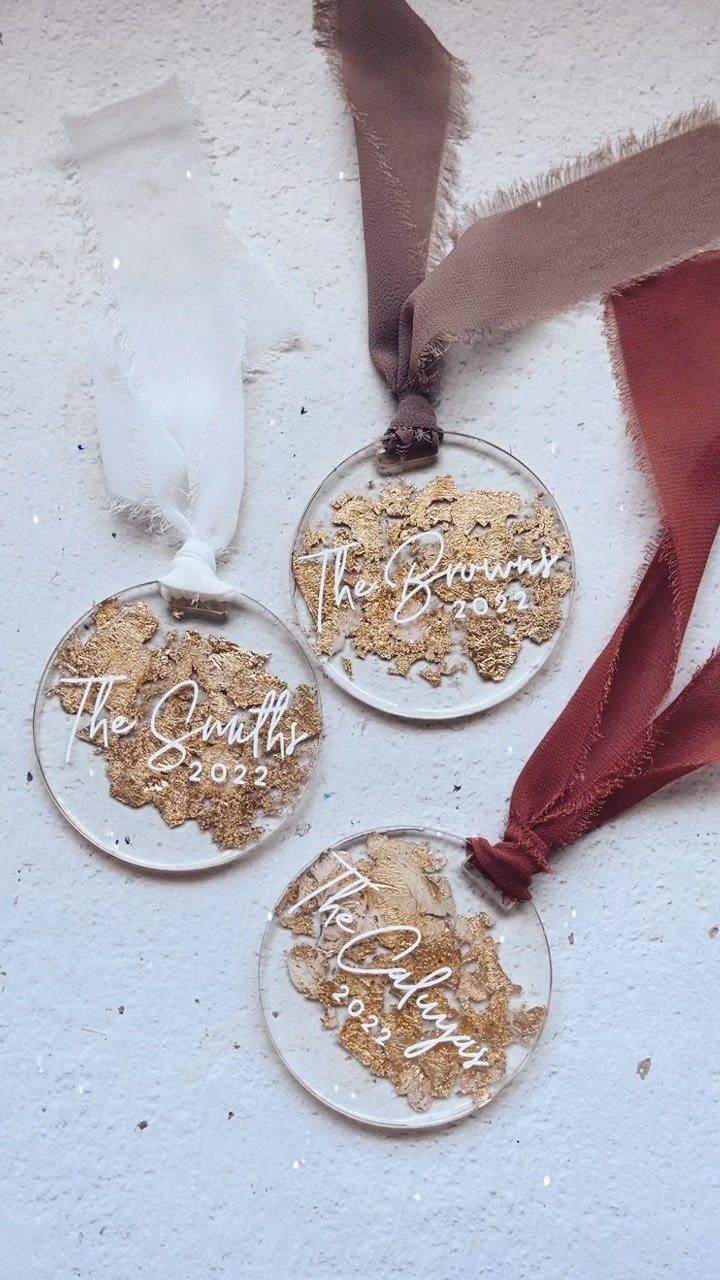
Flat acrylic disks carry gold leaf fragments under the surface, with family names in white vinyl floating above. The flakes read as warmth without going full glitter; the clear body keeps it modern.
Two thin sheets laminate cleaner than one thick cut.
I leave the back bare or mirror it with more gold, depending which side faces the room. Frayed cotton ribbon through the drill hole softens the hard edge against branch needles.
These suit last-name gifts for couples who merged addresses this year. The 2022 dating marks the moment; undated versions work for anyone you see every December.
14. Mini Toy Car Filled Balls
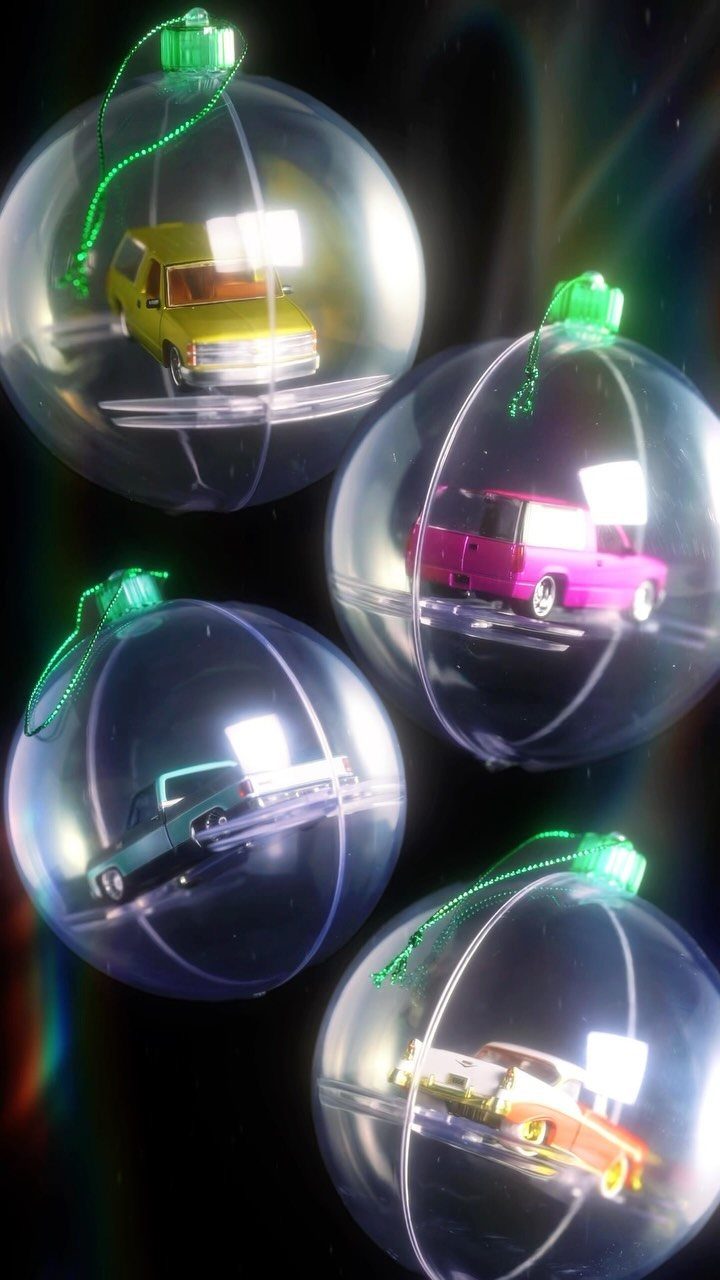
Clear plastic spheres turn toy cars into snow globes without the liquid. The cars read as found objects, not craft-store precious; a set from a gas station or cereal box carries the joke better than collectibles.
Check the ball opening against the car width before you buy either.
Most small die-cast models fit through a standard fillable ornament, but long hoods or wide mirrors jam. Green cord matches tree foliage; red would read as stoplight.
These work where a tree has room for one wink. The cars settle nose-down without glue, so you can swap them out next year when the joke gets old.
Materials for Ornaments
Cardstock, felt, wood, vinyl, and glass cover most of what these projects ask for.
A Cricut Maker 3 handles the bulk of it, though the Explore Air 2 or Joy lines manage lighter jobs. StandardGrip mats in 12 by 12 inches are the usual pairing.
Specialty work needs specific add-ons. Engraving on wood or acrylic takes the Engraving Tip with its QuickSwap Housing, and that only fits the Maker series.
Infusible Ink and sublimation both move the color into the surface rather than sitting on top; for those you need the compatible sheets or a sublimation printer setup, plus a heat press or EasyPress 2 and the pressing mat that goes with it.
Print-then-cut jobs need an inkjet printer. HP’s Envy 7155 shows up often in tutorials, though any inkjet works.
Transfer tape, weeding tools, and heat-resistant tape are the small items that slow you down if you forget them. I keep a drawer of these so the machine is not the bottleneck.
Painting Techniques
Painting the inside of a clear ball gives the smooth finish that outside painting rarely manages.
Pour a small amount first, swirl to coat, then add more only where the surface stays bare. Turn the ball upside down over a disposable cup so the extra paint runs out instead of pooling at the bottom.
Plastic balls store safer and survive drops better than glass; households with pets or small children lean that way for good reason. Either material takes the same interior coating.
Vinyl goes on only after the paint is fully cured and dry. I wait until the interior is fully dry, since uncured paint outgasses and lifts the adhesive.
Personalization Options
Names, dates, and short phrases turn a generic ornament into something the recipient keeps. Permanent vinyl is the usual method: cut, weed, transfer, and press onto the surface.
Heat transfer vinyl needs a press of some kind, even a household iron on its highest dry setting with a cloth between.
Infusible Ink moves the dye into coated surfaces like sublimation; the color will not peel because it is not on top.
Holographic and glitter vinyls add texture that catches tree light differently than flat color. Smart vinyl feeds without a mat on newer machines, which speeds up batch work.
Three passes for a layered acrylic tree, each with its own weeding, take longer than one cut-and-stick vinyl job.
Frequently Asked Questions
Can you make Christmas ornaments with Cricut?
Yes. The machine cuts paper snowflakes, vinyl lettering, fabric panels, and engraved wood or acrylic.
Cardstock, felt, and wood all feed through the right model, so the style depends on what you want to make rather than what the machine can handle.
What kind of vinyl do you use on Christmas ornaments?
Permanent vinyl is the usual choice for ornaments that stay decorated. Holographic and glitter vinyls catch tree light differently than flat color, and Smart vinyl feeds without a mat on newer machines for faster batch work.
What materials do I need to make ornaments?
Cardstock, felt, wood, vinyl, and glass cover most projects. Specialty add-ons include the Engraving Tip for wood or acrylic, Infusible Ink sheets for color that sinks in, and an inkjet printer for print-then-cut jobs.